Here is part two of the Painting 101 series I’m doing as we begin to work on our daughters room makeover. You can find part one here.
There’s a lot of debate in the world of paint.
What finish is best for what room? Here is a chart I made to help you decide…
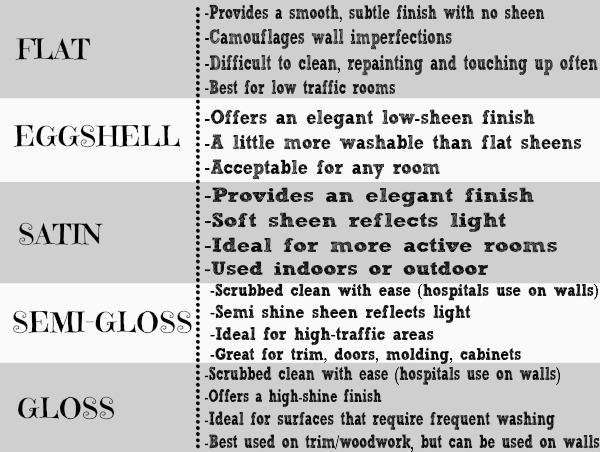
Again, this is completely preferential. It depends how shiny you like your paint, how often you plan to paint your rooms, and how much time you want to invest in cleaning your walls and touching up for maintenance.
Rule of thumb- The higher the shine, the easier it will be to clean. For me, I usually re-paint every 3 years or so for maintenance and that’s normally right around when my walls start to look dirty or marked up, so I go with a lower sheen.
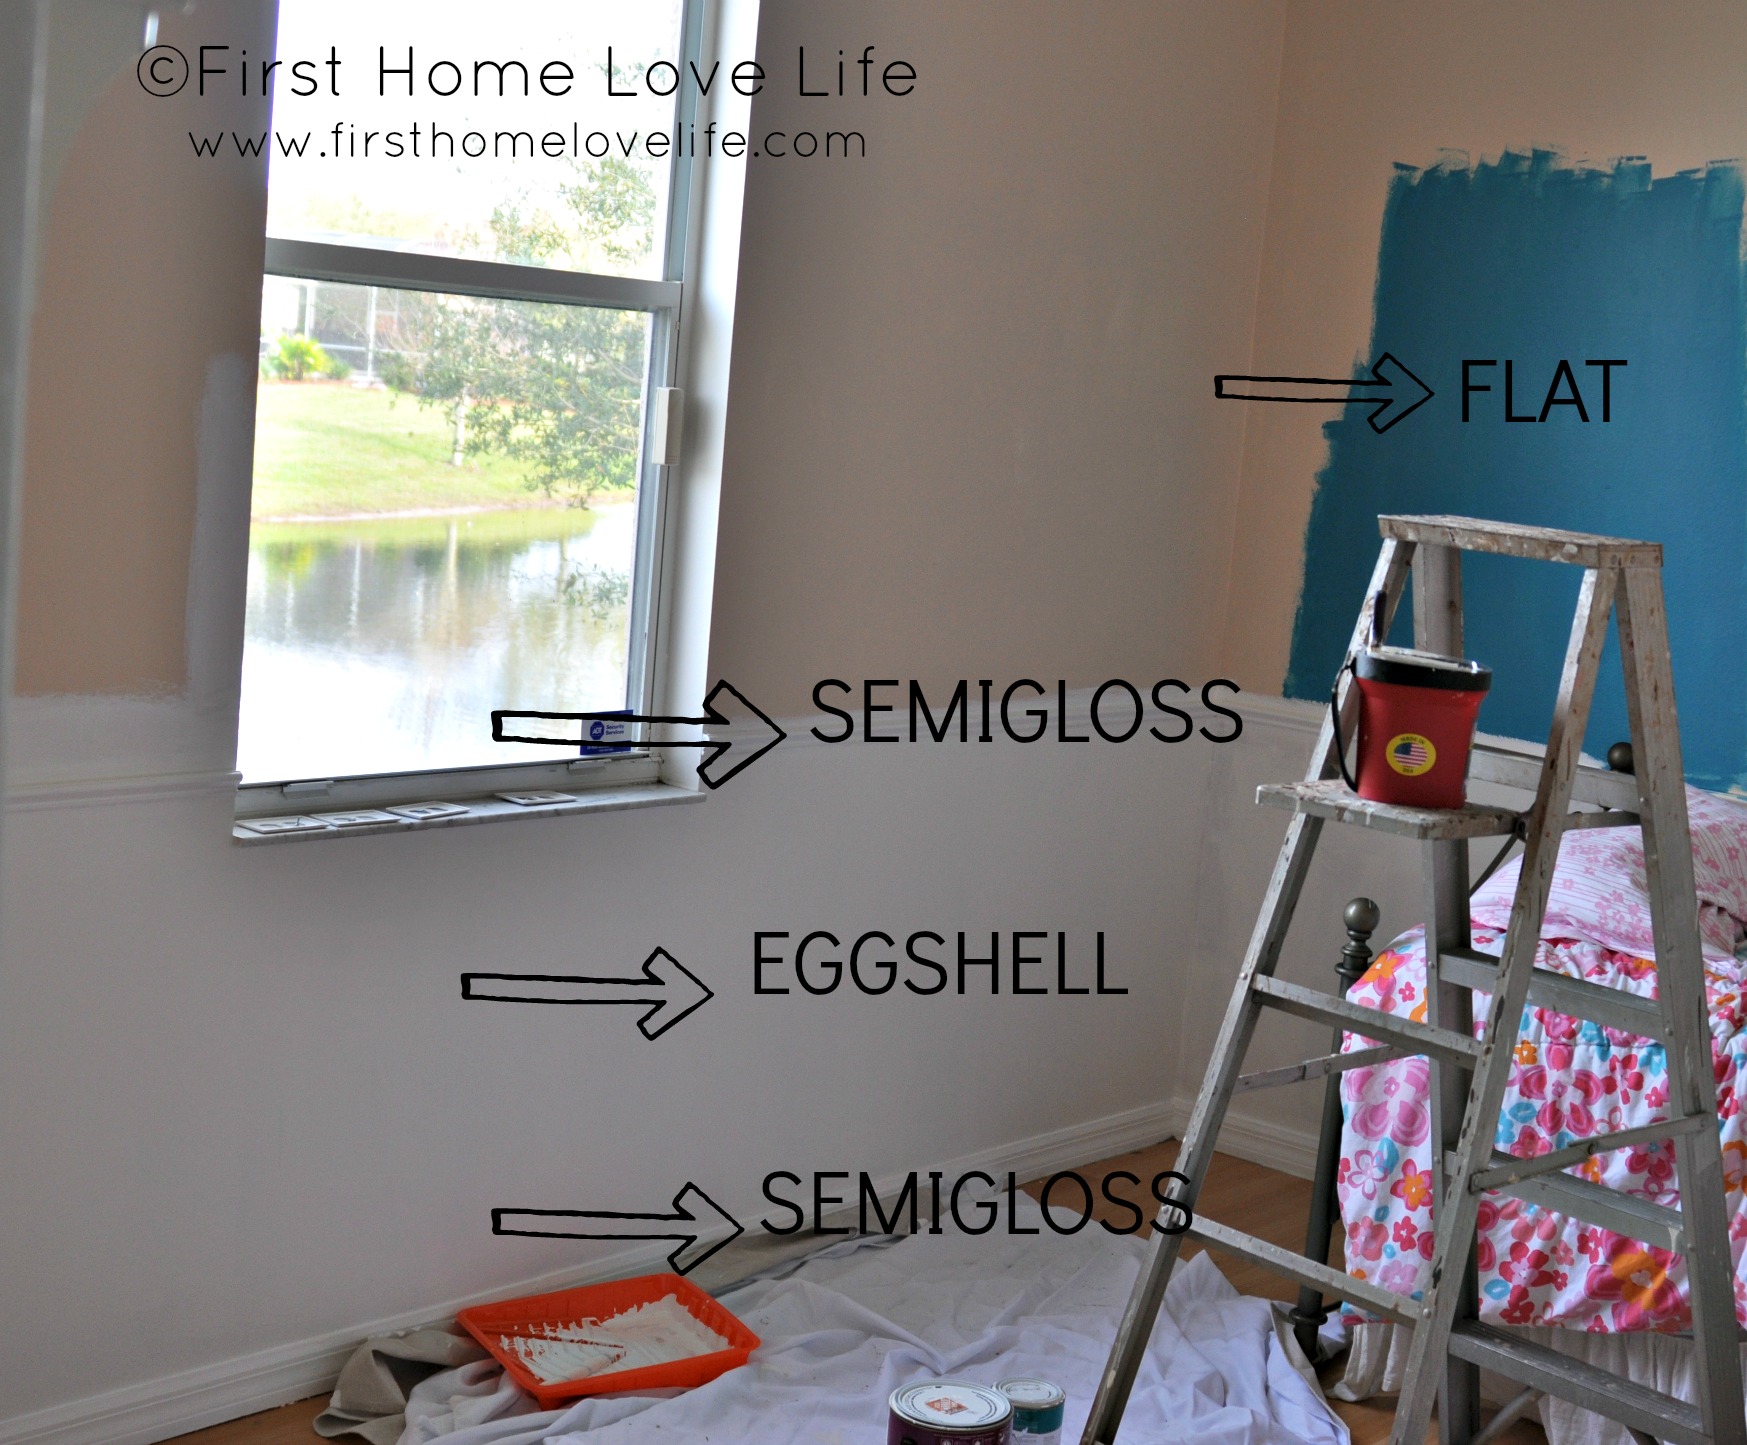
The picture above is how I plan to do my daughters room and what finishes we are using in that room.
My preference has always been and is flat or eggshell (lowest sheens) for the walls and semi-gloss or satin (kind of shiny) for baseboards, molding, and trim. The closet doors and door are also done in semi-gloss.
Another debate…Which do you do first? The trim or the wall?
Well I don’t know which is the correct way, but I do know the way that works easiest for us and that is to paint trim and baseboards first. Then paint the walls. Why? Well…I’ll show you in a minute and this is why I {heart} the Shurline edger so much!

To paint the trim, crown and baseboards I use a 2” Purdy angled brush. The key to a getting smooth and seamless paint job is LONG, LIGHT STROKES. Less is more people…It’s better to add a second or third coat then to have a drippy, heavy paint mess. So take your time, let the molding dry completely in between coats and use long, and light handed strokes on your moldings.
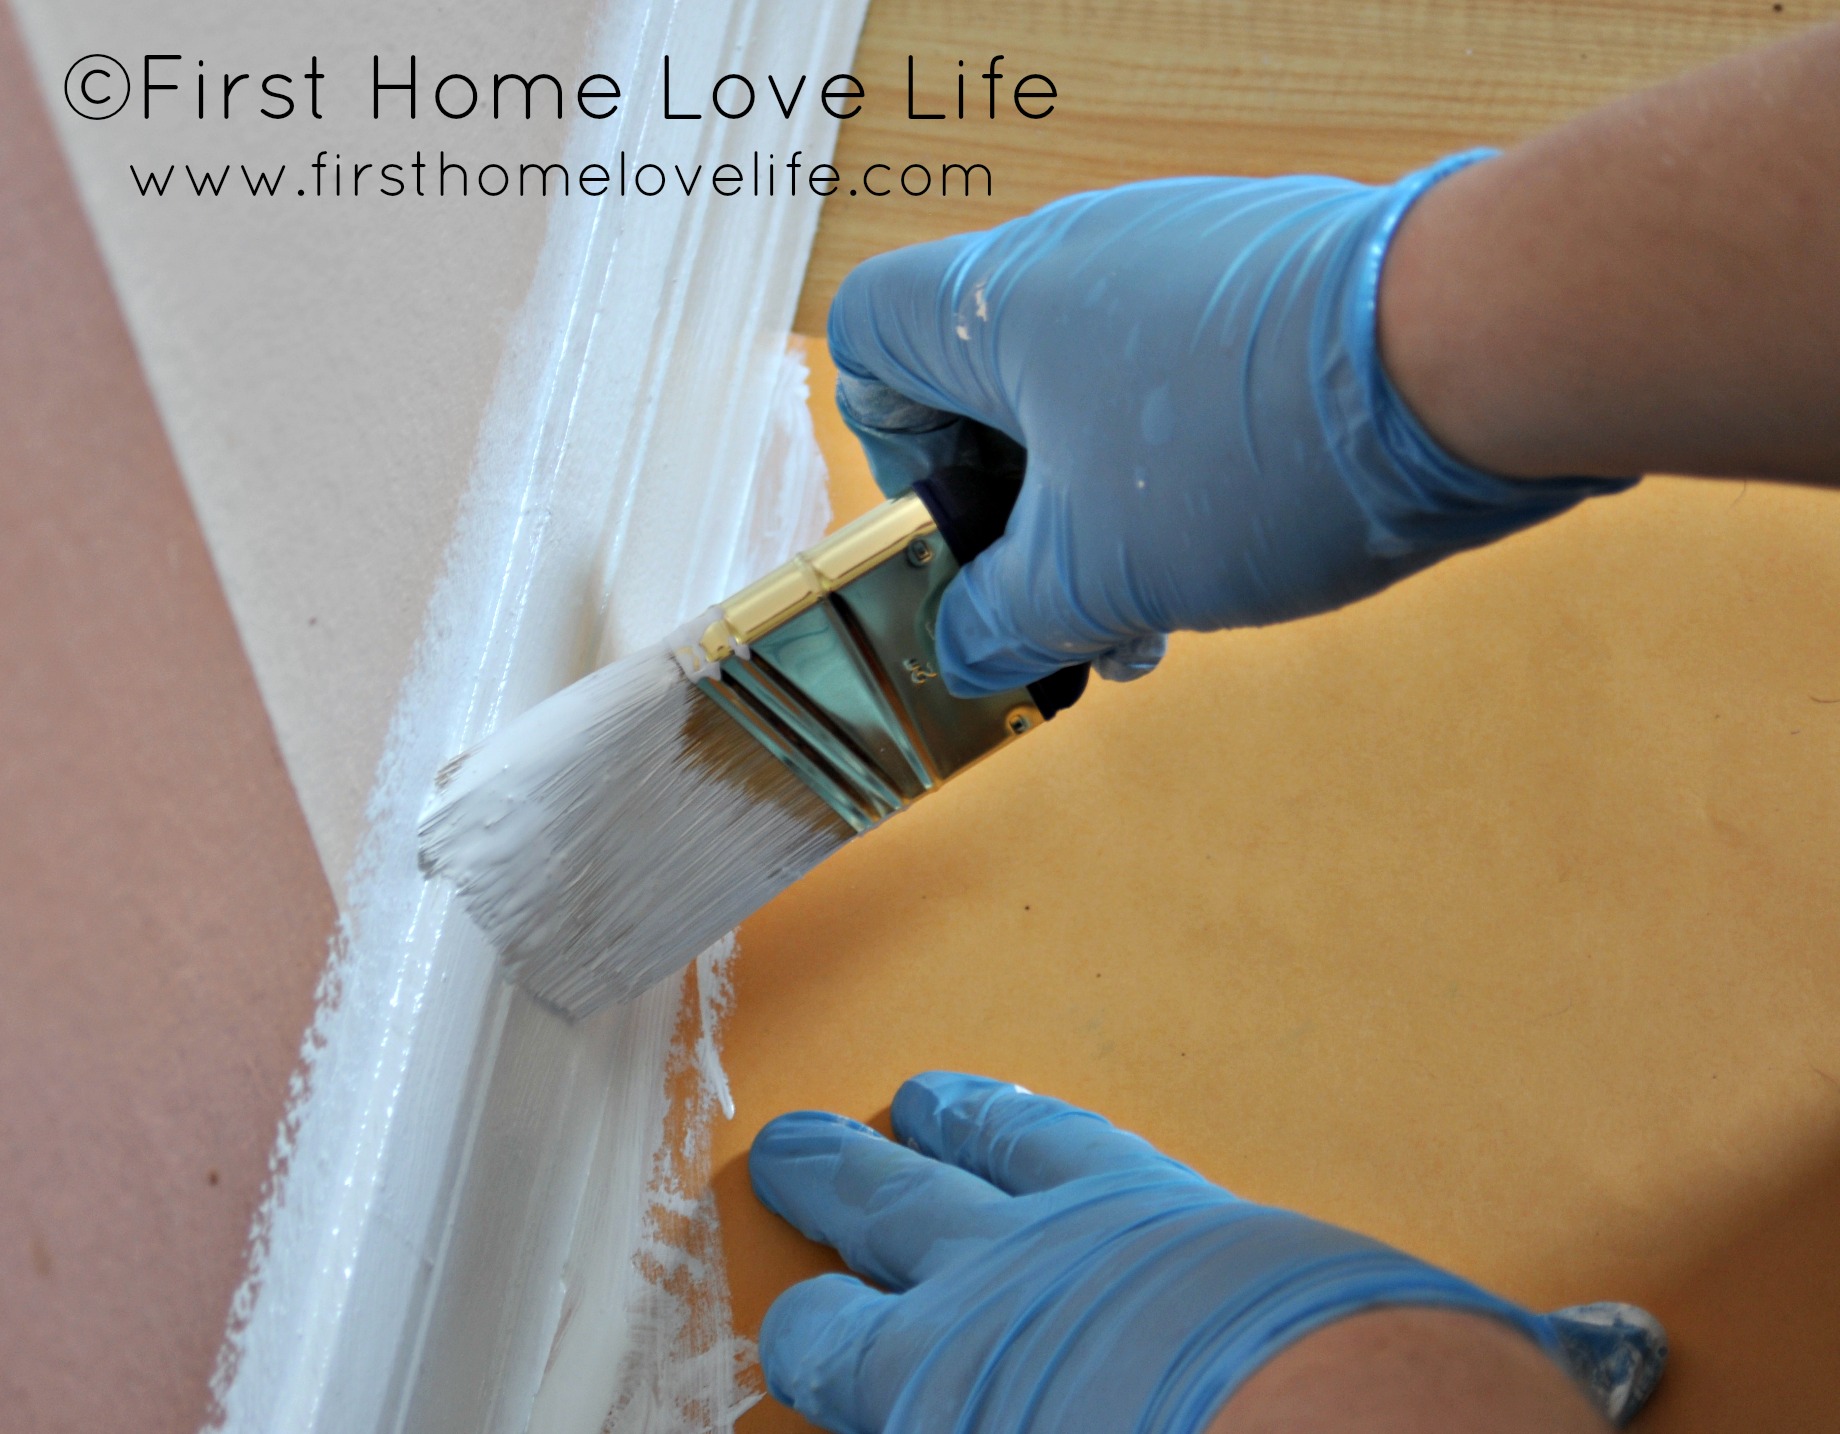
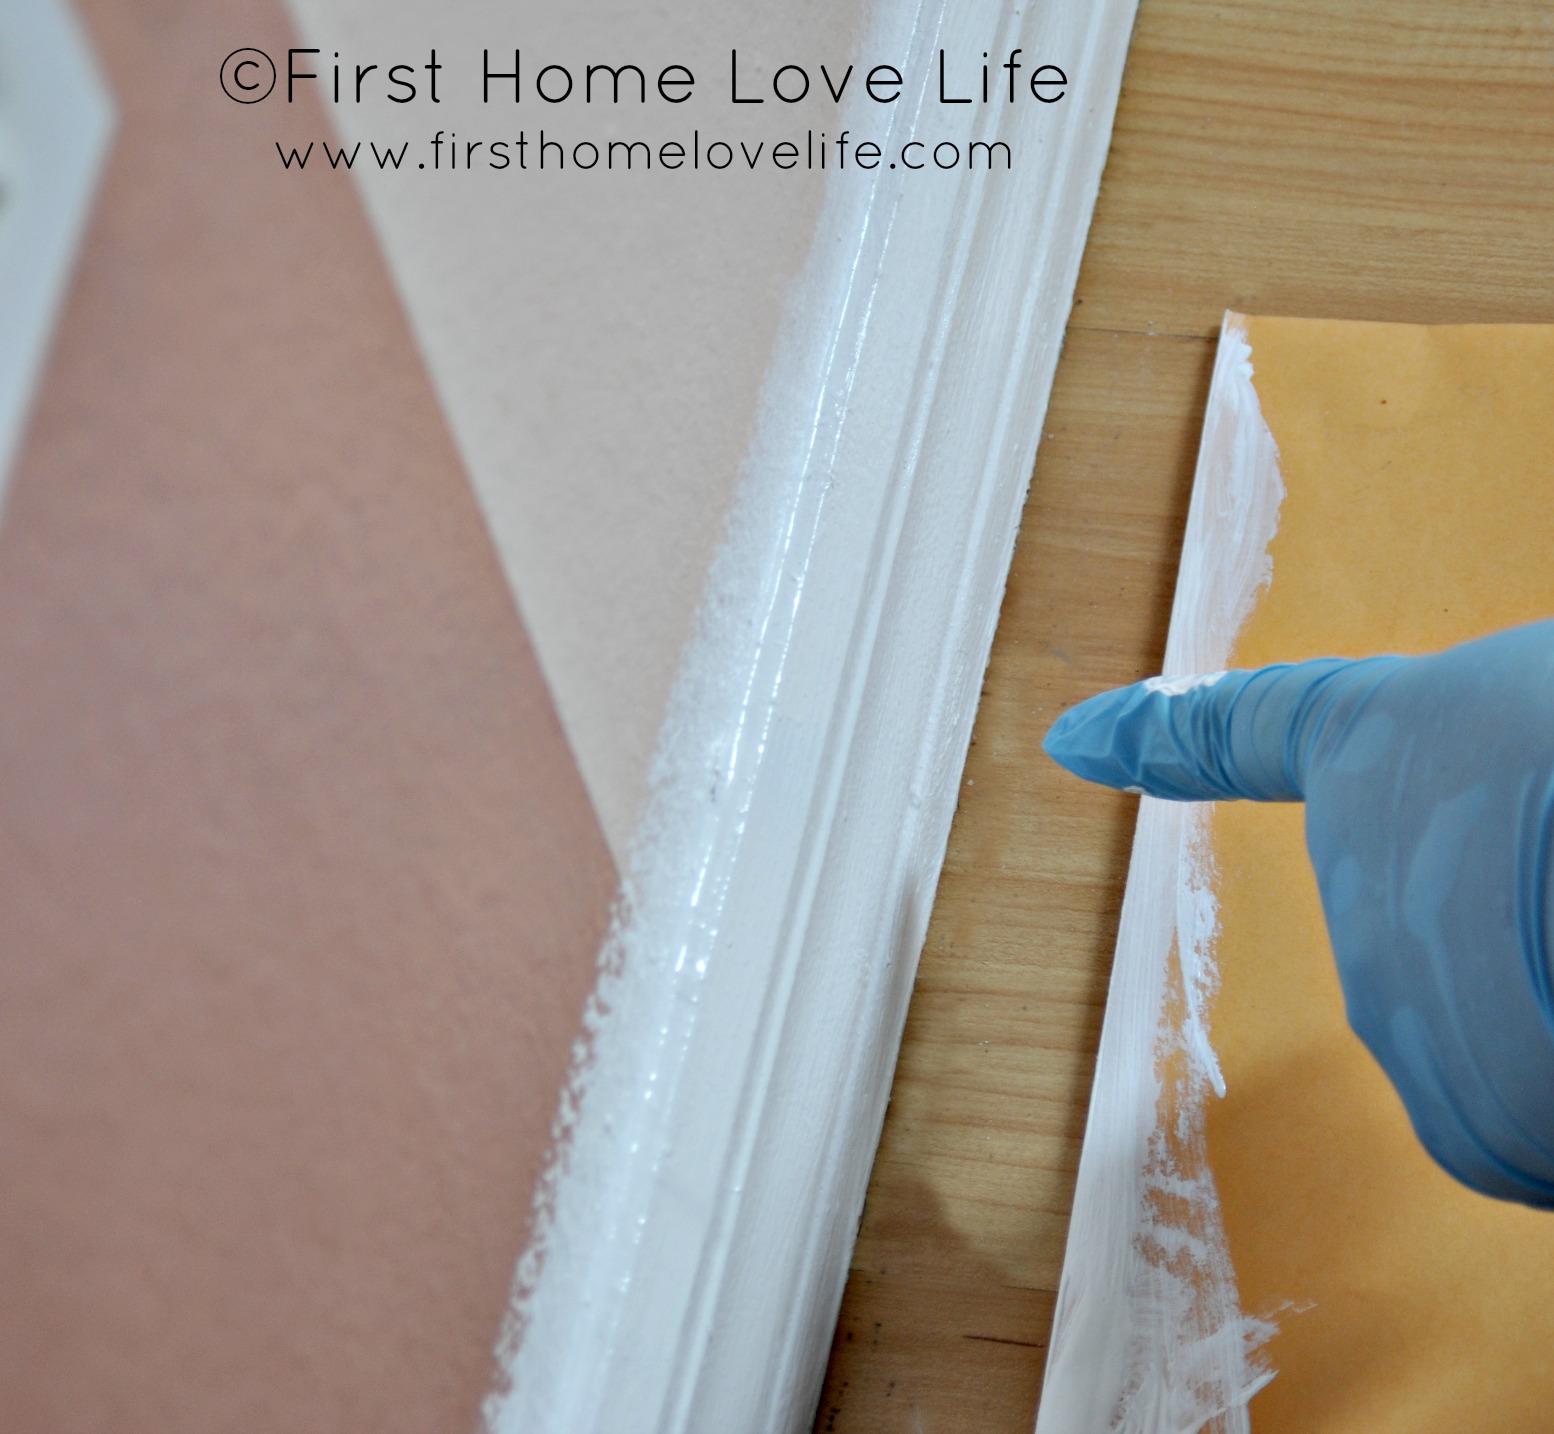
To get crisp, clean lines when painting the baseboard to the floor, I like to use a thicker paper instead of taping off the floor (i.e. construction or even a manilla folder will do) and wedge it tightly in between the bottom of the baseboard and floor. Again, soft long stokes and letting the paint dry in between coats will keep you from getting globs of paint on your trim. Working in sections, pulling back the paper as you go, and you will see you have crisp lines all around.
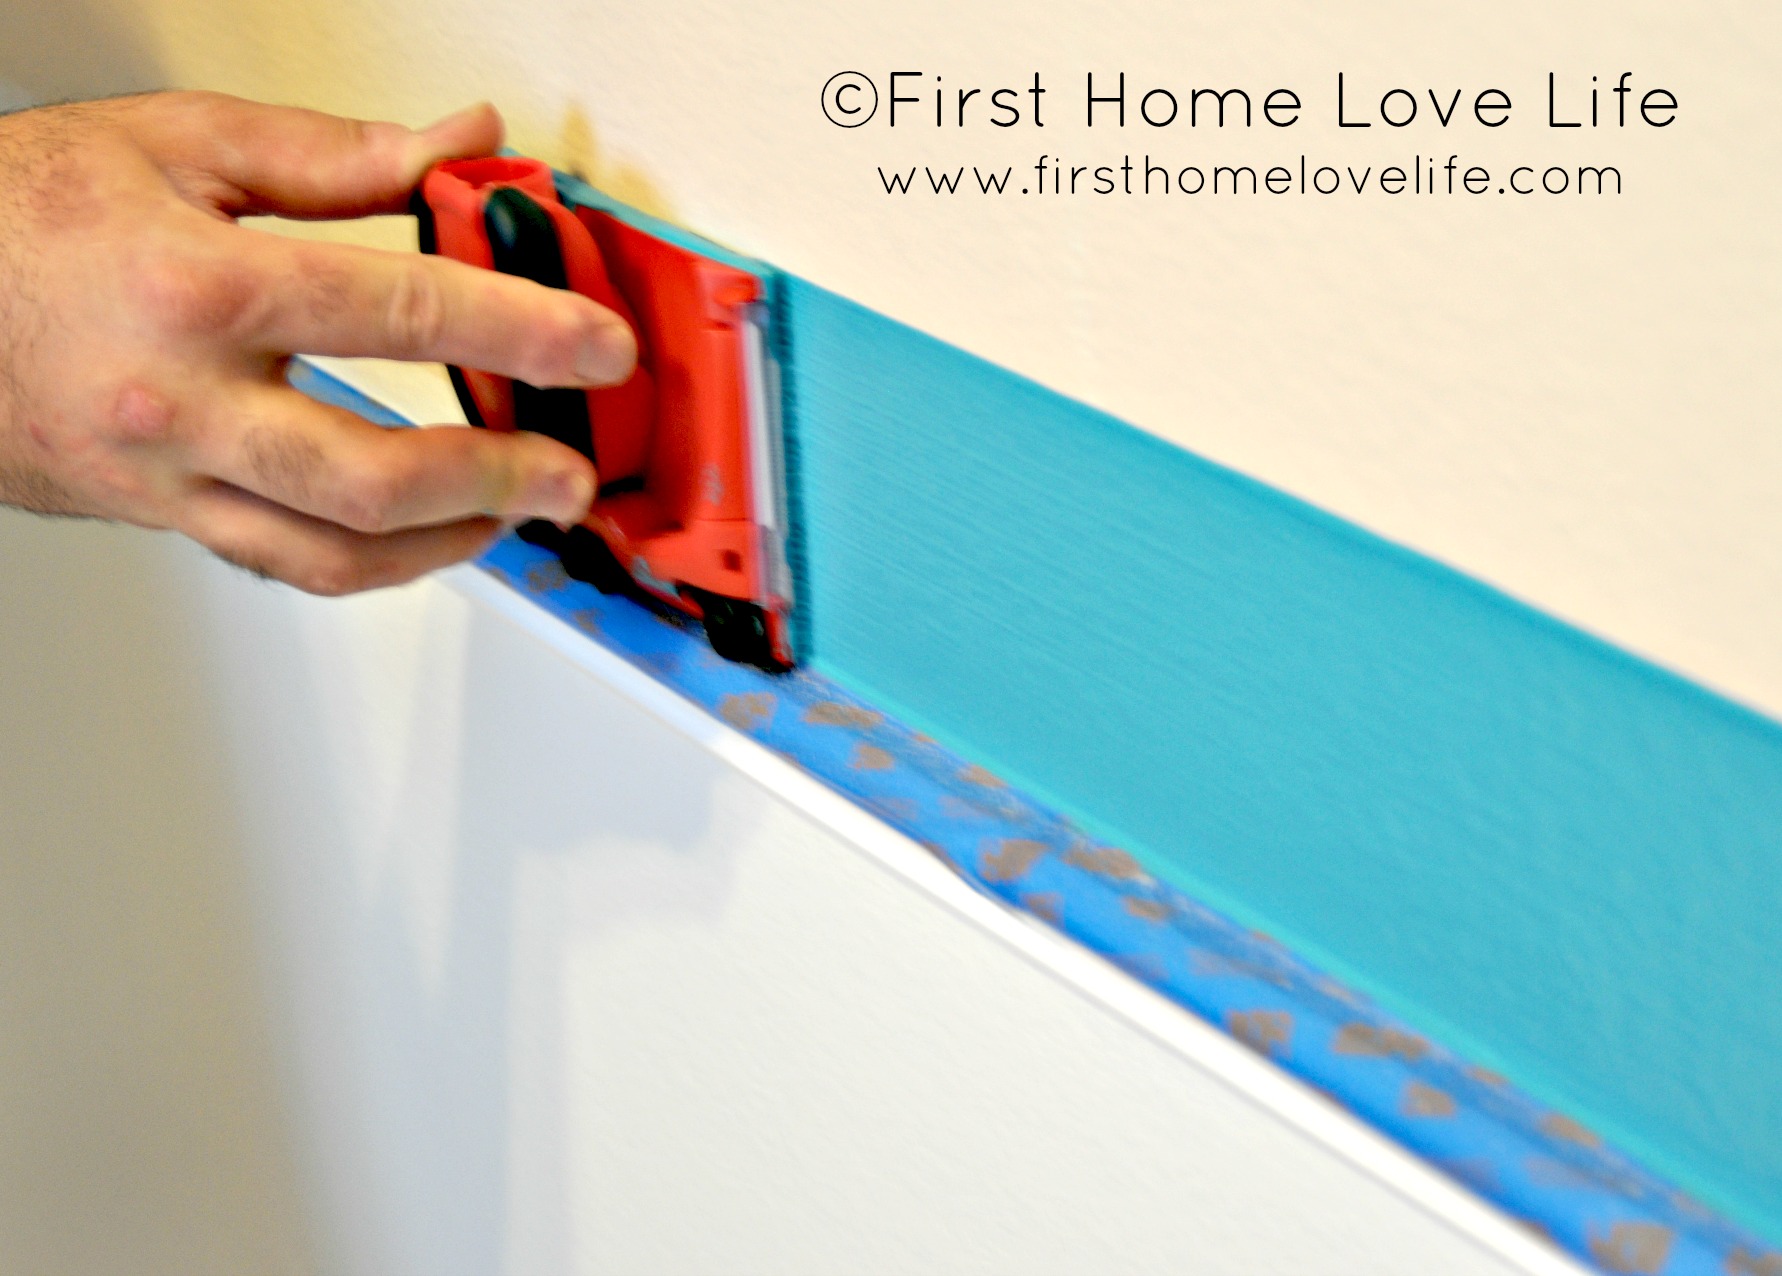
Once we do all of our trim, molding, door casings, etc. We begin to ‘cut’ our walls or outline them. This is where the edger comes in handy…You can read about the Shurline edger and other products I use for painting here.
Here you can see my husband demonstrating how it works, and it works beautifully!
Click here for part 3 of this painting series!
Linking up here…
![partybuttonHeather2 (1)_thumb[1]](https://www.firsthomelovelife.com/wp-content/uploads/2013/01/partybuttonHeather2-1_thumb1.png)
XO


Thanks for linking up your great guide to paint finishes at It’s Party Time! That edger tool looks awesome!
Heather recently posted…Winter Wreath Tutorial
It is Heather! Highly recommend it! Thanks for hosting and stopping by! XO