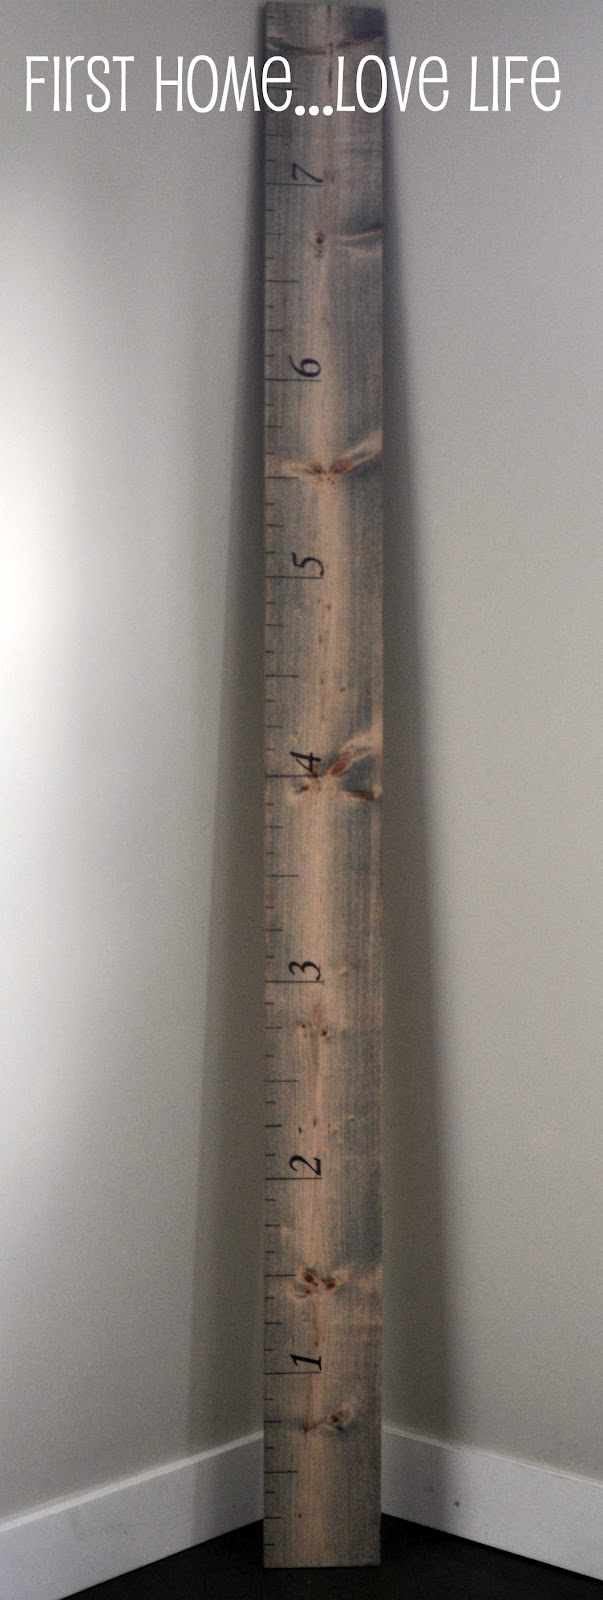
I found an image on Pinterest a few months ago of an oversized ruler that was originally from PB, but was knocked off by Dear Lillie. When I saw it, I knew I had to make it! It is such a whimsical piece to have in your home, a definite conversation starter, and it’s so inexpensive to do! Here’s my version and tutorial!
Supplies:
-8ft unfinished plank of wood
-wood stain (your choice)
-paint brush
-black sharpie
-numeric stencil
-ruler or yardstick
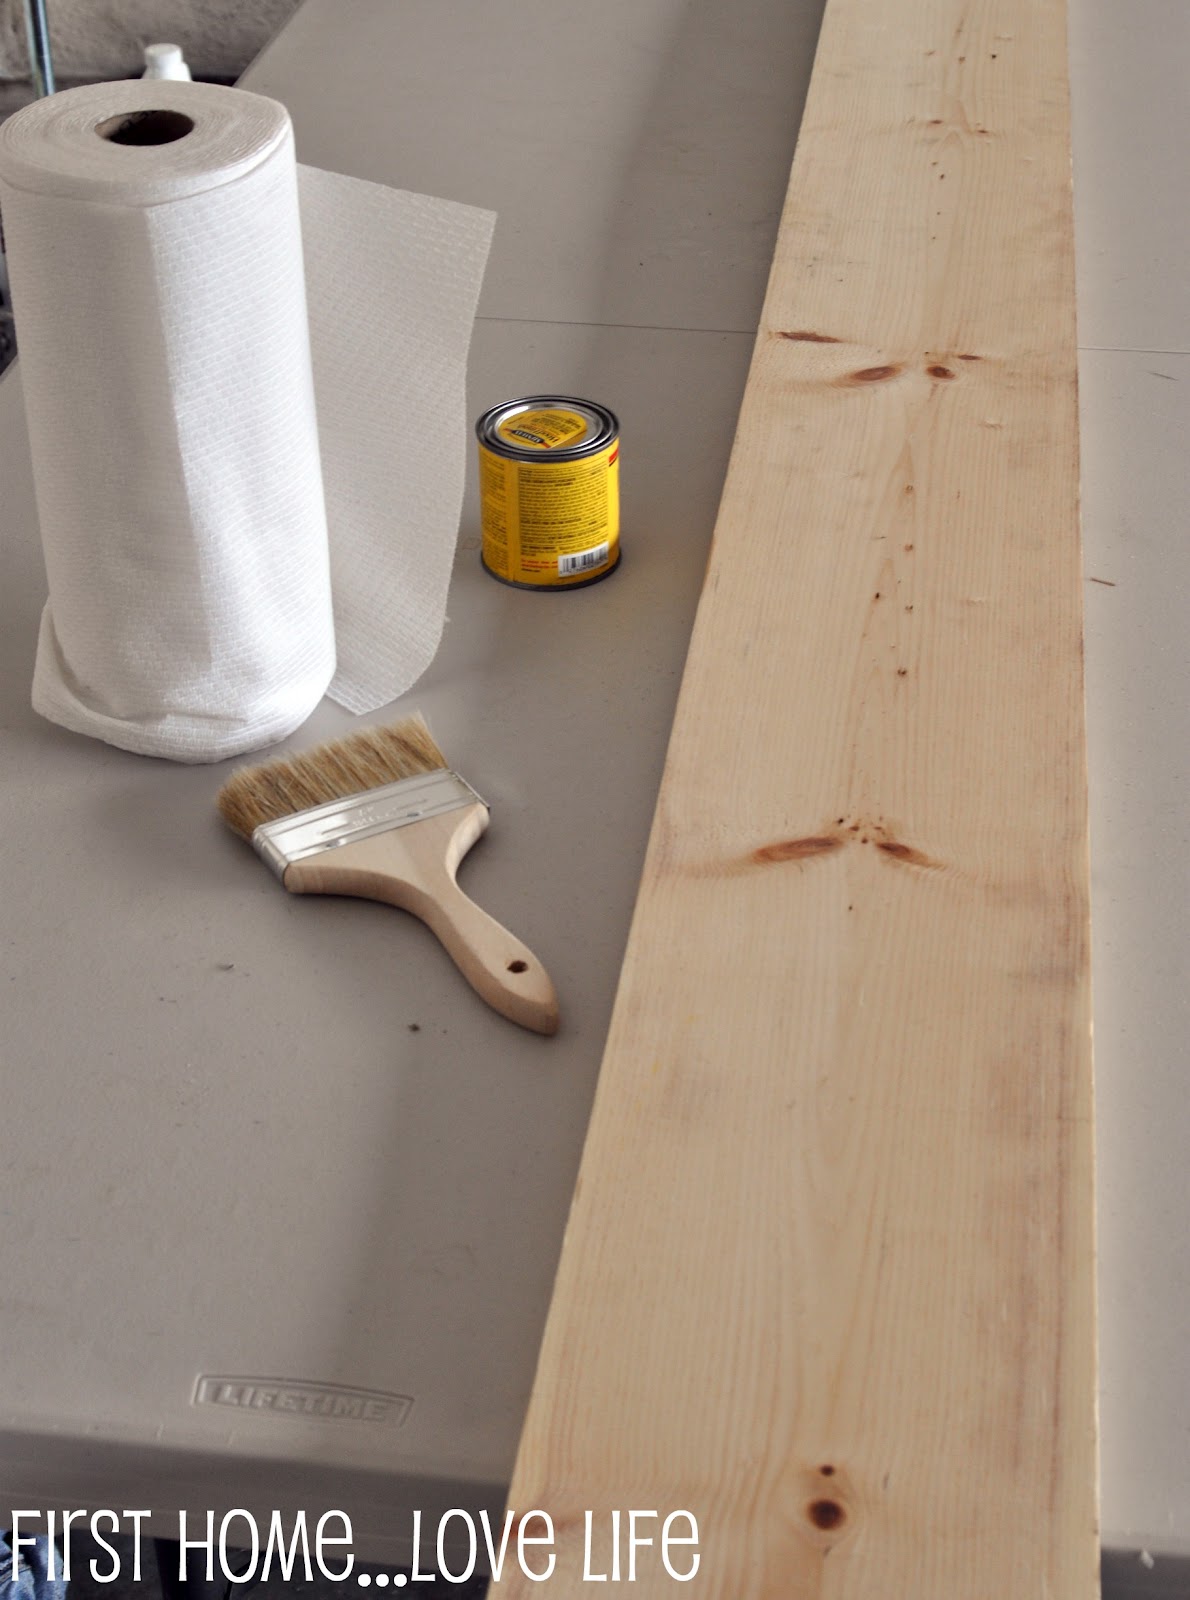
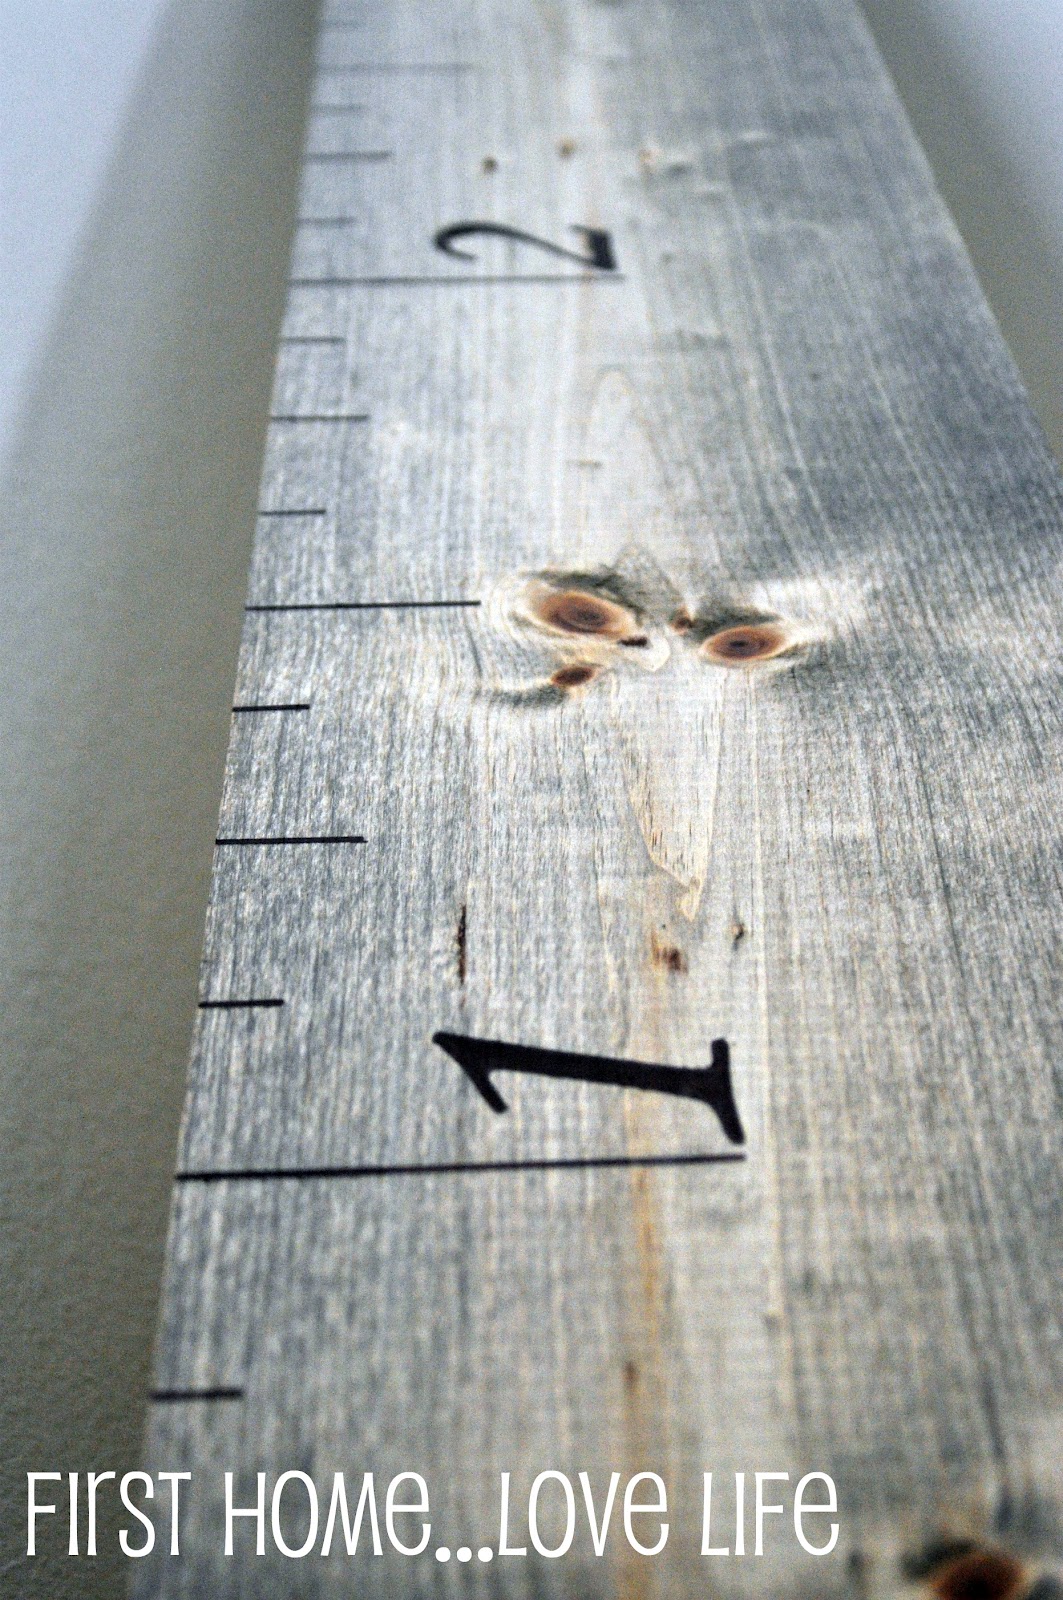
I started by giving my plank of wood a good heavy coat of stain. I stained, and wiped off about 3-4 times before I got the color I liked.
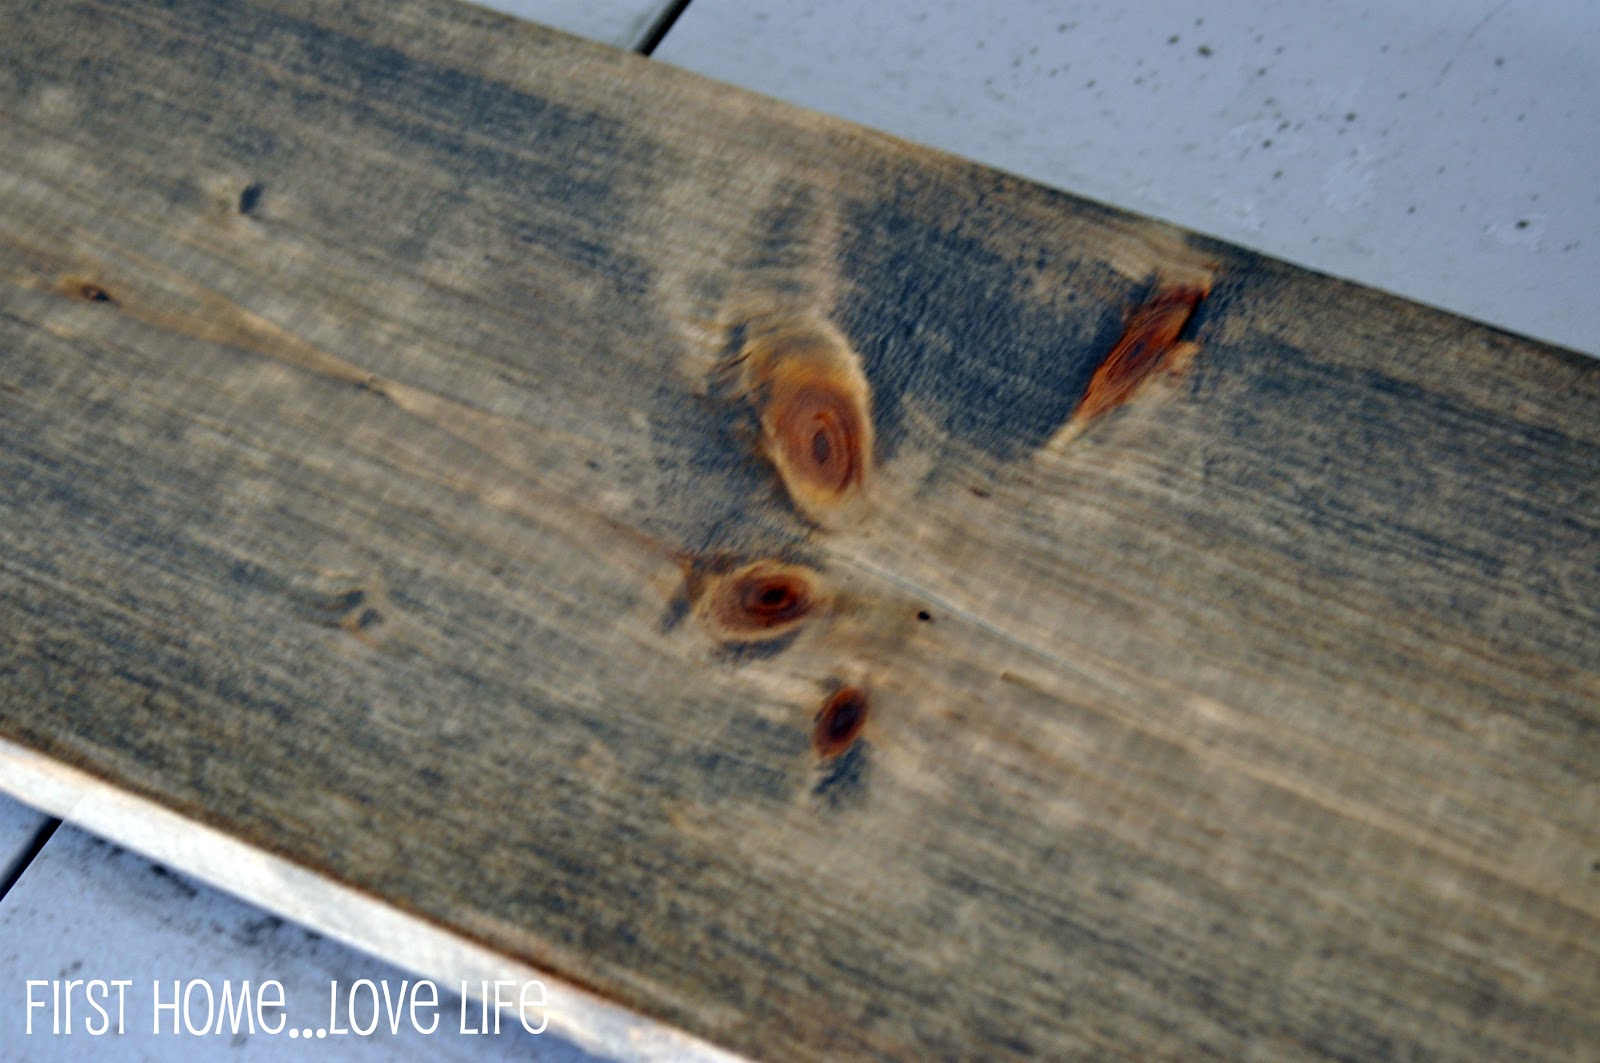
The color stain I chose is called “weathered oak” it’s a grayish color wood stain that gives the wood an aged almost burnt look. I like it, but like I said this step is personal preference, so choose whatever will go with your home decor.
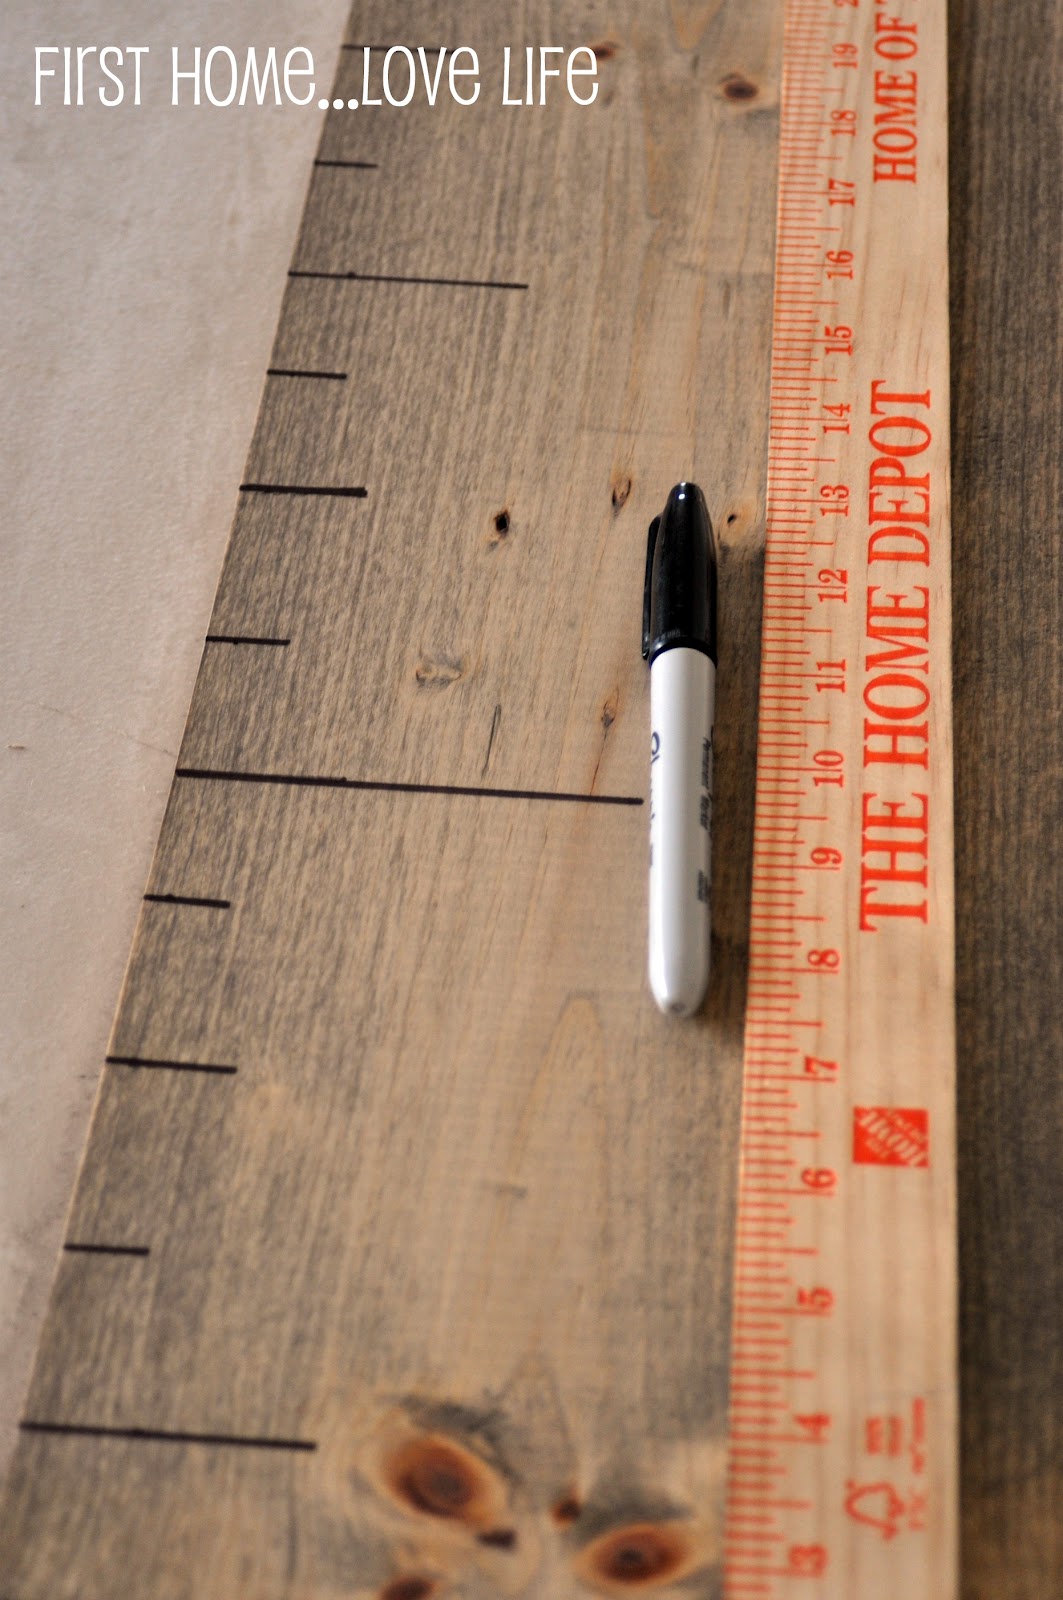
The next thing I did was mark my lines with a plain old black Sharpie. I tried to mimic the yard stick I was using. I made my inch line the longest, and my centimeter lines the shortest. Here’s how I measured. Stay with me..it’s kind of confusing…
I started by marking my “inch” lines- 12 inches apart (3 inches long)
Then I went back and measured every 6 inches from the “inch” line, marking the “1/2 inch line” (2 inches long)
Then I marked my 2 small “centimeter” lines at the 1 1/2 and 4 1/2 ( 1/2 inch long) and the middle “centimeter” at 3 inches (1 inch long)
Are you cross eyed now?
Sorry! Told you it was kind of confusing.
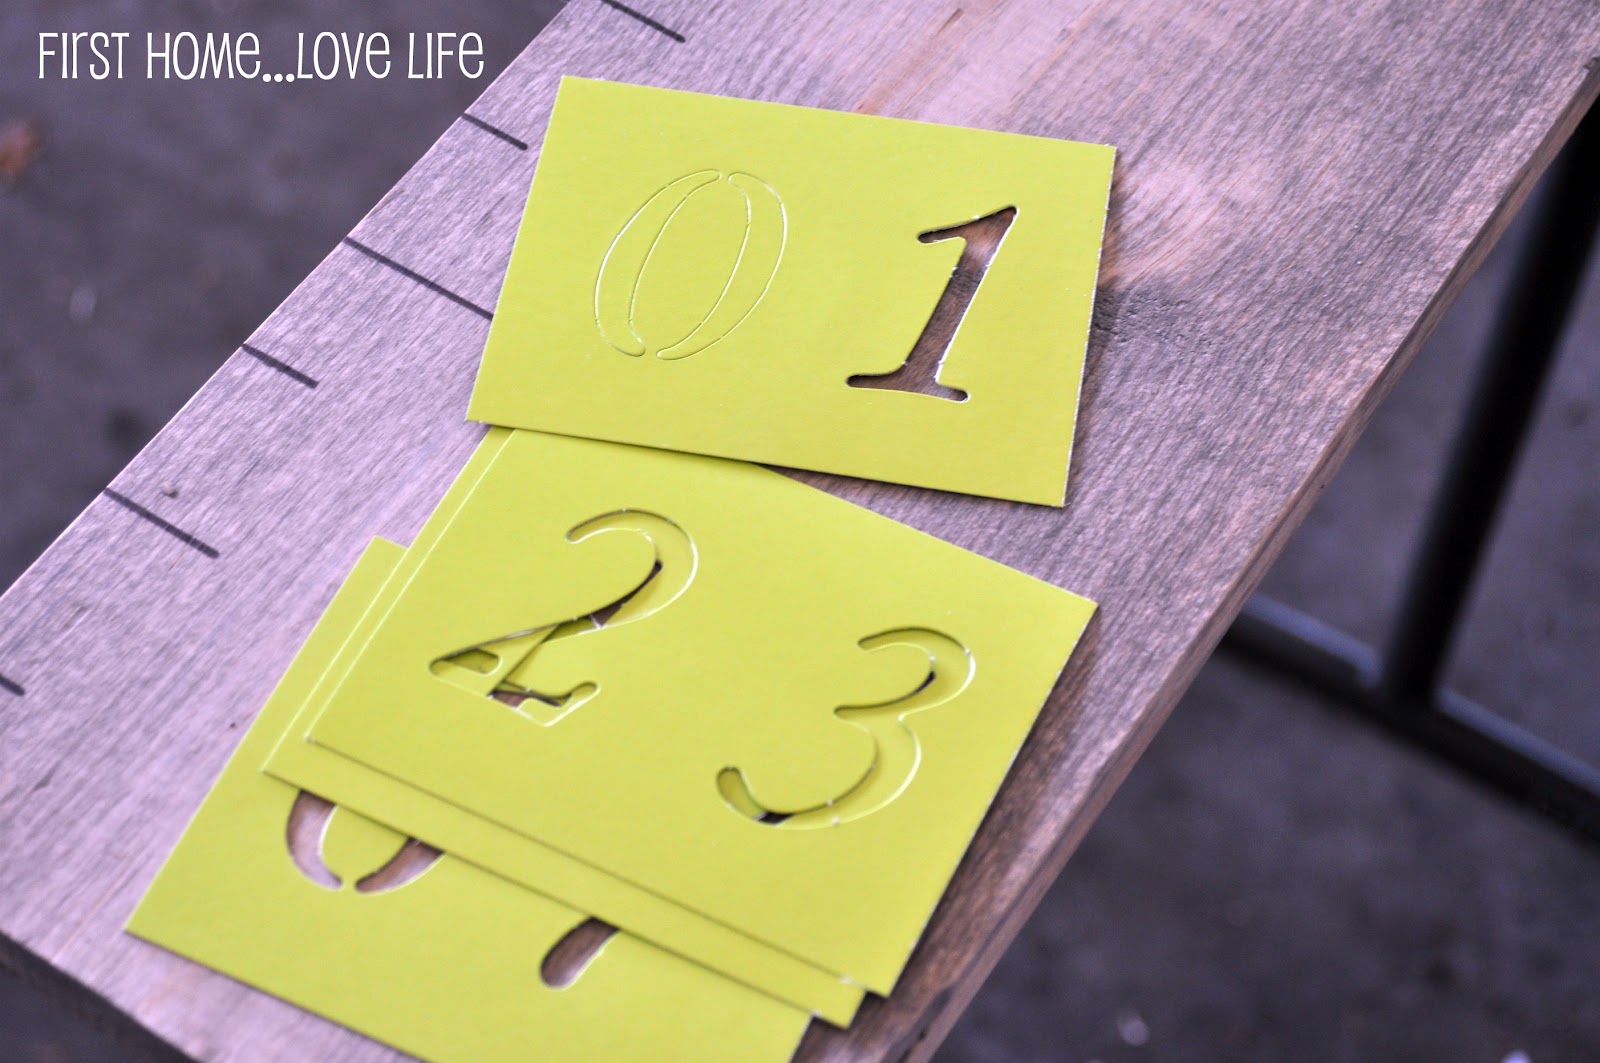
Once all my lines were in place, I used my stencils and Sharpie to make the numbers.
That’s it!
I’m going to leave it leaning against the wall in our family room for now, although I have seen it on other blogs hung up. I may do that eventually, but I just love how random it is. A ruler! Who knew it could be art as well?!
Talk to you soon!
xo-Christine


Very cool! Love it!
Thanks so much 🙂
Christine,
Your ruler looks amazing! The finish that you chose for the wood is perfect for giving it some vintage character. Thanks for sharing such a neat project!
Claire
Thank you for stopping by Claire. I’m happy with how the stain turned out too! 🙂
This is a super fun idea! I as well love the stain color you picked- looks perfect! Great job!
Thank you 🙂 It was really fun!
somehow I love this. maybe the exact part of me. however the oversized nature makes it also theatrical and whimsical. lovely and well executed job. please come add it to one of our parties, http://www.finecraftguild.com/party/
Thanks so much for the invite…coming over now! 🙂
Super cute! Love it!
It was so easy to do! I love it. Definitely one of those “where’d ya get that?!” pieces 😉
I saw that too and dismissed it because I knew I wouldn’t have the patience to figure it out. But you did it for me! Thank you so much for sharing at my party. I love this project. -K
Melanie here! I absolutely loved this piece, please email me–I have a question about your blog 🙂 MelanieLBowen[at]gmail[dot]com
Found you at Rose’s Fine Craft Guild, Christine.
I’m glad I did because I love how a simple item can look special when over-sized.Great job!
Cheers
Thanks so much for stopping by Donata! Your comment totally made my night! Cheers 🙂
Just a note to let you know that you have been featured on Jillify It!! Congratulations! 🙂
Jill
http://www.jillifyit.com
I so love this, sharing at my party tomorrow, should be up around 2:00 PST. Thanks!
Ahhh Thank you 🙂 always makes me smile seeing a comment from you! XO
So darn cute! I had seen the one over at Dear Lillie but thought of it more as a measurer for kid’s growth. On your blog it looks like more of a home decor item. Thanks for the great instructions! I saw your post over at Redoux. I “pinned” this project.
Too cute!! Really great tutorial.
Just wanted to let you know I’ve given you a Leibster Award! Stop on by to check it out;)
How cool about Haverty’s! I had no idea they had anything like that! I actually just bought our cast iron wheels for the warehouse cart project, but I’m still heading over to the Haverty’s website to check out their other furniture. Thanks for the suggestion. I’m always looking for good deals;)
This is just way to cute. Love the old weathered look. You did a wonderful job. Thanks for sharing your tutorial.
I love it! I thought it had a metallic finish some how. The photo totally looks like an old, bent, rusted metal tape measure.
And FYI, I don’t think you have “centimeter” marks at all. Looks like inch, 1/2, 1/4, and 1/8 marks to me. Generally the metric and English measurements aren’t on the same side as a ruler. 🙂
Hi I actually did this project but instead of just using it as art, I’m using mine as my sons growth chart by adding his age each year to the height. yours looks great!