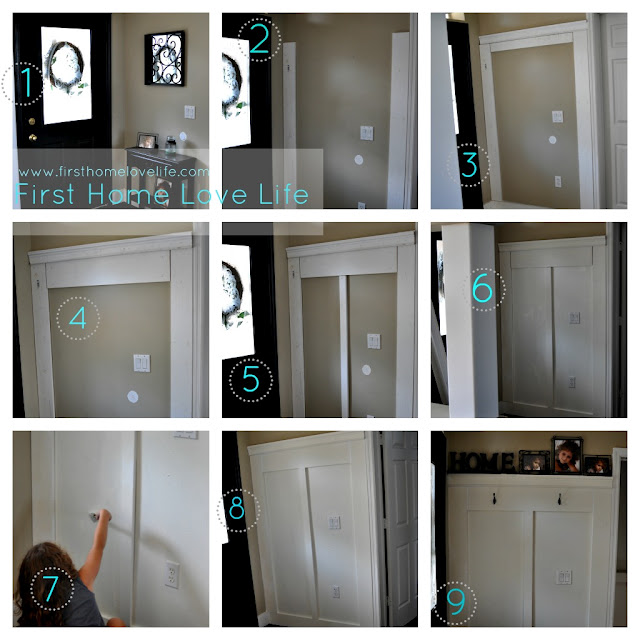
1. “Before” I got started, I removed everything off of the wall, dusted and put my supplies out.
2. I measured and cut with the miter saw two identical pieces of 8 inch boards for the ‘frame’ and hung with my nail gun.
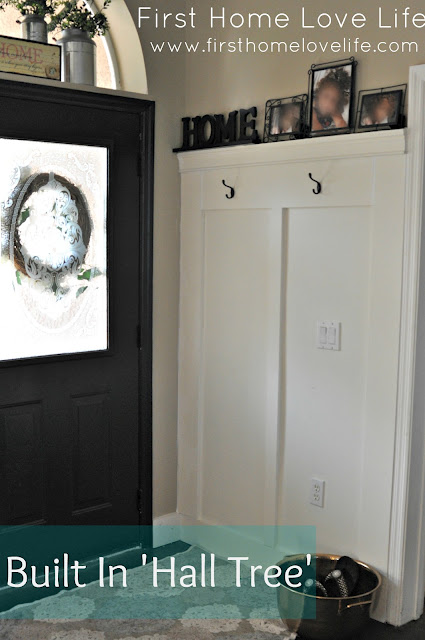
3. I then added a smaller piece of molding horizontal to create a square, and then added a decorative piece on top to create a ledge so I could place frames and other items on top.
4. Using a 12”w piece, I hung it below the thinner piece to hide the gap left by the ledge, and to give me a surface for the hooks.
5. I found my center point and hung a thin piece of molding down the center
6. Painted with over the counter white paint
7. Painted another coat and touched up
8. Caulked EVERYTHING! Caulk is seriously a DIYers best friend!
9. Hung my hooks and decorated the ledge
I promise you it was one of the easiest afternoon projects I’ve ever done! Not to mention it has totally inspired me to do it in the bathroom now as well, but you’ll just have to wait for that reveal 🙂
Talk to you soon,





Wow, you made it look so easy! I so wish I had a nail gun, I would have b and b everywhere in my house, it truly looks classy! I also like the height you picked out. Great job.
Christine this is Awesome!! What a nice looking wall now! 🙂
That is a total success! It loks amazing, the hooks and the shelf, everything.
Jessica
stayathomeista.com
Looks great!!!!