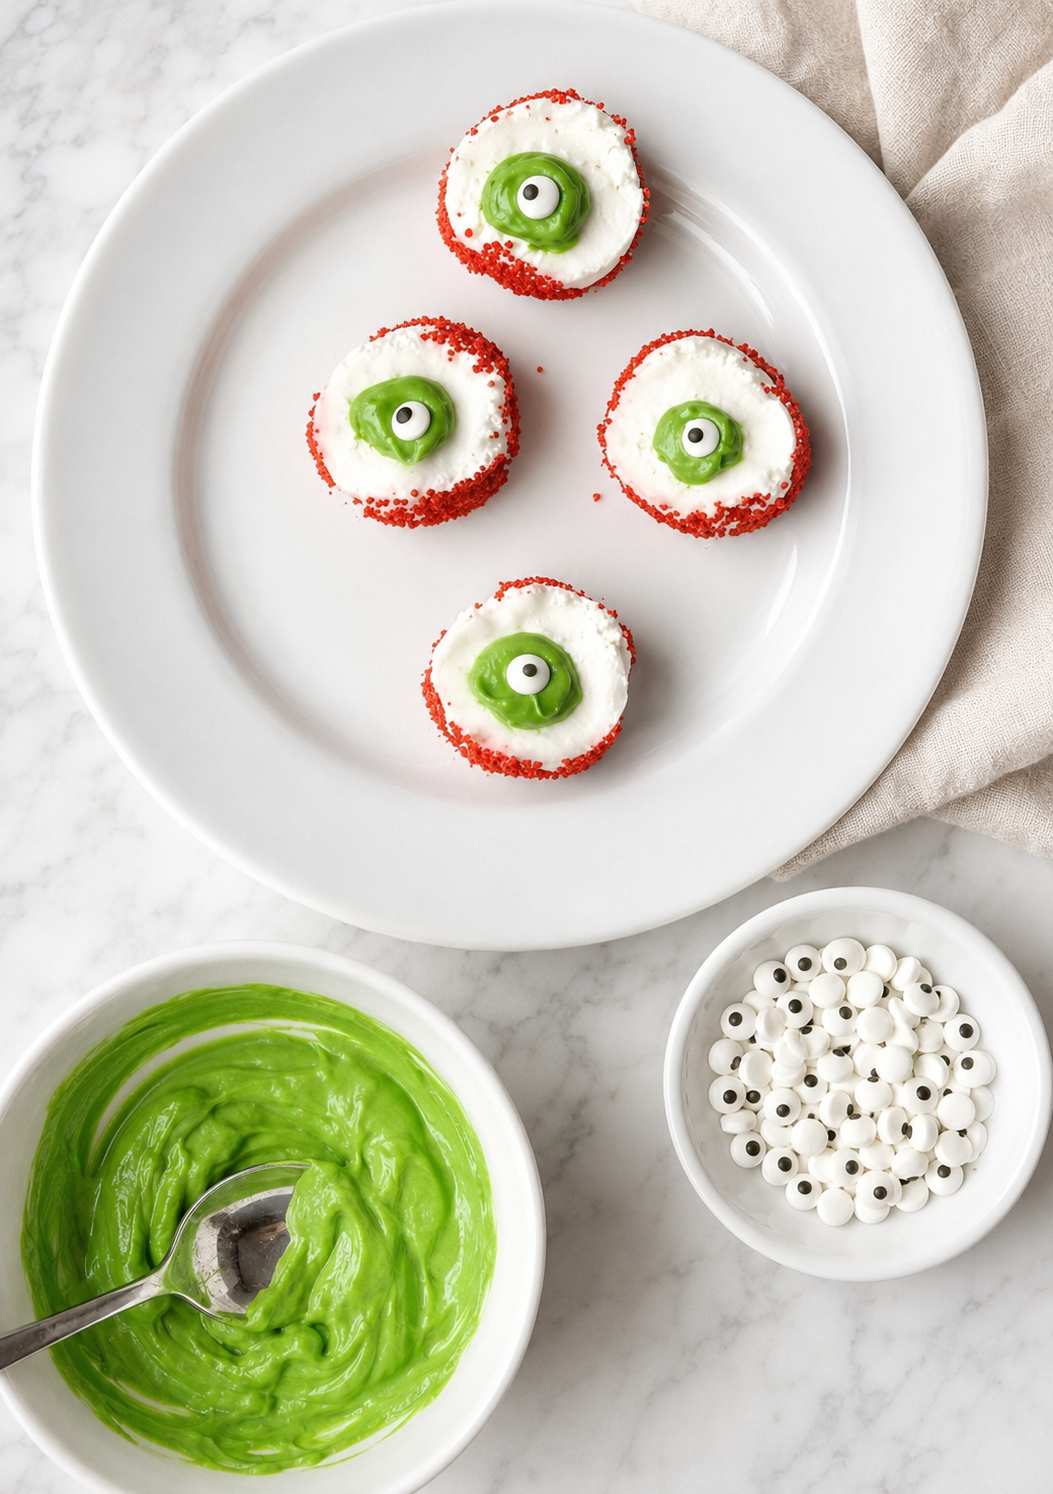
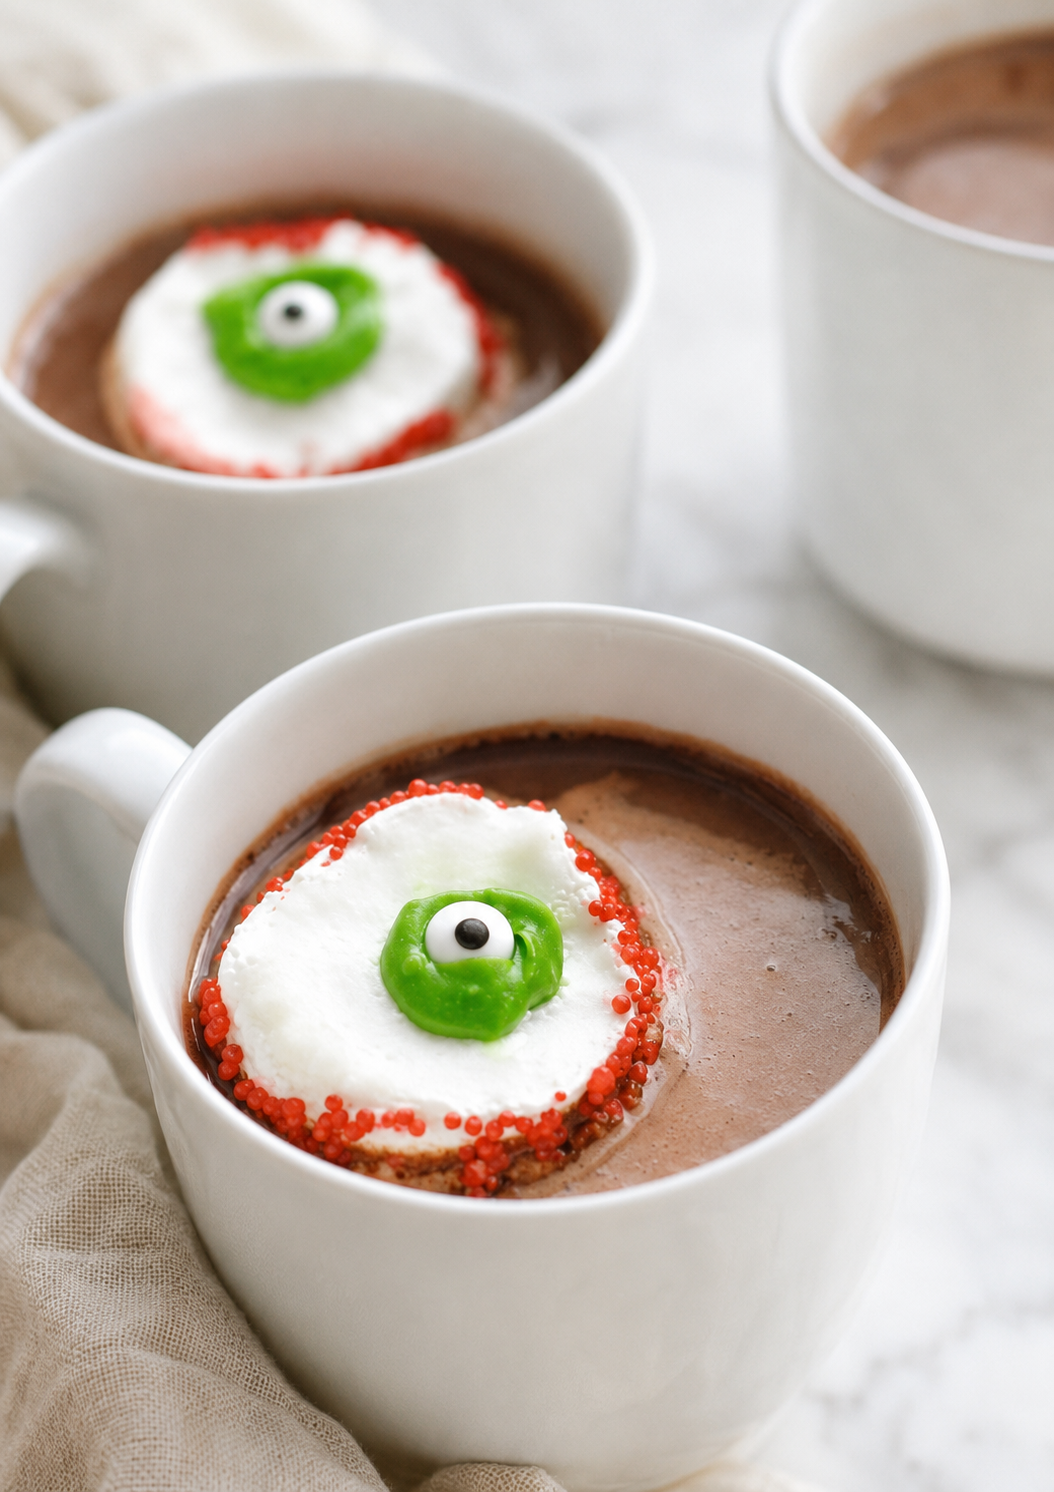
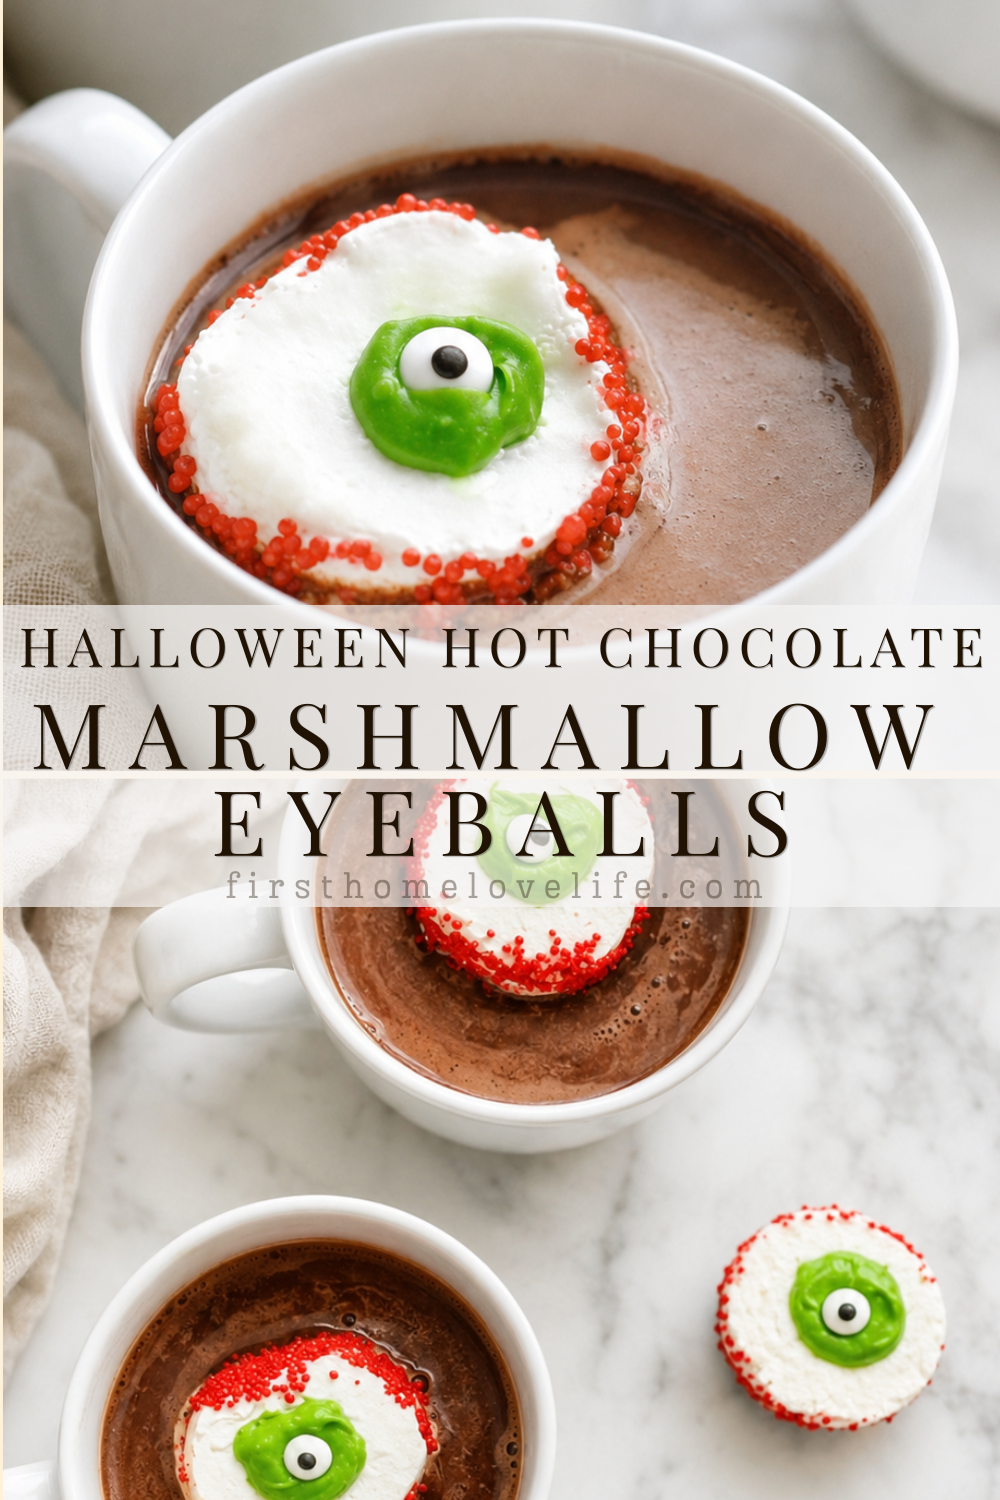
These creepy marshmallow eyeballs are an easy Halloween treat made with jumbo marshmallows, candy melts, candy eyes, and red sprinkles. Float them in hot chocolate or serve them on festive straws for a fun Halloween party treat the kids will love.
There is something about the first chilly evening of fall that makes me want to pull out the mugs and make a big batch of hot chocolate. Around Halloween, however, plain marshmallows simply will not do.
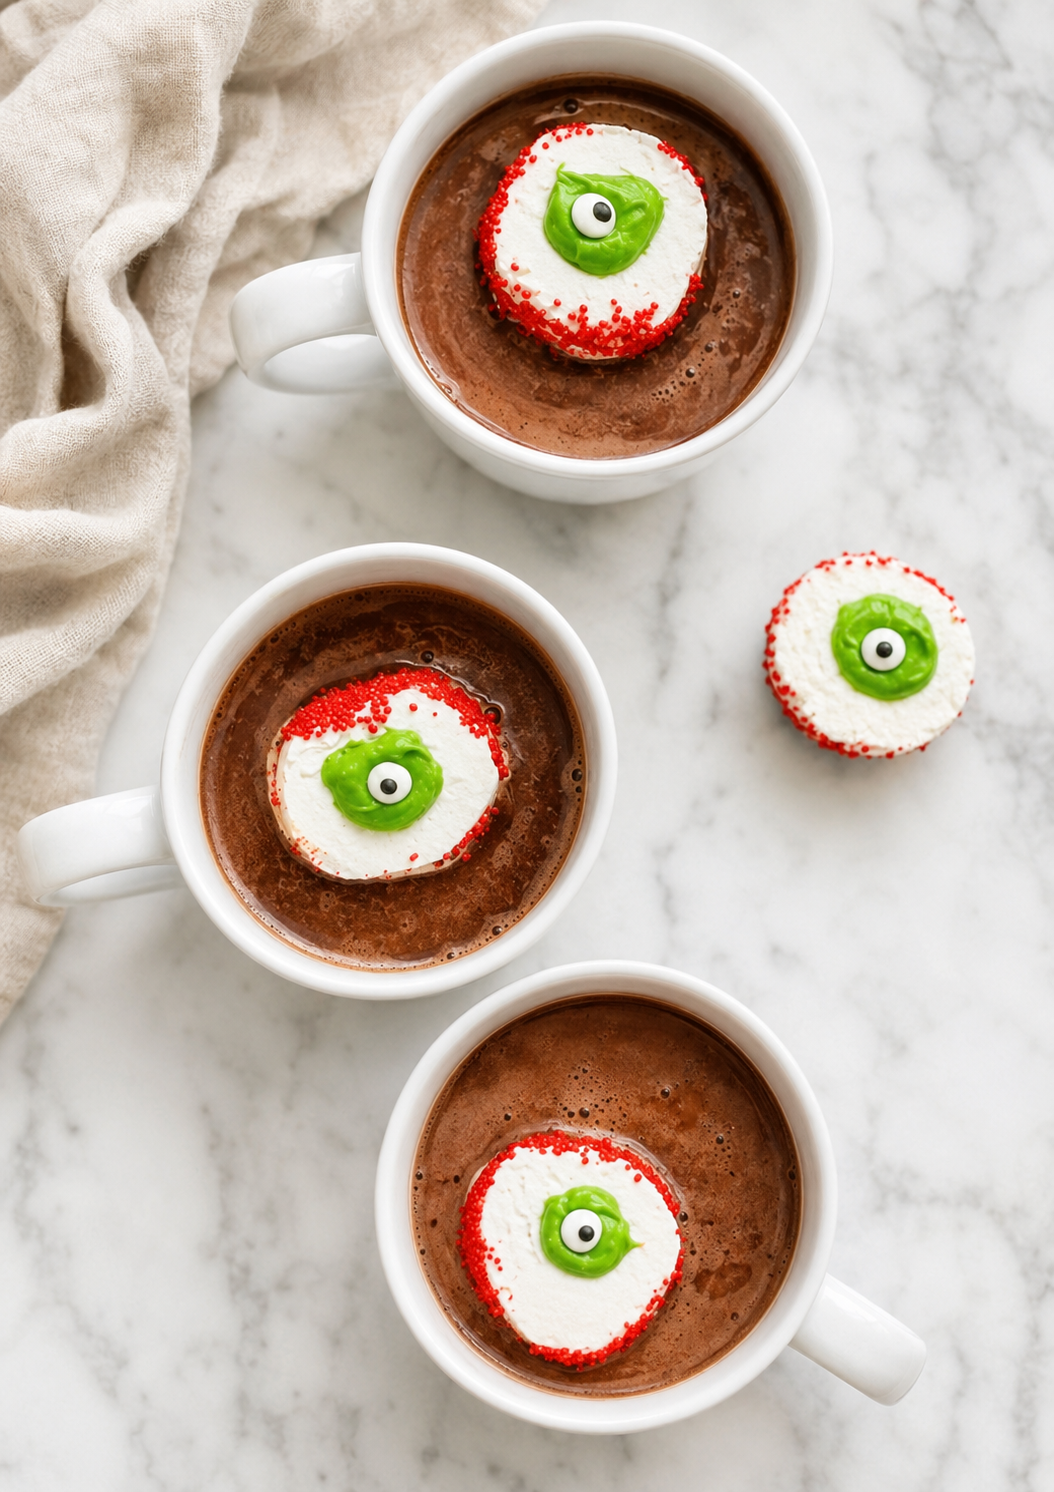
These easy marshmallow eyeballs turn an ordinary mug of hot chocolate into a spooky Halloween treat. They look delightfully creepy floating on top of the cocoa, but they are still cute enough for younger children.
Best of all, these Halloween marshmallow treats require only four ingredients and a few minutes of hands-on time. Make them for a Halloween movie night, classroom party, hot chocolate bar, or an easy after-school surprise.
Why You’ll Love These Marshmallow Eyeballs
- Only four simple ingredients
- No baking required
- Easy enough for children to help decorate
- Ready in about 20 minutes
- Perfect for Halloween parties and movie nights
- Fun served alone or floating in hot chocolate
- Easy to customize with different colors
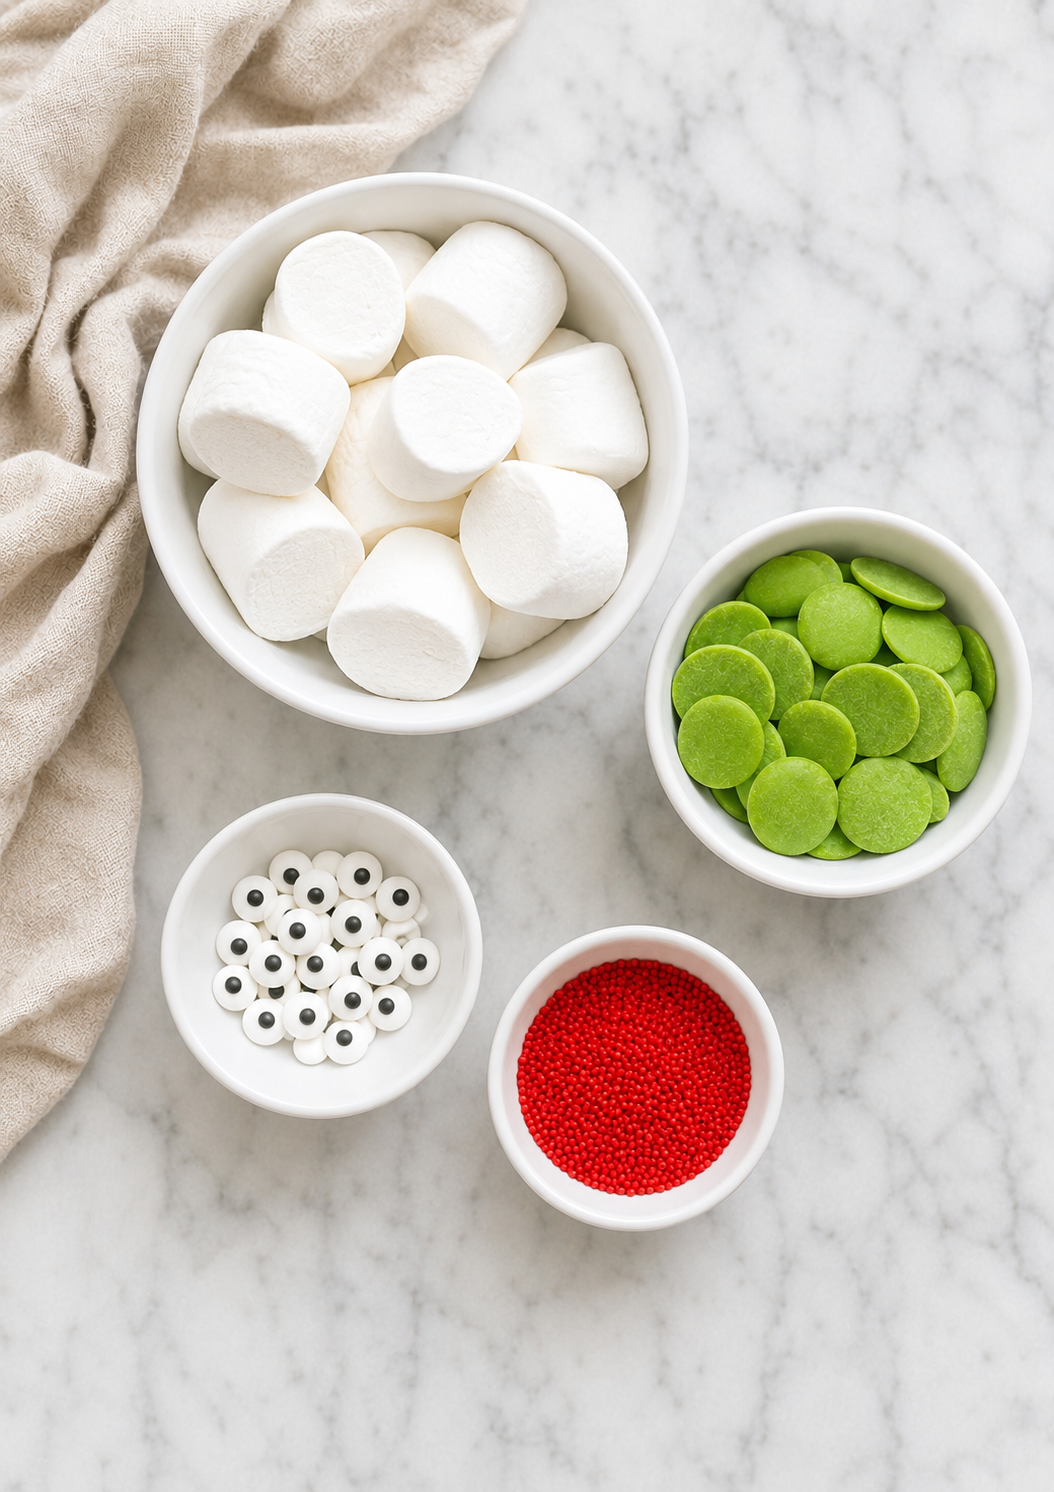
Ingredients You’ll Need
Jumbo marshmallows
Jumbo marshmallows create large, noticeable eyeballs that float nicely on top of a mug of hot chocolate. Each marshmallow is cut in half, giving you two eyeballs.
Green candy melts
The melted candy creates the colorful iris and holds the candy eye in place. Green looks especially spooky, but purple, blue, orange, or red candy melts will also work.
Candy eyeballs
Small candy eyes create the pupil in the center of each marshmallow. You can find them in the baking aisle, craft stores, or seasonal Halloween sections.
Red decorating sugar
Red decorating sugar or fine red sprinkles around the outside of the marshmallow gives the eyeballs a bloodshot appearance.
More Halloween Ideas You’ll Love



How to Make Marshmallow Eyeballs
Step 1: Prepare the marshmallows
Use a sharp knife or clean kitchen scissors to cut each jumbo marshmallow in half crosswise. Place the marshmallows cut-side up on a parchment-lined baking sheet or plate.
The freshly cut side will be sticky, which helps the decorations stay in place.
Step 2: Add the red sugar
Lightly dampen the outside edge of each marshmallow half with water. Do not soak the marshmallow; you only need enough moisture to make the sugar stick.
Roll the outside edge in red decorating sugar or gently press the sugar around the perimeter. This creates the creepy, bloodshot effect.
Step 3: Melt the candy
Place the green candy melts in a microwave-safe bowl. Microwave according to the package directions, stirring frequently, until completely melted and smooth.
If the melted candy seems too thick, stir in a small amount of coconut oil or vegetable shortening until it reaches a smooth consistency.
Step 4: Create the eyeballs
Spoon or pipe a small circle of melted green candy onto the cut side of each marshmallow. Immediately press one candy eye into the center.
Repeat until all the marshmallows have been decorated.
Step 5: Let them set
Leave the marshmallow eyeballs at room temperature for approximately 10 to 15 minutes, or until the candy coating has hardened.
Serve them on a platter, add them to decorative paper straws, or float one or two eyeballs on top of each mug of hot chocolate.
Tips for the Best Halloween Marshmallow Eyeballs
- Cut the marshmallows with kitchen scissors lightly coated in nonstick cooking spray to prevent sticking.
- Use only a tiny amount of water around the edges. Too much can make the marshmallows sticky or cause them to dissolve.
- Add the candy eyes while the candy melts are still wet so they stay securely in place.
- Transfer the melted candy into a small piping bag for neater circles.
- Make each eyeball a little different. Imperfect shapes and uneven “veins” make them look even creepier.
- Let the decorations set completely before stacking or storing the marshmallows.
Make Them Your Own
These marshmallow eyeballs are easy to customize for your Halloween party.
- Use purple, orange, blue, or red candy melts for different eye colors.
- Use several colors to make a platter of monster eyeballs.
- Insert festive paper straws or lollipop sticks to make marshmallow eyeball pops.
- Dip the bottom of each marshmallow in chocolate for an extra-sweet treat.
- Use red gel icing to draw thin blood vessels across the marshmallows.
- Add them to cupcakes, pudding cups, brownies, or a Halloween dessert board.
- Serve them beside a slow cooker filled with hot chocolate for an easy party station.
How to Serve Marshmallow Eyeballs
My favorite way to serve these is floating on top of a warm mug of hot chocolate. The marshmallows slowly soften while the candy eyeballs appear to stare back at you.
They would also be perfect for:
- A Halloween hot chocolate bar
- A children’s Halloween party
- A spooky movie night
- Classroom Halloween treats
- A Halloween dessert board
- An after-school October snack
- A monster-themed birthday party
Arrange the finished eyeballs on a white platter and place them beside mugs, hot cocoa toppings, chocolate chips, whipped cream, and Halloween sprinkles. Guests can add their own marshmallow eyeballs to their drinks.


Easy Marshmallow Eyeballs | Halloween Hot Chocolate
These easy marshmallow eyeballs are a fun four-ingredient Halloween treat. Serve them on their own or float them in hot chocolate for a spooky drink kids will love.
- Prep Time: 15 minutes
- Setting Time: 10 minutes
- Total Time: 25 minutes
- Yield: 24 marshmallow eyeballs 1x
- Category: Dessert
- Cuisine: HALLOWEEN | HOLIDAY
- Diet: Vegetarian
Ingredients
- 12 jumbo marshmallows
- 1/2 cup green candy melts
- 24 small edible candy eyes
- 1/4 cup red decorating sugar or fine red sprinkles
- 1 teaspoon coconut oil or vegetable shortening, optional
Instructions
- Line a baking sheet or large plate with parchment paper.
- Cut each jumbo marshmallow in half crosswise. Place the marshmallow halves cut-side up on the prepared baking sheet.
- Lightly dampen the outside edge of each marshmallow half with water. Use only enough water to make the surface slightly sticky.
- Roll or gently press the dampened edge into the red decorating sugar to create the bloodshot appearance.
- Place the green candy melts in a microwave-safe bowl. Melt according to the package instructions, stirring frequently until smooth.
- If the melted candy is too thick, stir in a small amount of coconut oil or vegetable shortening until it reaches a smooth, spoonable consistency.
- Spoon or pipe a small circle of melted green candy onto the cut side of each marshmallow.
- Immediately press one edible candy eye into the center of the green candy before it begins to set.
- Let the marshmallow eyeballs stand at room temperature for 10 to 15 minutes, or until the candy coating is firm.
- Serve the marshmallow eyeballs on a platter, place them on festive paper straws, or float one or two on top of each mug of hot chocolate.
Notes
- Lightly coat your knife or kitchen scissors with nonstick cooking spray to make the marshmallows easier to cut.
- Do not soak the marshmallows in water. You only need a small amount of moisture to make the red sugar stick.
- Purple, blue, orange, or red candy melts can be substituted for the green candy melts.
- Add the candy eyes while the melted candy is still wet so they remain securely attached.
- Allow the decorations to set completely before stacking or storing.
- Store the finished marshmallow eyeballs in an airtight container at room temperature for up to two days.
- Do not refrigerate them. Condensation can make the marshmallows and decorating sugar sticky.
Can You Make Marshmallow Eyeballs Ahead of Time?
Yes. These Halloween marshmallow treats can be made one or two days before serving.
Once the candy coating has completely hardened, place the marshmallows in a single layer inside an airtight container. Store them at room temperature in a cool, dry location.
Avoid refrigerating them. Moisture inside the refrigerator can make the marshmallows and decorating sugar sticky.
Frequently Asked Questions
What can I use instead of green candy melts?
You can use white chocolate tinted with oil-based candy coloring. Regular liquid food coloring may cause melted chocolate to seize, so candy melts are generally the easiest choice.
Can I use regular-size marshmallows?
Yes, although the eyeballs will be smaller. Use small candy eyes and reduce the amount of melted candy added to each marshmallow.
Can children help make these?
Children can help roll the marshmallows in decorating sugar and add the candy eyes. An adult should cut the marshmallows and supervise the melted candy because it may be hot.
Will the candy eye melt in hot chocolate?
The decorations will eventually soften in a hot drink. Add the marshmallow eyeballs immediately before serving for the best appearance.
How should I store leftover marshmallow eyeballs?
Store them in an airtight container at room temperature for up to two days. Place parchment paper between layers to prevent the decorations from sticking together.
More Halloween Inspiration
These creepy marshmallow eyeballs are one of the easiest ways to make Halloween feel extra special without spending hours in the kitchen. They are quick, inexpensive, and guaranteed to make an ordinary mug of hot chocolate much more fun.
For more spooky seasonal inspiration, visit my Halloween ideas page and find more easy ways to celebrate the season at home.