These DIY bloody candles are an easy way to add a creepy, gothic touch to your Halloween decorations. With white taper candles and dripping red wax, you can create realistic blood-drip candles in just a few minutes.
Halloween has always been one of my favorite holidays to decorate for. I love decorations that are spooky without looking overly cheesy, and these bloody Halloween candles are the perfect combination of creepy and elegant.
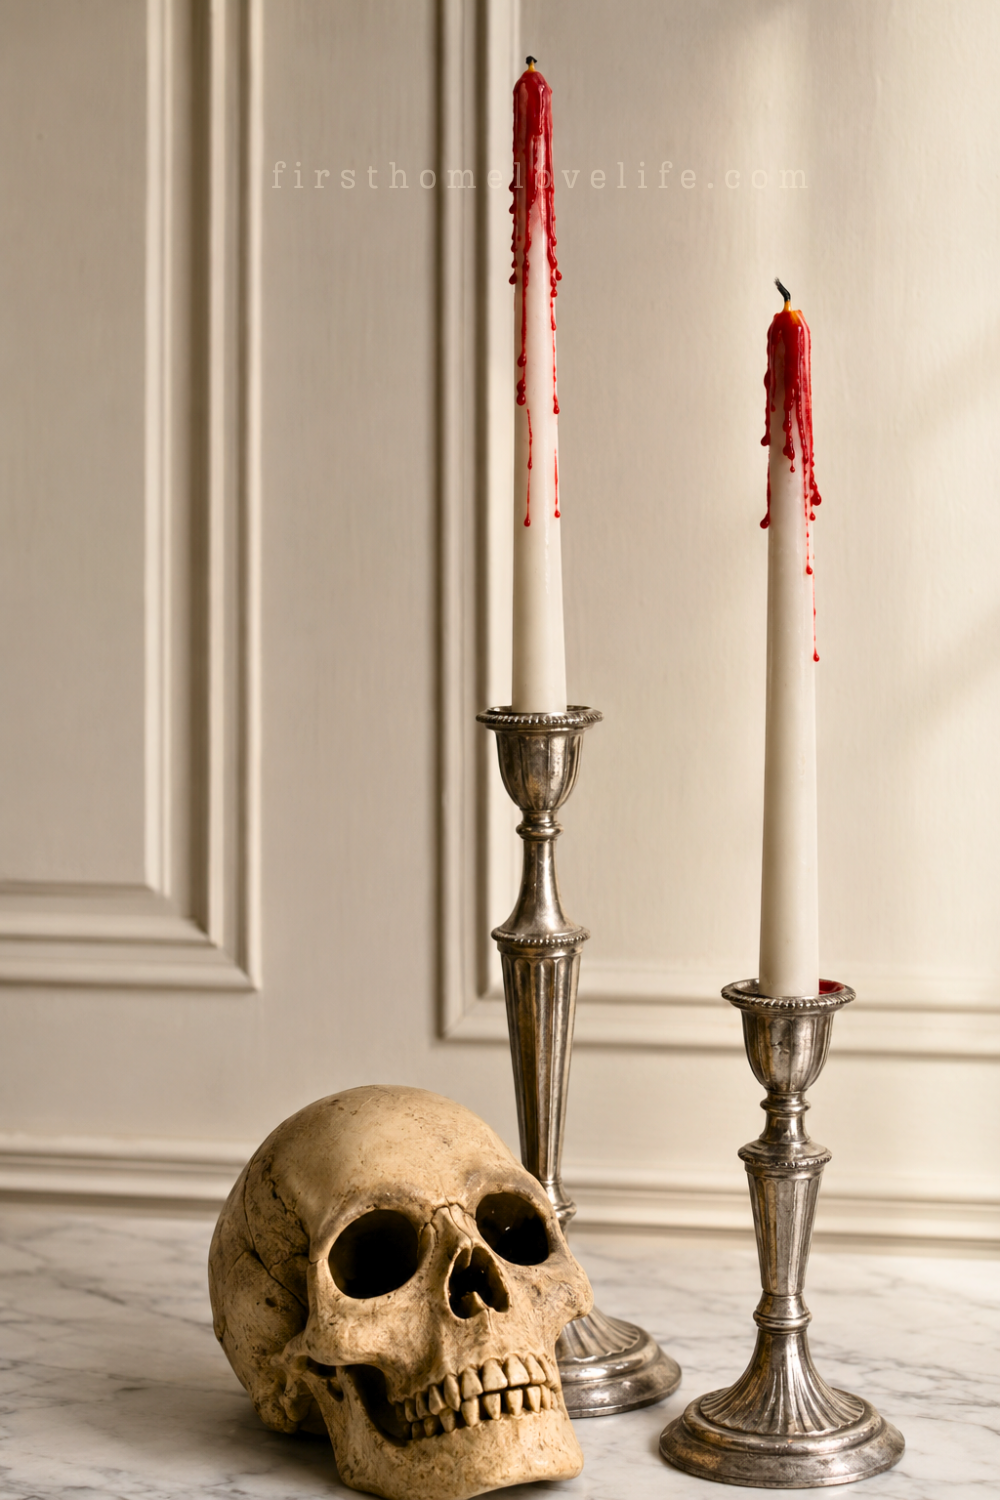
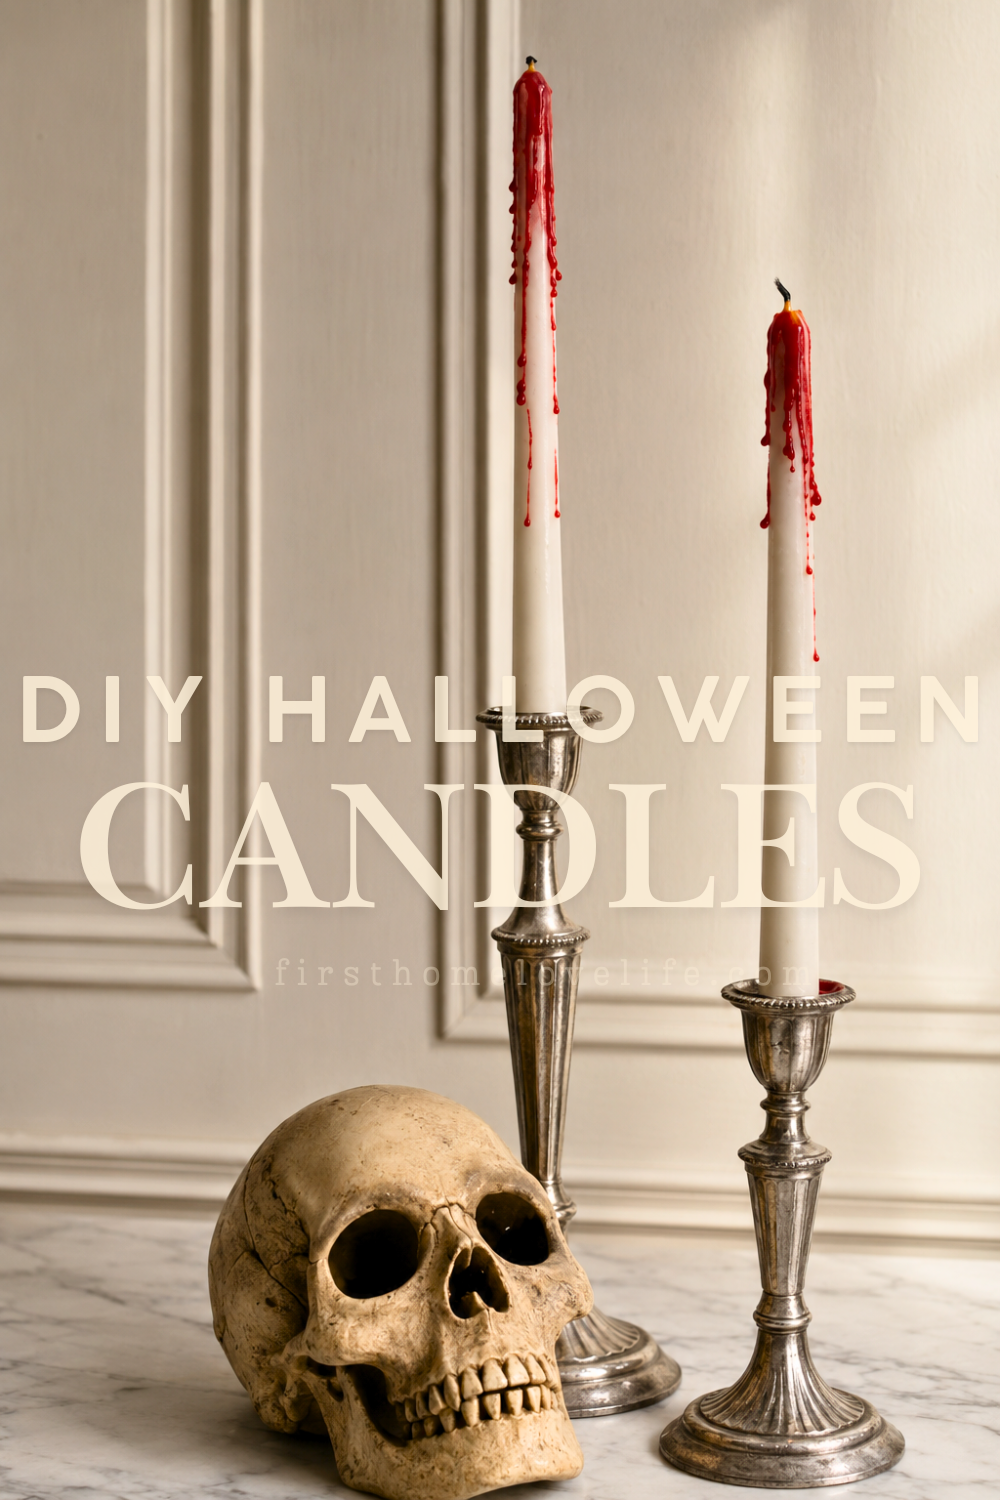
Arrange several finished candles together on a dining table, fireplace mantel, entryway console, or Halloween party buffet. They look especially dramatic displayed in vintage brass, silver, or black candlesticks.
Best of all, this easy Halloween craft only requires a few inexpensive supplies and takes less than 15 minutes to complete.
Other Halloween Ideas To Do





Why You’ll Love These DIY Bloody Candles
- Quick and easy to make
- Only four basic supplies required
- Inexpensive Halloween decoration
- Easy to customize with different candles and holders
- Perfect for Halloween tablescapes and parties
- Creepy enough for Halloween without overwhelming your decor
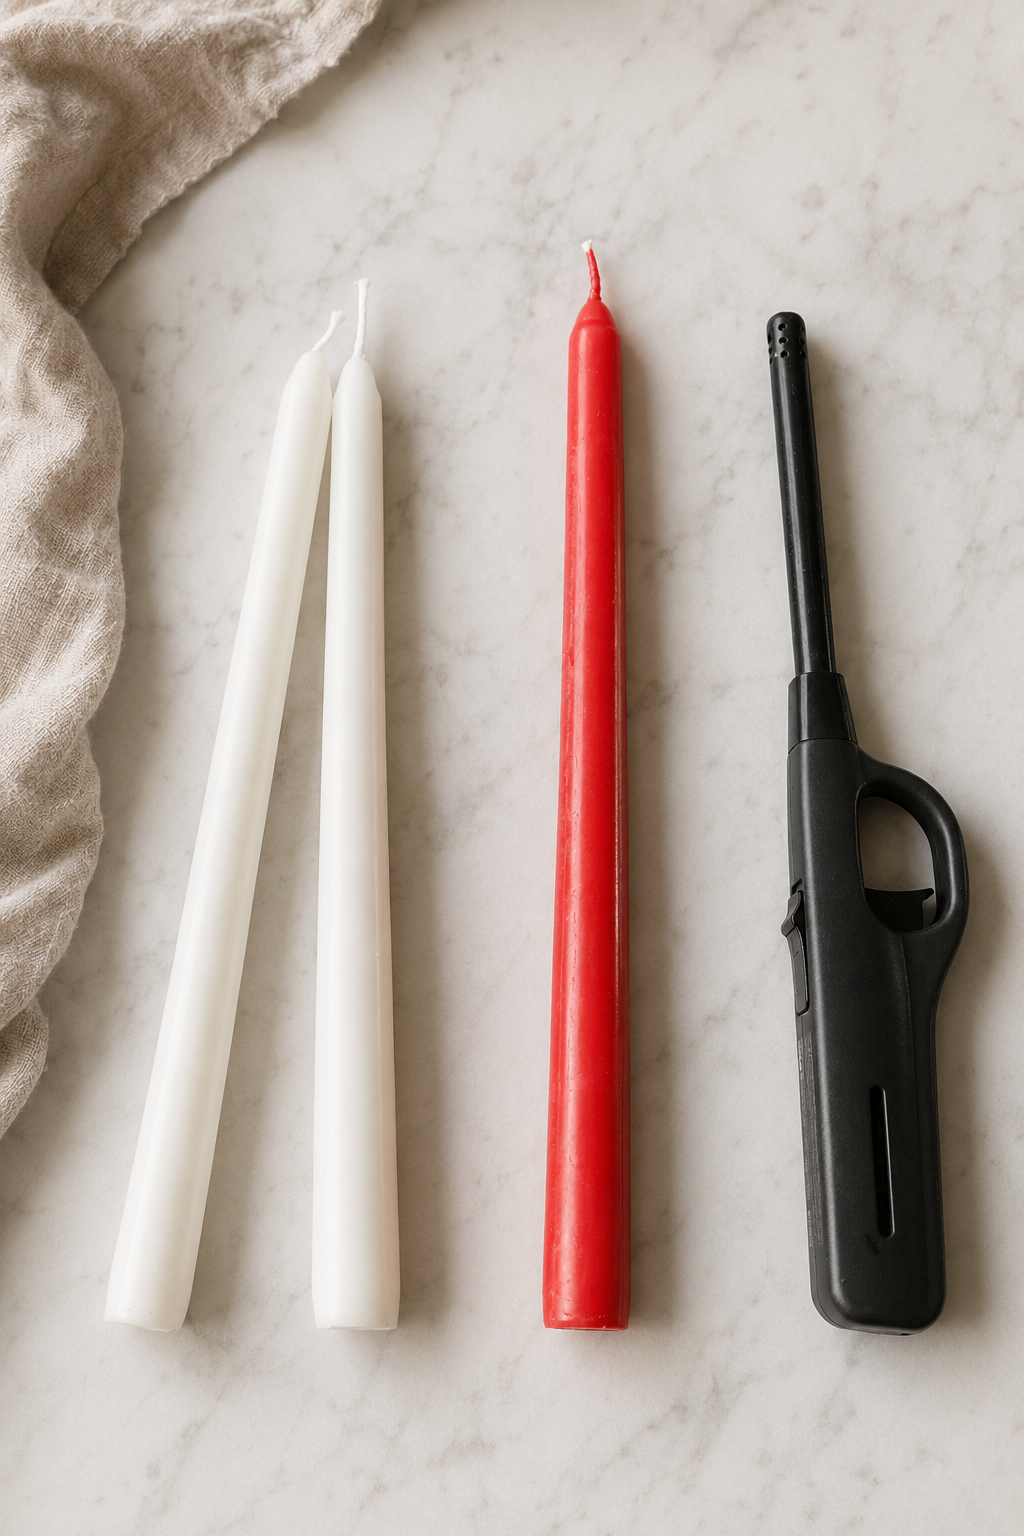
Supplies Needed
- White taper candles
- One red taper candle
- Candle holders
- Lighter or long fireplace match
- Parchment paper, wax paper, or scrap paper
You can use as many white taper candles as you need for your display. I prefer using several candles in different heights because it gives the finished arrangement a more collected, dramatic appearance.
Choosing the Best Candles
White taper candles create the most realistic blood-drip effect because the red wax shows up clearly against the white background.
Ivory candles will also work if you want the display to have an older, more vintage-inspired appearance. You can even use black candles for a darker gothic Halloween look, although the red wax may not stand out quite as much.
Pillar candles can be used, but I think tall taper candles create longer, more dramatic wax drips.
How to Make DIY Bloody Candles
Step 1: Protect Your Work Surface
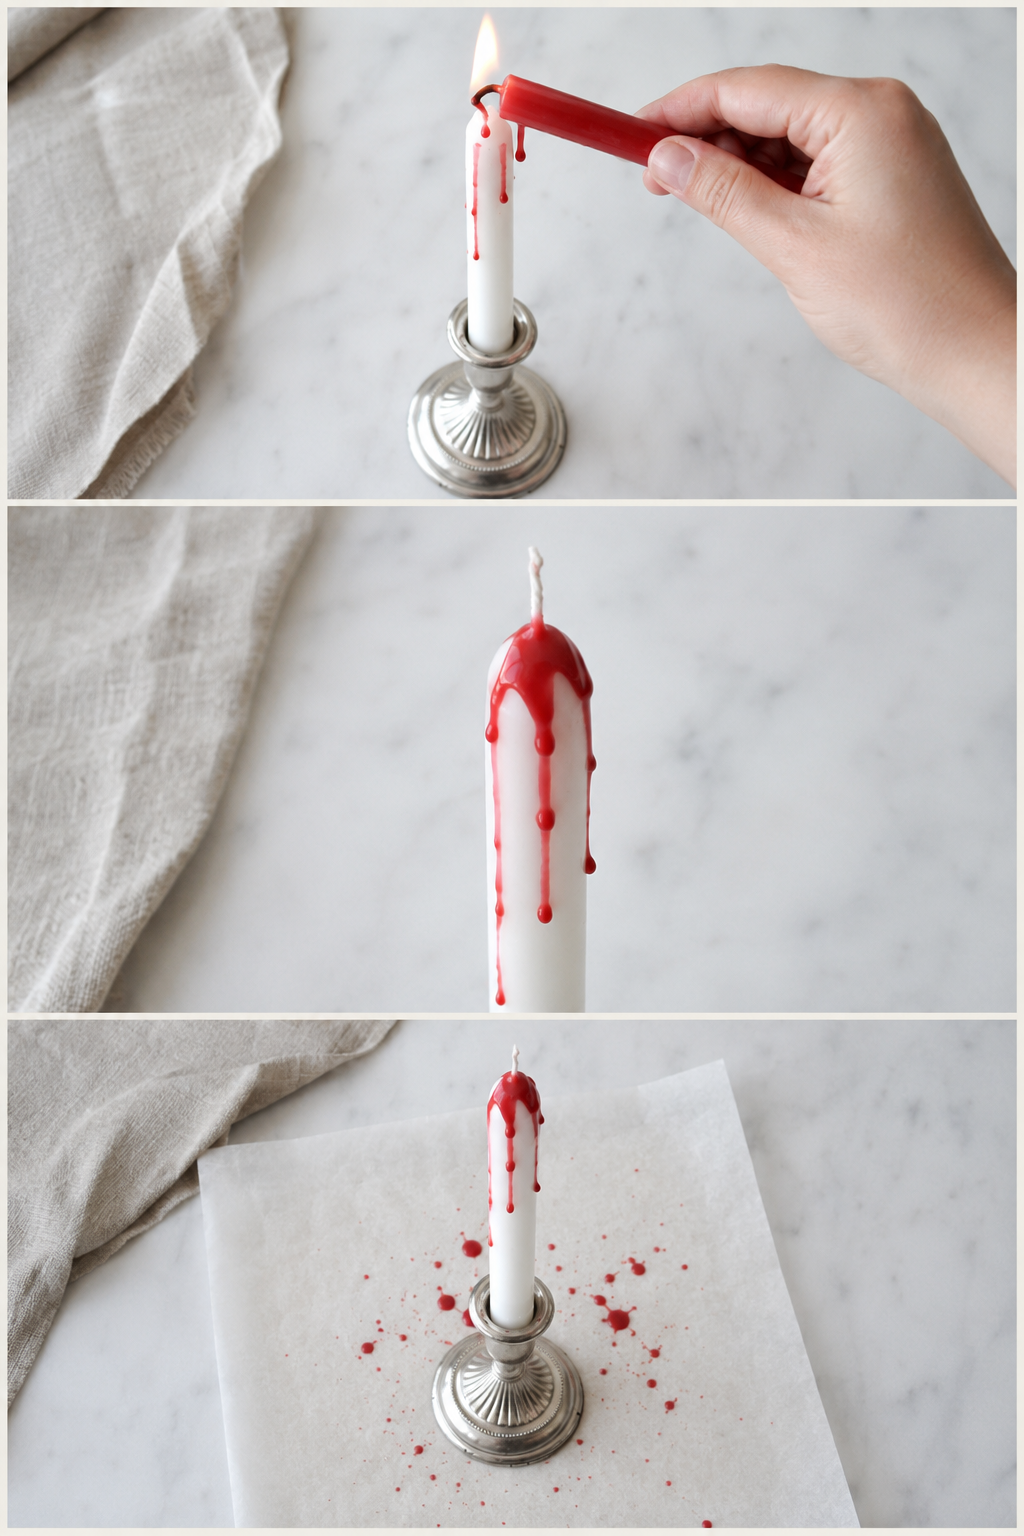
Cover your work area with parchment paper, wax paper, or a large piece of scrap paper. Melted wax can splatter farther than you might expect, so make sure the area around your candle is protected.
Place one white taper candle securely inside a sturdy candle holder.
Step 2: Light the Red Candle
Light the red candle, but do not light the white taper candle.
Allow the flame to burn for a minute or two so a small pool of melted red wax begins forming around the wick.
Step 3: Drip Red Wax Over the White Candle
Carefully tilt the red candle over the top edge of the white taper. Hold it approximately half an inch above the white candle and allow the melted red wax to drip down the sides.
Let the red wax fall naturally rather than trying to control every drip. The uneven trails are what make these Halloween candles look realistic.
Step 4: Build Longer Blood Drips
For longer, thicker drips, continue dripping the red wax onto the same spot spot five to ten times before moving to another section.
Turn the candle holder as you work so the red wax travels down every side of the candle. Some drips should be short while others run farther down the taper.
Don’t worry if a little wax splatters onto the candle holder. It adds to the messy, creepy effect and can usually be removed once the wax has completely cooled.
Step 5: Let the Wax Cool
Continue adding red wax until you are happy with the design. Then allow the candle to sit undisturbed until the wax has completely hardened.
Repeat the process with the remaining white taper candles.
Tips for Realistic Blood-Drip Candles
Use Different Amounts of Wax
Avoid making every candle look exactly the same. Add heavier wax drips to some candles and lighter drips to others for a more natural, collected appearance.
Concentrate the Wax Near the Top
Most of the red wax should gather around the top edge of the candle. Allow a few longer trails to travel down the sides, but leave some white wax showing underneath.
Rotate the Candle
Turn the candle holder as you add the wax so the bloody effect is visible from every angle.
Work Slowly
Allow the red candle to develop a pool of melted wax before tilting it. If you move too quickly, you may not get enough wax to create long drips.
Mix Candle Heights
Use taper candles in two or three heights to make the finished centerpiece look fuller and more interesting.
More Fall Ideas You’ll Love


How to Decorate With Bloody Halloween Candles
These DIY Halloween candles can be used anywhere you want to add a little spooky atmosphere.
Try displaying them:
- Down the center of a Halloween dining table
- On a fireplace mantel with black garland
- On an entryway table surrounded by old books
- On a Halloween party buffet
- Beside a collection of skulls and potion bottles
- In vintage brass or silver candlesticks
- With dark flowers, gauzy fabric, or black lace
- As part of a vampire-themed Halloween display
For an elegant Halloween tablescape, arrange the candles in mismatched vintage candlesticks and surround them with dark red flowers, miniature pumpkins, black feathers, and old silver serving pieces.
If you prefer a simpler display, group three bloody candles together on a small tray. The red wax provides plenty of drama on its own.
Make It Your Own
This easy Halloween candle craft can be customized to coordinate with your decorations.
- Use ivory candles for an aged, vintage look.
- Place the candles in black holders for gothic Halloween decor.
- Use brass candlesticks for a traditional, collected appearance.
- Mix white and black taper candles in the same arrangement.
- Add a few short pillar candles for varying heights.
- Place the finished candles in old wine bottles for a haunted-house effect.
- Use dark burgundy wax instead of bright red for a more sophisticated look.
Important Candle Safety
Always work carefully around an open flame and hot wax. Place the candles in sturdy, nonflammable holders and keep them away from curtains, paper decorations, greenery, and anything else that could catch fire.
Never leave a burning candle unattended, and keep candles away from children and pets. These precautions align with the U.S. Consumer Product Safety Commission’s Halloween candle-safety guidance.
If you are using the finished candles strictly as decorations, you do not need to light the white tapers. You can also surround the display with battery-operated candles to add more light without adding additional open flames.
Frequently Asked Questions
Can I use pillar candles instead of taper candles?
Yes. White pillar candles can be decorated with red wax using the same method. However, taper candles tend to create longer wax trails and a more dramatic finished look.
Can I use red crayons instead of a red candle?
A red candle is the easiest option because it already has a wick and can be tilted directly over the white candle. Using crayons generally requires a separate heat-safe container and melting method.
Will the red wax come off the candle holder?
Once the wax has cooled completely, it can often be gently lifted or scraped from a smooth metal or glass holder. Test a hidden area first, especially when working with painted, antique, or delicate candlesticks.
Can I make these bloody candles without lighting them?
The red candle must be lit to melt the wax during the crafting process. However, the completed white candles do not need to be lit when displayed.
How long do DIY blood-drip candles take to make?
A small group of candles can usually be completed in approximately 10 to 15 minutes, plus a few minutes for the wax to harden.


Final Thoughts
These DIY bloody candles prove that a Halloween decoration doesn’t need to be complicated or expensive to make a big impact.
The dripping red wax looks creepy, dramatic, and almost elegant when paired with vintage candlesticks. Make a few for a small mantel display or create an entire collection for a Halloween dinner party or spooky tablescape.
Each candle will turn out a little differently, which is exactly what makes this easy Halloween project look so good. Let the wax drip, splatter, and run wherever it wants—the messier it looks, the better.
If you’re looking for more spooky decorating inspiration, visit my Halloween page for more easy Halloween crafts, decorations, party ideas, and recipes.