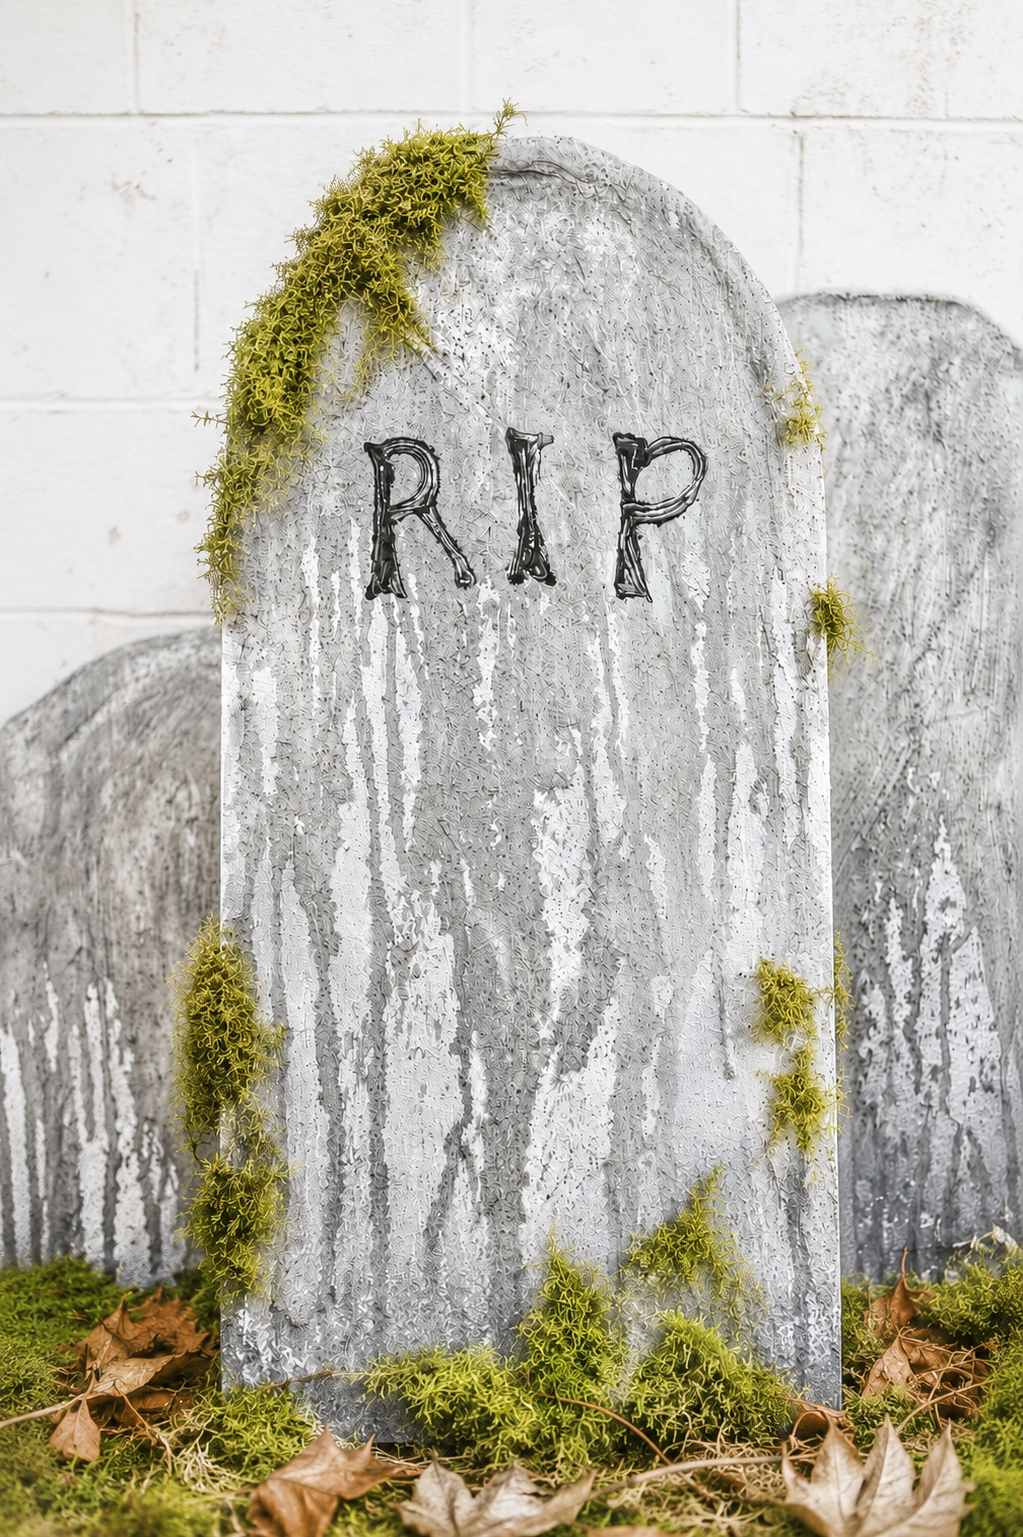
Nothing says Halloween quite like a spooky graveyard filled with creepy old tombstones. If you’re looking for an inexpensive way to create a haunted cemetery in your front yard, these DIY Halloween tombstones are the perfect project. They are easy to make, incredibly affordable, and look surprisingly realistic once finished.
A few simple supplies from the home improvement store can transform your yard into a spooky Halloween display that will have trick-or-treaters stopping for a closer look. Whether you’re creating a full haunted graveyard or simply adding a few eerie accents to your outdoor decorations, these homemade Halloween tombstones are guaranteed to make a statement.
More Halloween Decor You’ll Love
Why You’ll Love These DIY Halloween Tombstones
- Budget-friendly Halloween decoration
- Easy beginner-friendly project
- Lightweight and simple to move
- Customizable with funny or spooky epitaphs
- Perfect for Halloween yard displays
- Durable enough to use year after year
Supplies Needed
- Foam insulation boards
- Utility knife
- Pencil or marker
- Popcorn ceiling patch
- Putty knife
- Gray exterior paint
- Black craft paint
- White craft paint
- Paint brushes
- Wooden stakes
- Hot glue or construction adhesive
- Clear sealer (optional)

How to Make DIY Halloween Tombstones
Step 1: Cut Out Your Tombstone Shapes
Begin by sketching various tombstone shapes onto the foam insulation boards. Traditional rounded headstones work well, but don’t be afraid to create crosses, obelisks, or weathered Victorian-inspired designs.
Using a sharp utility knife, carefully cut out each shape.
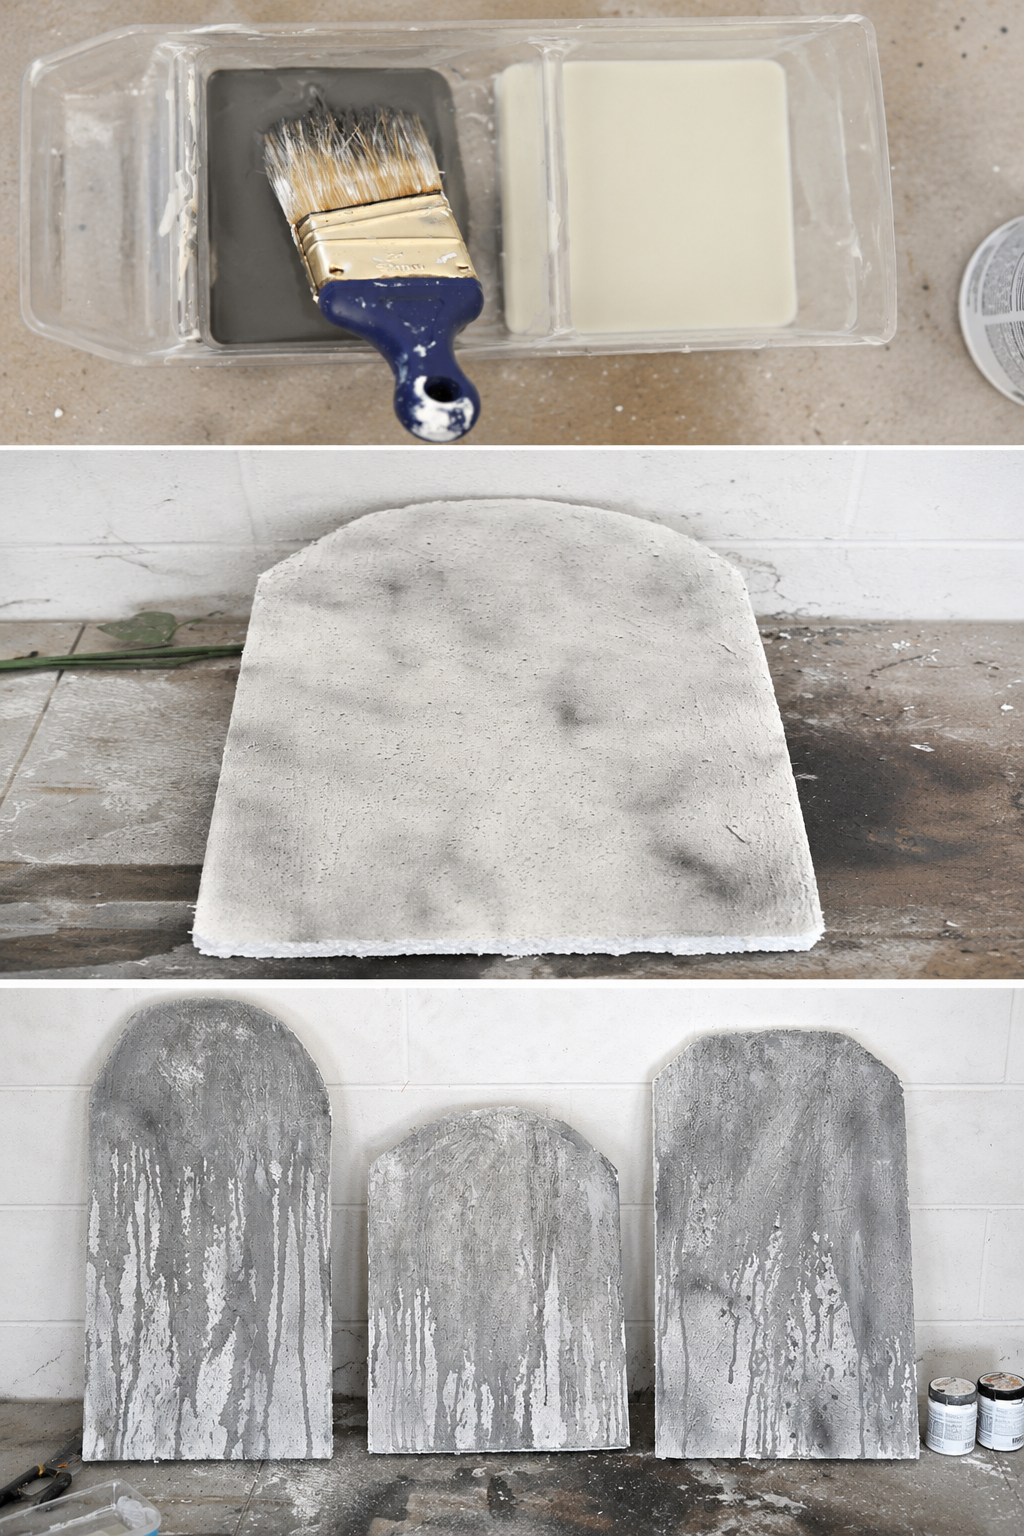
Step 2: Add Stone Texture
To create realistic-looking stone, spread a thin layer of popcorn ceiling patch across the front and sides of each tombstone.
Don’t worry about making it perfectly smooth. The uneven texture actually helps create an aged, weathered appearance that resembles real stone.
Allow the texture to dry completely.
Step 3: Paint the Tombstones
Apply a coat of gray paint over the entire tombstone.
Once dry, use darker gray and black paint to create shadows around the edges and inside any cracks or imperfections.
Lightly dry brush white paint across raised areas to highlight the texture and give the tombstones an aged appearance.
Step 4: Add Names and Epitaphs
This is where the fun begins.
Use black paint to add funny, spooky, or personalized gravestone inscriptions.
Some ideas include:
- I. M. Gone
- Ben Better
- Barry D. Alive
- Rusty Gates
- Al B. Back
- Ima Goner
- Here Lies Common Sense
You can also add dates, skulls, ravens, vines, or creepy symbols for extra detail.
Step 5: Attach Stakes
Secure wooden stakes to the back of each tombstone using hot glue or construction adhesive.
These stakes will allow you to easily place the tombstones throughout your yard.
Step 6: Create Your Halloween Graveyard
Arrange the tombstones in groups throughout your lawn.
For an even creepier effect, add:
- Skeletons
- Fog machines
- Black mulch
- Battery-operated lanterns
- Faux crows
- Spider webs
- LED spotlights
- Moss and dried branches
Layering decorations creates a realistic haunted cemetery that looks amazing after dark.
Tips for Realistic Halloween Tombstones
- Vary the sizes and shapes of your tombstones.
- Use multiple shades of gray paint.
- Add moss for an aged appearance.
- Create cracks and chips before painting.
- Group tombstones in odd numbers for a natural look.
- Use low landscape lighting to create dramatic shadows.
Frequently Asked Questions
What is the best material for DIY Halloween tombstones?
Foam insulation board is one of the best materials because it is lightweight, inexpensive, weather resistant, and easy to carve.
How do you make Halloween tombstones look realistic?
Adding texture with popcorn ceiling patch, layering paint colors, and distressing the edges creates an authentic weathered stone appearance.
How do you keep Halloween tombstones from blowing over?
Attach wooden stakes to the back and push them securely into the ground.
Can DIY tombstones be reused every year?
Yes. Store them in a dry location after Halloween and they can last for many seasons.
Final Thoughts
These DIY Halloween tombstones are one of the easiest ways to create a spooky haunted graveyard without spending a fortune. With a few inexpensive supplies and a little creativity, you can transform your yard into the neighborhood’s favorite Halloween destination.
Whether you’re decorating for a Halloween party, a haunted house, or simply want the best yard on the block, these homemade Halloween tombstones deliver maximum spooky impact on a minimal budget.