Listen up builders…The ONLY thing these things are good for is collecting dust! Stop with the drywall built-ins and ‘plant shelves’… They’re awful!
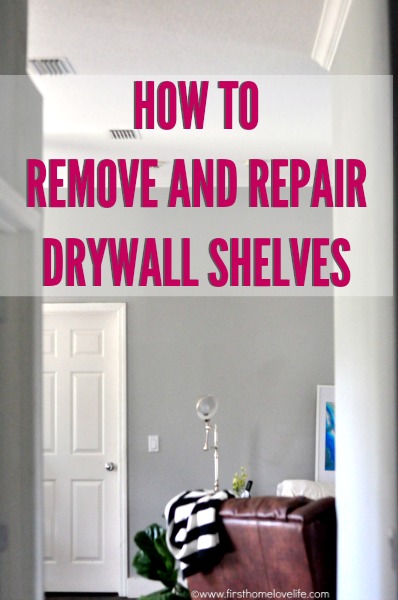
If you live in an area where stucco homes are the norm and your house was built in the 90’s to 2000’s- chances are you’ve been in or live in a home that has drywall built-in’s or shelves. It was super popular for builders to create these little nooks all over the house so you could put baskets/faux greenery/knick knacks etc. and while some people love that kind of stuff, others (like me) are forced into filling those nooks with stuff we don’t really want, so our house won’t look empty. We seriously have some sort of built in/shelf thing in EVERY room of our house, but this one…
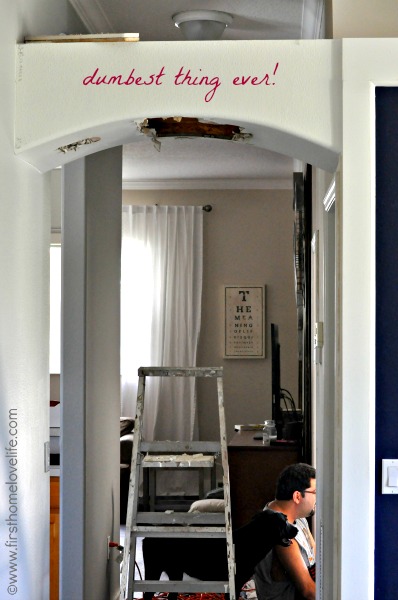
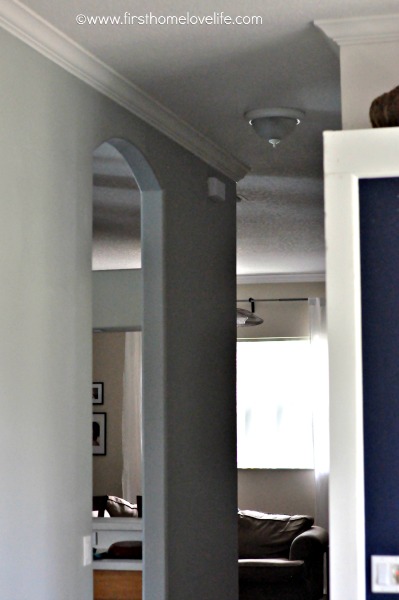
This one has been a thorn in my side from day 1. It made this small hallway super dark and feel claustrophobic. AND. THE. DUST. THAT. COLLECTS. UP. THERE!
‘Nuff said.
It had to go…
Here’s what we used for demo–
- Reciprocating Saw
- Ryobi Multi Max (Similar to a Dremel)
- Hammer
- Gloves
- Safety Goggles
- Ladder
- Heavy Duty Trash Bags
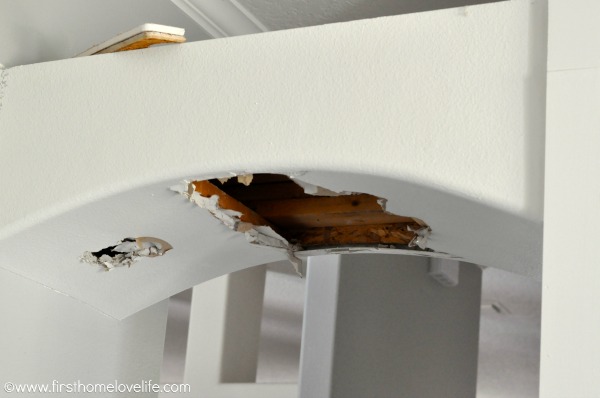
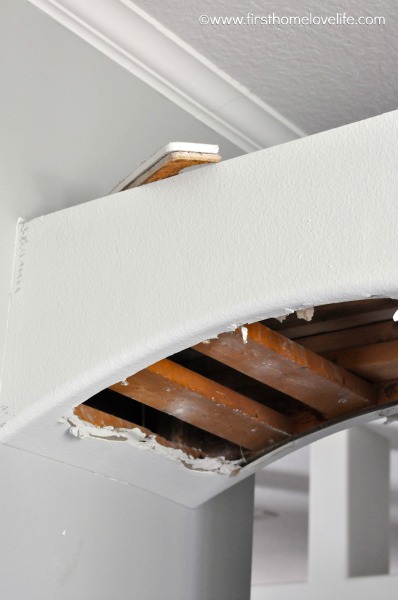
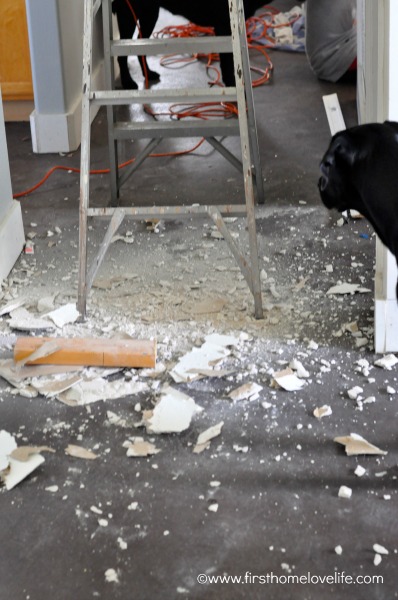
I had originally thought this would be an easy 1.2.3. knock down of a hollow arch way, but no. It was almost entirely solid particle wood and 2×4’s except for the arched part which had some hollow spots so we could knock a few holes into and see where we needed to make our cuts to get this thing down.
Fun times. Fun times.
You might also notice yet another drywall monstrosity behind this one. That one is in our kitchen, and it’s hopefully coming down next. I told you they were everywhere in our house!
Once we opened the hole big enough to see, we made cuts along the sides with the reciprocating saw and were able to get the thing down in a few pieces, leaving us with big holes in the walls and a ton of dust a debris to clean up. {And when I say “we” and “us” I really mean “he” and “him”} 😉 Thanks, babe <3
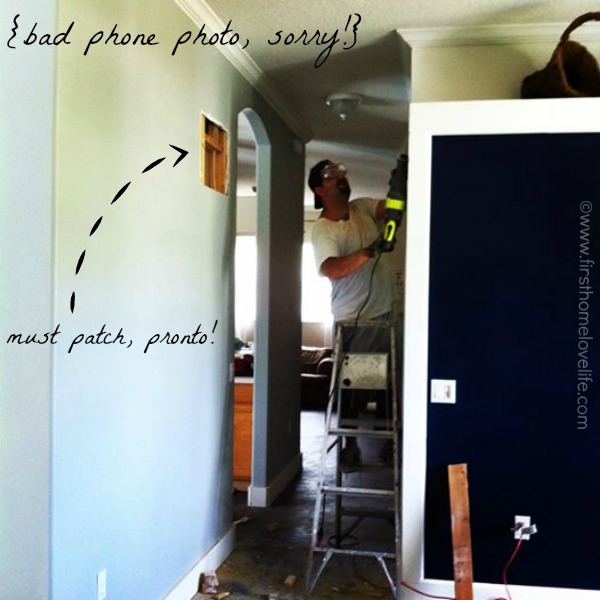
Now onto repairing the drywall holes. Here’s the tools/supplies we used.
- Measuring Tape
- Box Cutter
- Drywall
- Joint Compound
- Drywall Mesh Tape
- Joint Knife
- Drill
- Sanding Sponge
- Drywall Repair Clips and Drywall Screws
- Orange Peel Wall Texture Spray
- Primer
- Wall Paint
- Roller and Paint Pan
These are the drywall clips we used to secure the cut drywall to the existing drywall. {You can find these at the home improvement store with all the other drywall goodies}
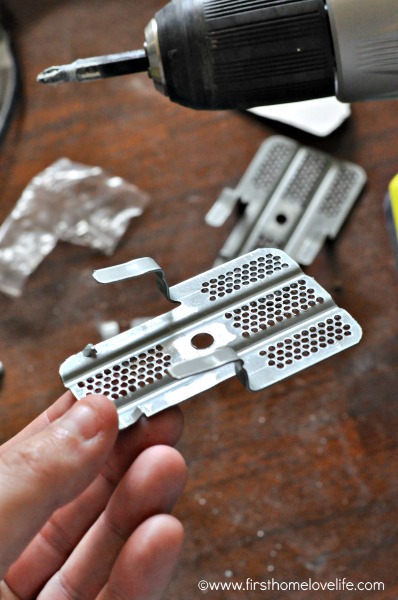
We found this to be the easiest way and they felt really secure once in place. We were fortunate to have studs in the walls where the holes were made so we also screwed into them to make sure the patch wasn’t moving.
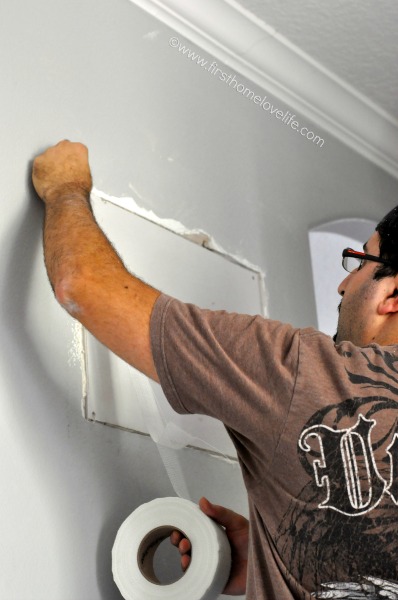
Once we had the drywall secured into the clips and screwed in, we broke off the little tabs the were sticking out in the seams, and then covered the seams around the patch with strips of fiberglass-mesh tape.
At this point I’m like deliriously happy…NO MORE EYESORE…ahhhhh
Mudding…
Yes. That’s what happened next…
Using premixed joint compound and a joint knife hubs buttered up that patch job like warm butter on a biscuit. Smoothing out any lines and feathering it out 4 inches past the tape line.

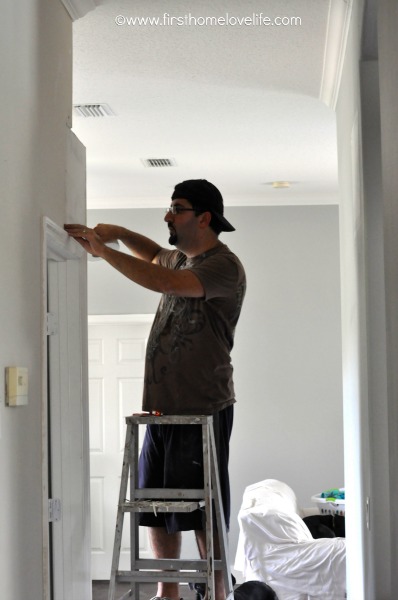
We let it dry for 24 hours and then I used a fine grit sanding block to sand it smooth, and added another thin layer of joint compound and sanded again after it was completely dry.
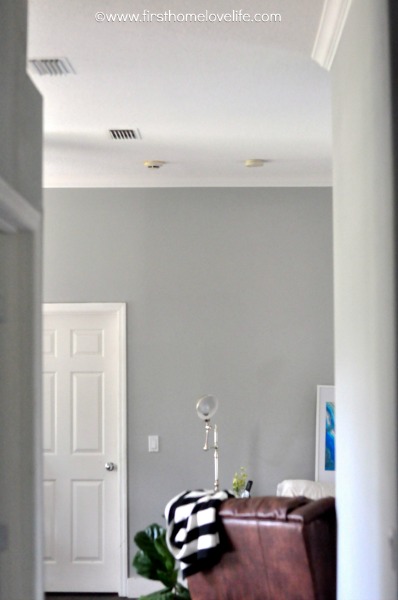
All that was left to do was retexture the wall using a spray specifically for orange peel textured walls, prime and paint.
Its like it was never there!
Deliriously happpppppy….
Best part about this? We saved over $450 doing it ourselves since I was quoted $600 a few months ago to have that thing removed. After buying the supplies and tools we needed to do it which cost roughly around $150, I’d say that’s a pretty sweet deal and the reason we like to go the DIY route! 🙂
Talk to you soon friends, take care!
XO