Nothing elevates decorated sugar cookies like the right royal icing — glossy, smooth, and firm when dry, with colors and patterns that pop. This royal icing recipe is taken directly from the beloved sugar cookie tutorial on First Home Love Life. It’s easy enough for beginners and versatile for any occasion.
What Makes This Royal Icing Special
Royal icing is traditionally made with powdered sugar and meringue powder (a safe, shelf-stable alternative to raw egg whites). It dries hard — perfect for outlining, flooding, and detailed designs — and holds its shape beautifully on cookies for gifting, stacking, or display.
This particular recipe from First Home Love Life calls for two textures of icing:
- Thicker icing for outlining and fine details
- Thinner “flood” icing for filling in sugar cookie shapes with color
Royal Icing Recipe (From First Home Love Life)
Ingredients — Royal Icing Border (Thicker Texture)
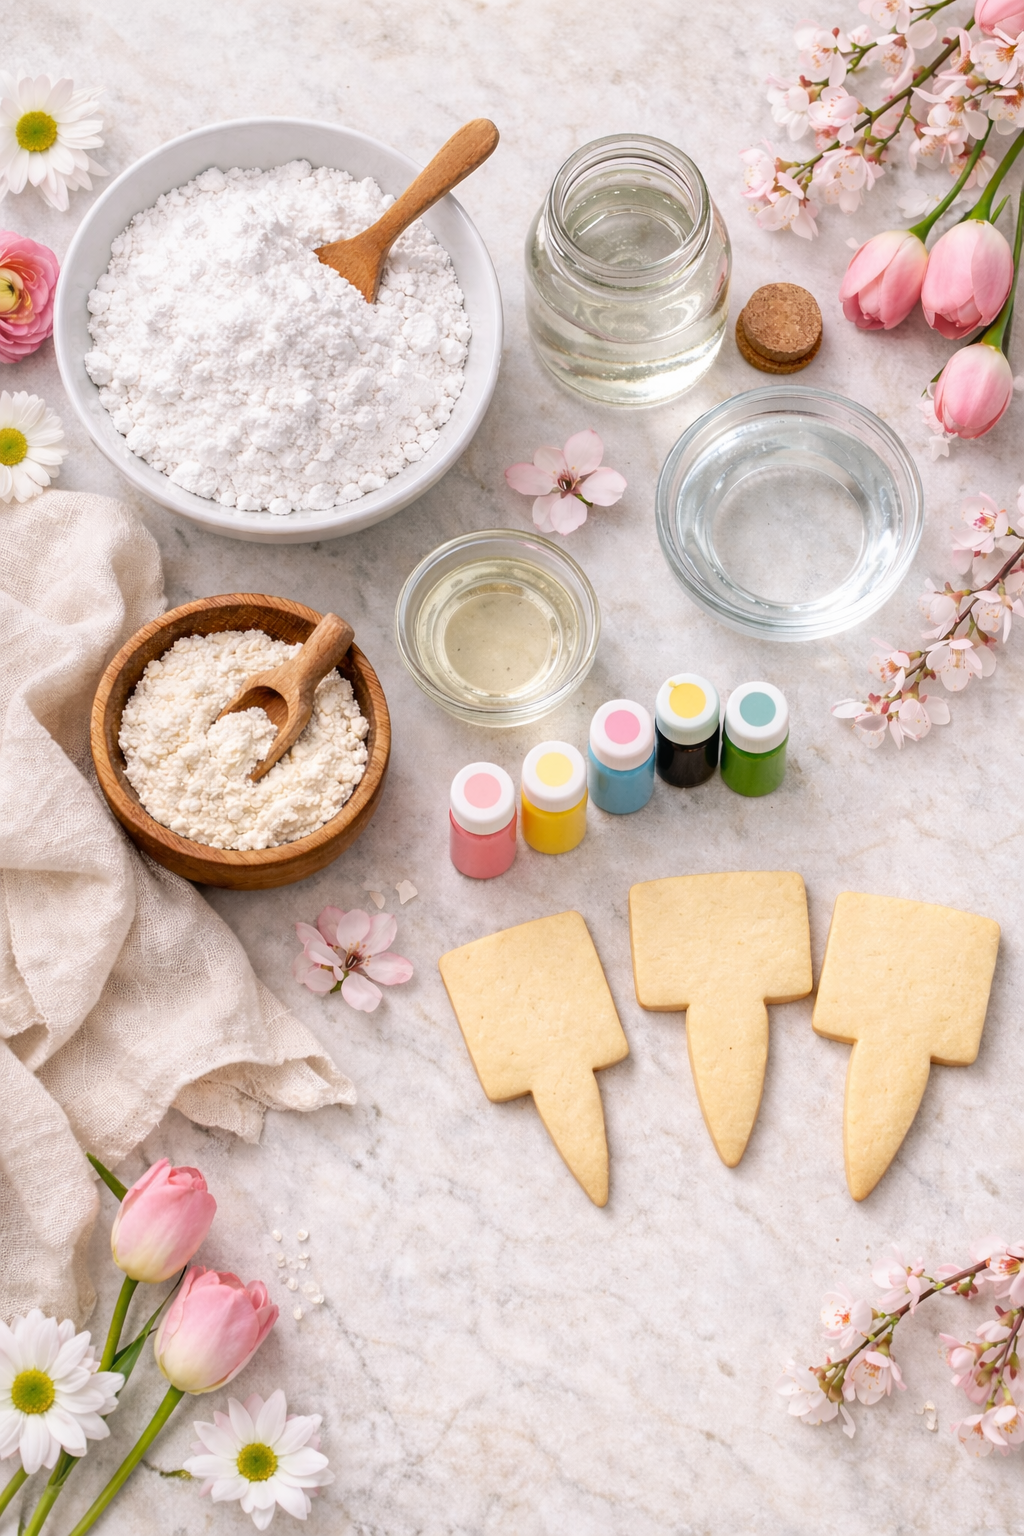
- 16 oz powdered sugar (about half a 32-oz bag)
- 3 tablespoons meringue powder
- 1 teaspoon corn syrup
- 5–6 tablespoons warm water
Ingredients — Royal Icing Flood (Thinner Texture)
- 16 oz powdered sugar
- 3 tablespoons meringue powder
- 1 teaspoon corn syrup
- 7–8 tablespoons warm water
The corn syrup helps keep the icing smooth and gives it a slight sheen once it dries. If you don’t have meringue powder, you can use egg whites instead — though meringue powder is safer and easier to work with.
How to Make the Royal Icing
- Combine ingredients: In two separate bowls, mix the powdered sugar, meringue powder, corn syrup, and warm water to make two batches — one thick and one thinner.
- Mix until smooth: Stir each bowl until the icing is lump-free and smooth. The thicker batch should hold its shape, while the flood batch should flow gently off a spoon.
- Adjust texture: If the icing seems too thick, add a tiny bit of warm water. If too thin, add a touch more powdered sugar.
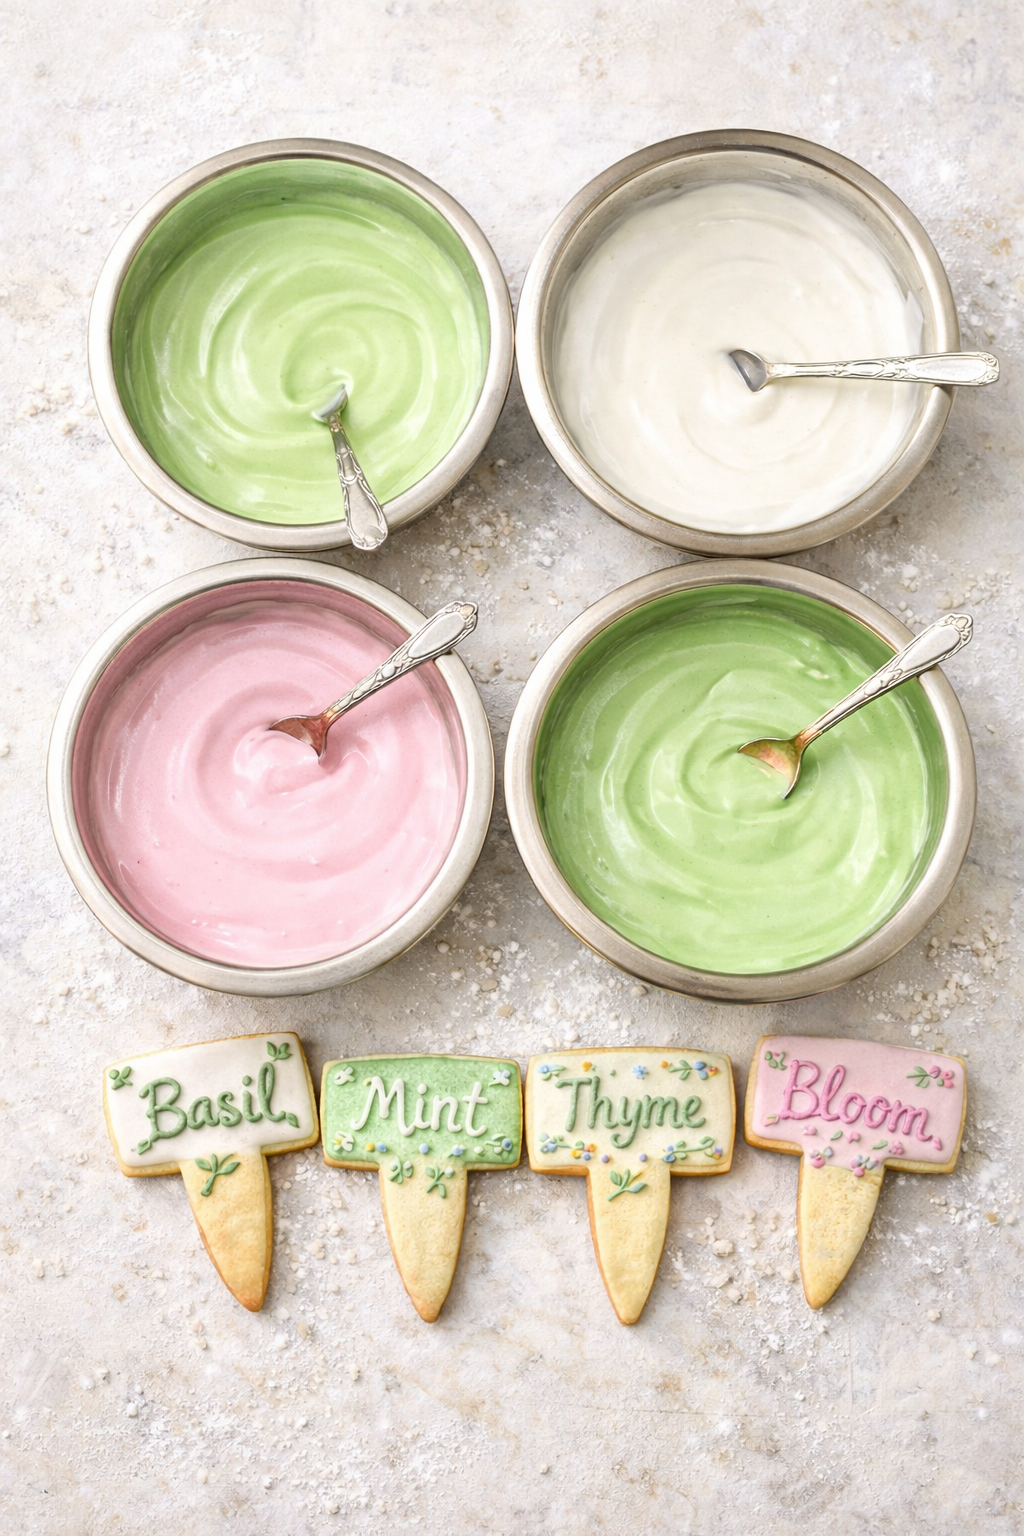
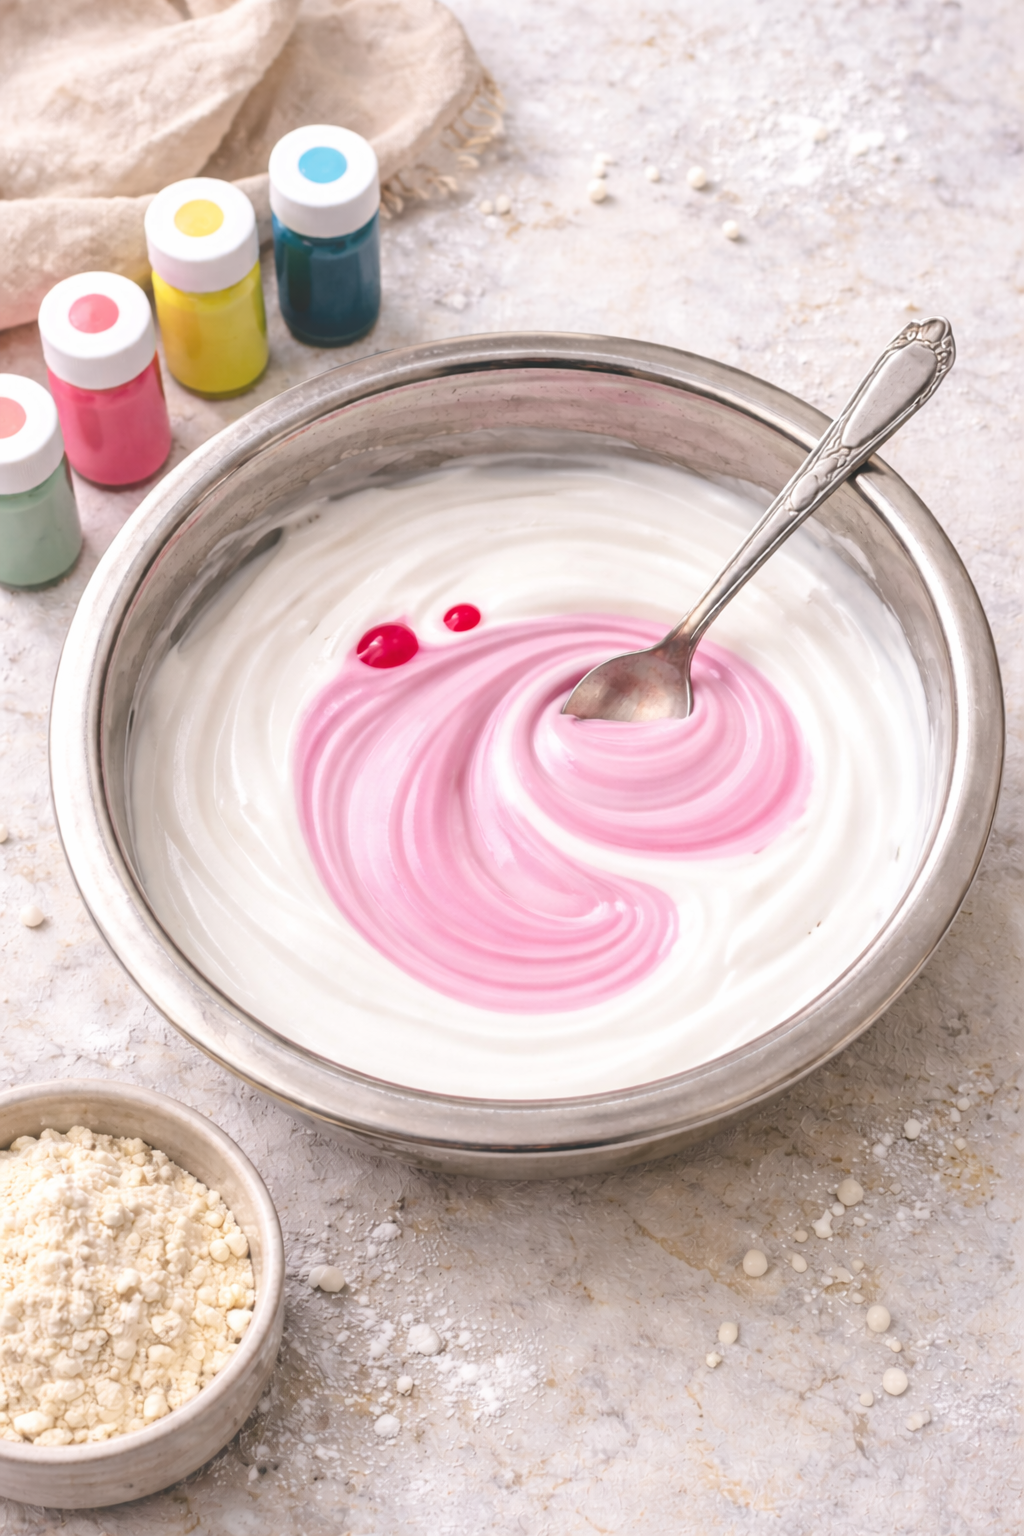
- Color and decorate: Divide the flood icing into smaller bowls, tint with gel food coloring, and pour onto outlined cookies. Use a toothpick or skewer to spread and smooth the icing into every corner.
Tips for Decorating with This Icing
- Outline first: Use the thicker icing to pipe a border around each cookie. This creates a “dam” to hold in the thinner icing when flooding.
- Flood inside the lines: Fill the inside area with the thinner icing and let it settle — the corn syrup and warm water help it spread smoothly.
- Use gel colors: Gel food coloring won’t thin your icing like liquid dyes can, and colors stay vibrant.
- Work in sections: If you’re using multiple colors, let one area dry slightly before moving to the next to avoid colors blending unintentionally.
- Dry completely: Let iced cookies sit at room temperature until the surface is firm — this can take several hours or overnight depending on humidity.
Storage and Make-Ahead Notes
- Royal icing can be made ahead and stored in an airtight container. Bring it to room temperature and stir before decorating.
- Leftover icing can be refrigerated for a few days — just stir again before use.
- If the surface begins to crust while decorating, cover your icing bowls with damp paper towels to keep them workable.
The Best Royal Icing for Decorating Sugar Cookies
This is the best royal icing for decorating sugar cookies. It’s smooth, easy to work with, perfect for outlining and flooding, and dries hard with a beautiful finish—ideal for beginners and experienced decorators alike.
- Prep Time: 10 MINS
- Total Time: 10 minutes
- Yield: APPROX 24 COOKIES 1x
- Category: DESSERT | ICING
- Cuisine: AMERICAN
Ingredients
-
16 oz powdered sugar (about half a 32 oz bag)
-
3 tablespoons meringue powder
-
1 teaspoon corn syrup
-
5–8 tablespoons warm water (adjust for consistency)
-
Gel food coloring (optional)
Instructions
-
In a medium bowl, combine powdered sugar and meringue powder.
-
Add corn syrup and 5 tablespoons of warm water. Stir until smooth and lump-free.
-
Adjust consistency by adding more water, one teaspoon at a time, until desired thickness is reached.
-
For outlining, keep icing thicker so it holds its shape.
-
For flooding, thin icing slightly until it flows smoothly and settles flat.
-
Divide icing into bowls and tint with gel food coloring if desired.
-
Use immediately or cover tightly until ready to decorate cookies.
Notes
-
Use gel food coloring to avoid thinning the icing.
-
Cover icing with plastic wrap touching the surface to prevent crusting.
-
Let decorated cookies dry completely (4–8 hours or overnight) before stacking.
Royal Icing FAQ
What is royal icing made of?
Royal icing is made with powdered sugar, meringue powder (or egg whites), water, and sometimes corn syrup. It dries hard, making it perfect for decorating sugar cookies.
Why use meringue powder instead of egg whites?
Meringue powder is shelf-stable, food-safe, and more consistent than raw egg whites. It also helps royal icing dry firm without cracking and is ideal for cookie decorating.
How do I color royal icing?
Use gel food coloring, not liquid. Gel colors are highly concentrated and won’t thin your icing. Start with a small drop and mix well before adding more.
How do I get the right royal icing consistency?
- Outline consistency: Thick and pipeable, holds its shape
- Flood consistency: Thinner, flows smoothly and settles flat
Add water a few drops at a time to thin, or powdered sugar to thicken.
Why does my royal icing look lumpy?
Lumps usually come from unsifted powdered sugar or under-mixing. Always sift your sugar and mix until smooth. Let icing rest a few minutes to release air bubbles.
How long does royal icing take to dry?
Royal icing will crust in about 15–30 minutes but needs 4–8 hours (or overnight) to fully harden, depending on humidity and thickness.
Can I make royal icing ahead of time?
Yes. Store royal icing in an airtight container in the refrigerator for up to 3–4 days. Bring to room temperature and stir before using.
Can royal icing be frozen?
Royal icing does not freeze well once mixed. It’s best made fresh or stored short-term in the refrigerator.
Why add corn syrup to royal icing?
Corn syrup adds shine and elasticity, helping prevent cracking and giving cookies a smoother, glossier finish once dry.
Is royal icing safe to eat?
Yes, when made with meringue powder or pasteurized egg whites, royal icing is safe to eat and commonly used for decorated cookies.
Can I stack cookies decorated with royal icing?
Yes—once fully dry. Royal icing dries hard, making decorated cookies perfect for stacking, gifting, and packaging.
Final Thought
This royal icing recipe is my go-to staple for anyone decorating sugar cookies — simple ingredients, easy prep, and professional-looking results. Whether you’re making holiday shapes, birthday designs, or everyday treats, mastering this icing will take your cookies from tasty to truly artful.