If you love natural fall décor but want something a little different from the traditional orange-and-red color palette, this DIY blue pumpkin wreath is such a pretty alternative. Soft blue pumpkins, earthy moss, and a rustic grapevine wreath come together to create an elegant fall wreath that feels timeless, collected, and just a little unexpected.
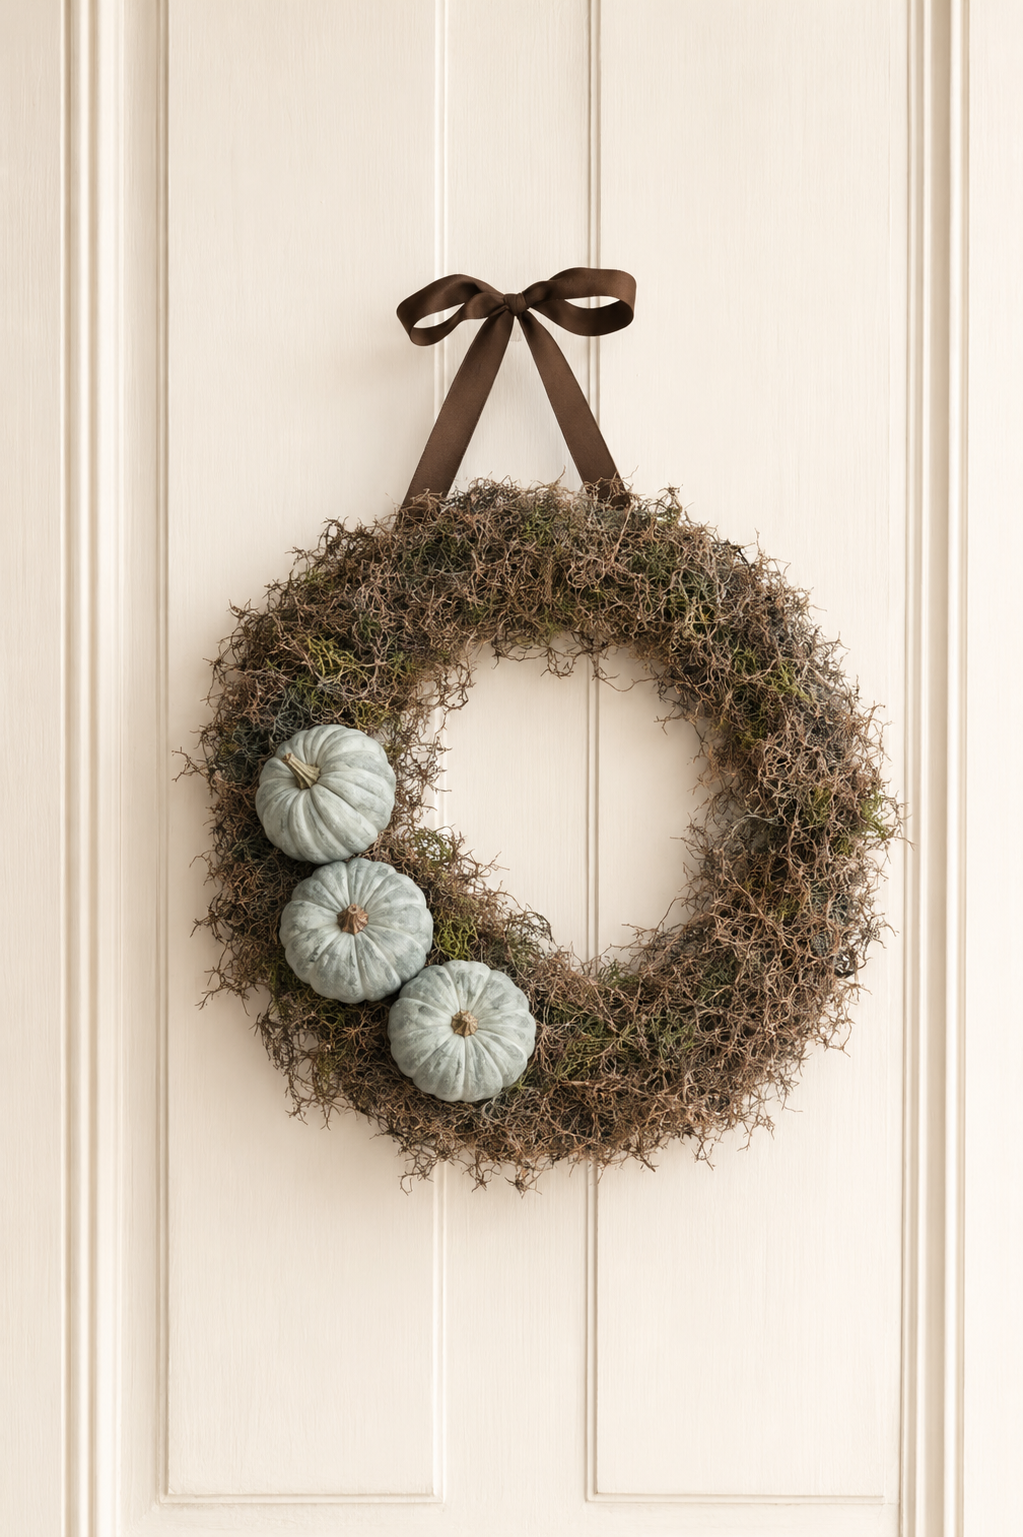
Best of all, this homemade fall wreath is inexpensive and surprisingly easy to make. With a few faux pumpkins, craft paint, preserved moss, and a basic grapevine wreath, you can create beautiful fall front door décor in less than an hour.
More Fall Ideas You’ll Love



A Non-Traditional Fall Wreath for the Front Door
I have always loved decorating with the natural textures and muted colors of fall, but I don’t necessarily want everything covered in bright orange. For this wreath, I painted inexpensive faux pumpkins in shades of dusty blue to make them resemble blue Hubbard squash.
The soft blue pumpkins look especially pretty against the rustic grapevine and moss. The finished wreath still feels warm and seasonal, but the cooler color palette gives it a more unique, elegant look.
This is also an easy fall craft to customize with pumpkins and ribbon that complement the colors already used throughout your home.
Why You’ll Love This DIY Fall Wreath
- Easy enough for beginners
- Made with inexpensive craft-store or dollar-store supplies
- Can be completed in less than one hour
- Works for both fall and Thanksgiving decorating
- Easy to customize with different pumpkin colors
- Can be reused or refreshed from year to year
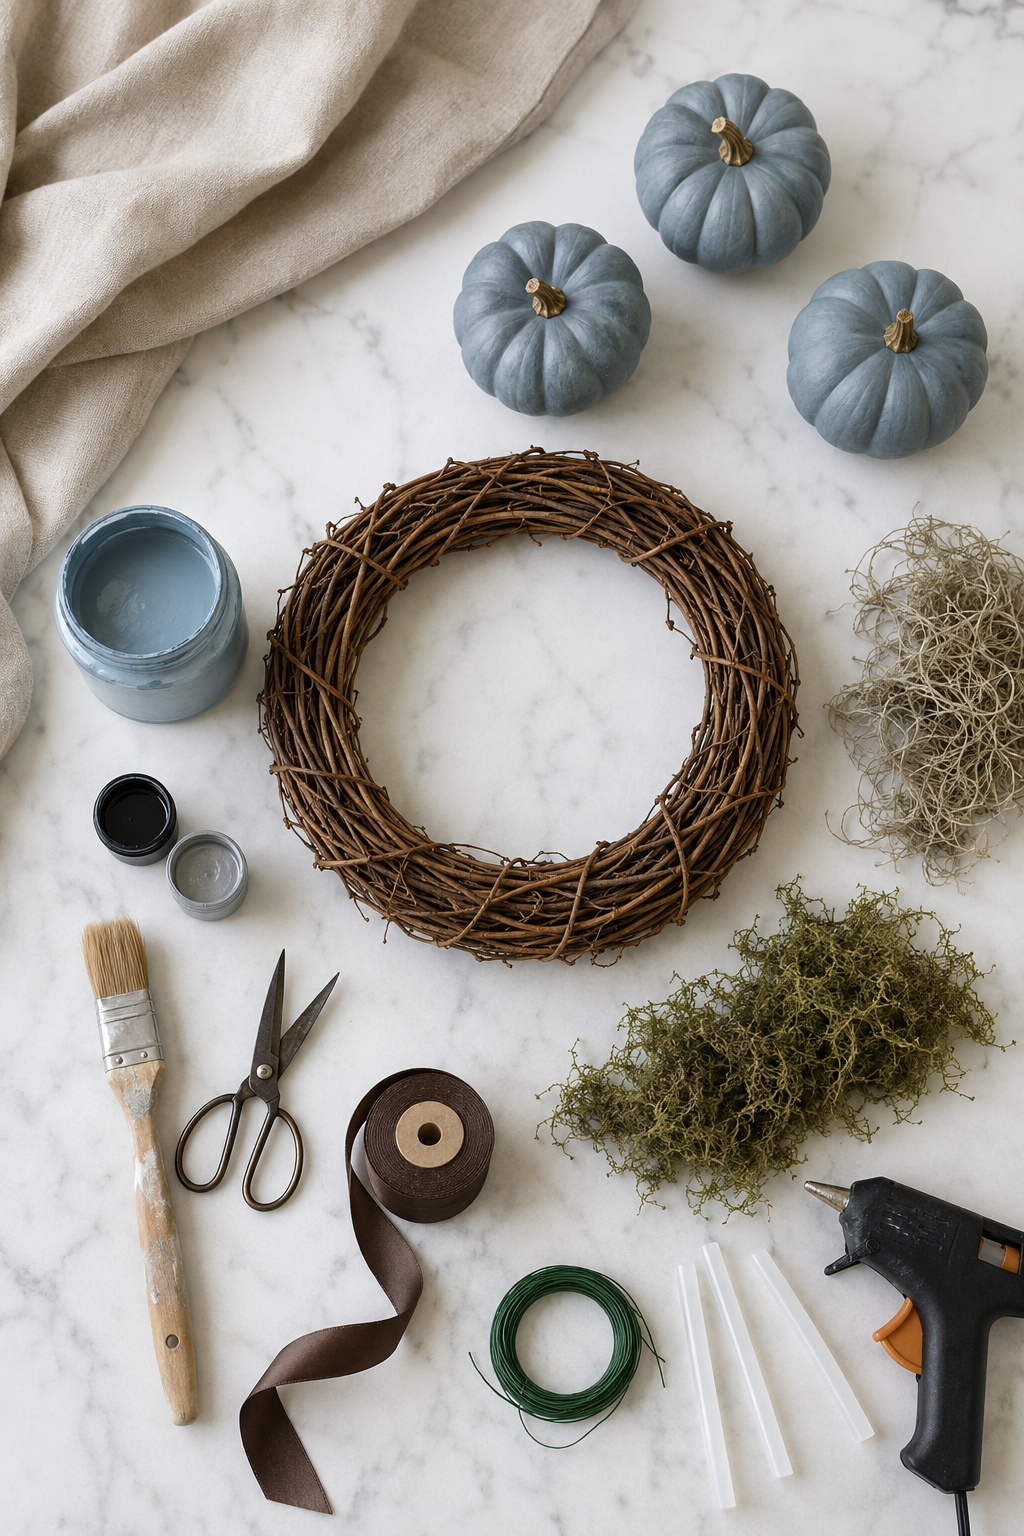
Supplies You’ll Need
- One grapevine wreath form
- Three small faux pumpkins
- Dusty blue or blue-gray chalk paint
- Black craft paint
- Silver or gray craft paint
- Small paintbrush
- Preserved green and gray moss
- Hot glue gun
- Hot glue sticks
- Brown satin, velvet, or burlap ribbon
- Scissors
- Floral wire, optional
How to Make a Blue Pumpkin and Moss Fall Wreath
Step 1: Paint the Faux Pumpkins
Begin by painting the small faux pumpkins with dusty blue chalk paint. Apply one or two coats as needed, allowing the paint to dry between coats.
I wanted my pumpkins to resemble blue Hubbard squash, so I used a muted blue-gray color rather than a bright blue.
Don’t worry about making the finish perfectly smooth. A little variation in the paint helps the pumpkins look more natural and less like inexpensive plastic decorations.
Step 2: Add an Aged Glaze
Once the blue paint is dry, thin a small amount of black and silver craft paint with water.
Lightly brush the watery paint over the pumpkins, allowing it to settle into the grooves. Quickly wipe or blend away any excess paint until you achieve a softly weathered finish.
This step adds depth and helps bring out the shape and texture of the pumpkins.
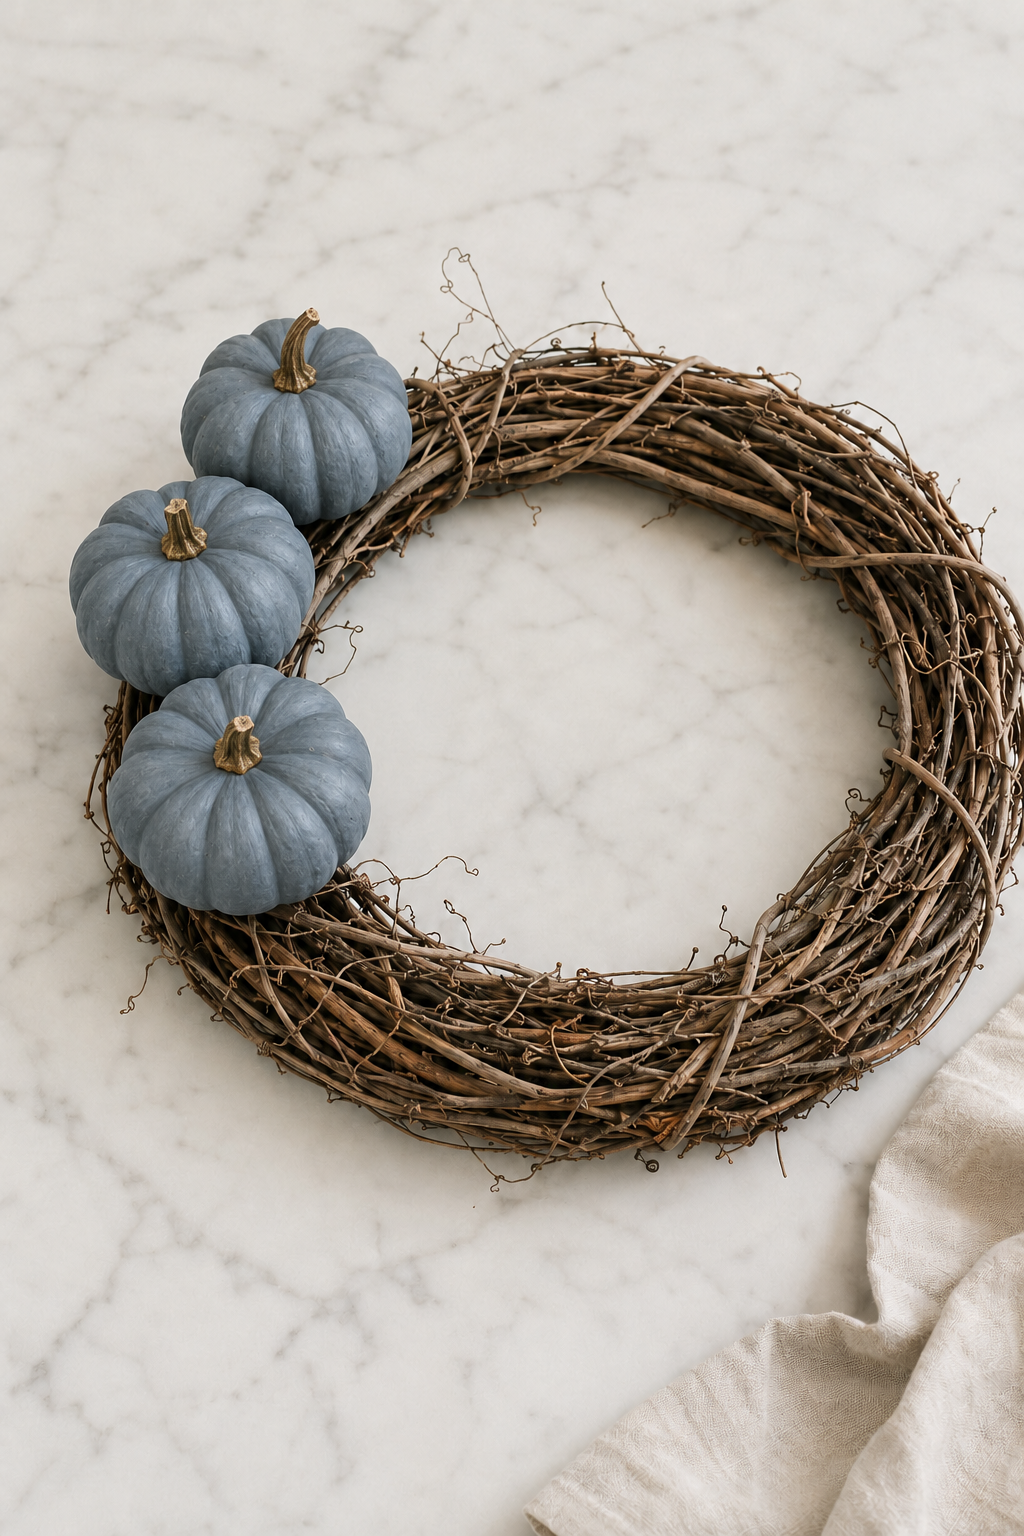
Step 3: Arrange the Pumpkins
Place the painted pumpkins on the grapevine wreath before gluing anything in place. Try grouping the three pumpkins slightly off-center rather than spacing them evenly around the wreath.
An asymmetrical arrangement gives the wreath a more natural, collected appearance.
Once you are happy with the placement, attach the pumpkins to the grapevine wreath with plenty of hot glue. For a little extra security, you can also use floral wire to anchor them to the wreath form.
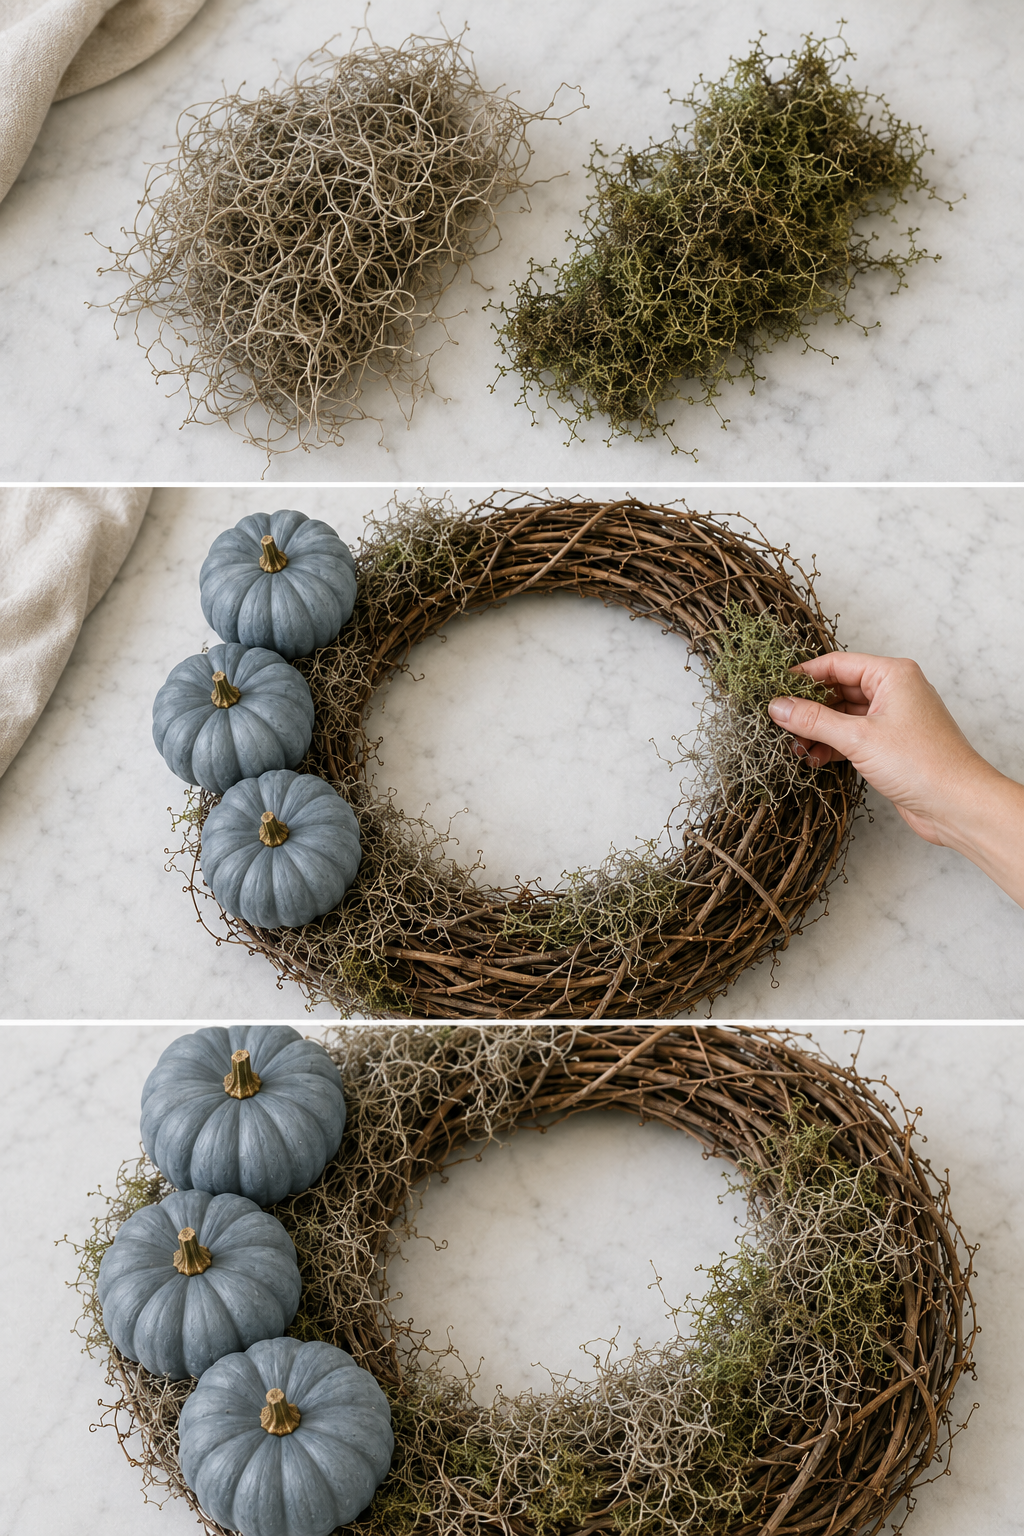
Step 4: Add the Moss
Tuck small pieces of green and gray moss into the grapevine around the pumpkins.
Continue adding moss until the arrangement looks full but still allows some of the natural grapevine to show. Use small dabs of hot glue to secure any loose pieces.
Mixing two shades of moss adds more texture and keeps the wreath from looking flat.
Step 5: Add a Ribbon Hanger
Allow the paint and hot glue to dry completely. Turn the wreath over and attach a length of brown satin, velvet, or burlap ribbon to the back.
Tie the ribbon into a simple bow or use it as a loop for hanging the wreath on your front door.
Tips for Making the Wreath Look More Natural
Use more than one shade of paint on the pumpkins. A little gray, cream, silver, or black layered over the blue will create a more realistic finish.
Avoid covering the entire grapevine form with moss. Leaving some of the branches visible adds rustic texture and prevents the wreath from looking too heavy.
Work with small pieces of moss at a time. It is easier to add more than it is to remove moss after it has been glued down.
Step back occasionally while arranging the pumpkins and moss. Looking at the wreath from a distance will help you spot any empty areas or places that feel unbalanced.
More Pumpkin Ideas


Make It Your Own
One of the best things about making your own fall wreath is being able to customize it for your home.
Try painting the pumpkins navy blue, sage green, creamy white, or muted terracotta. You could also add dried seed pods, acorns, pinecones, wheat stems, feathers, berries, or small pieces of eucalyptus.
For a more traditional farmhouse fall wreath, replace the satin ribbon with burlap. For a richer and more elegant look, use brown, navy, or rust-colored velvet ribbon.
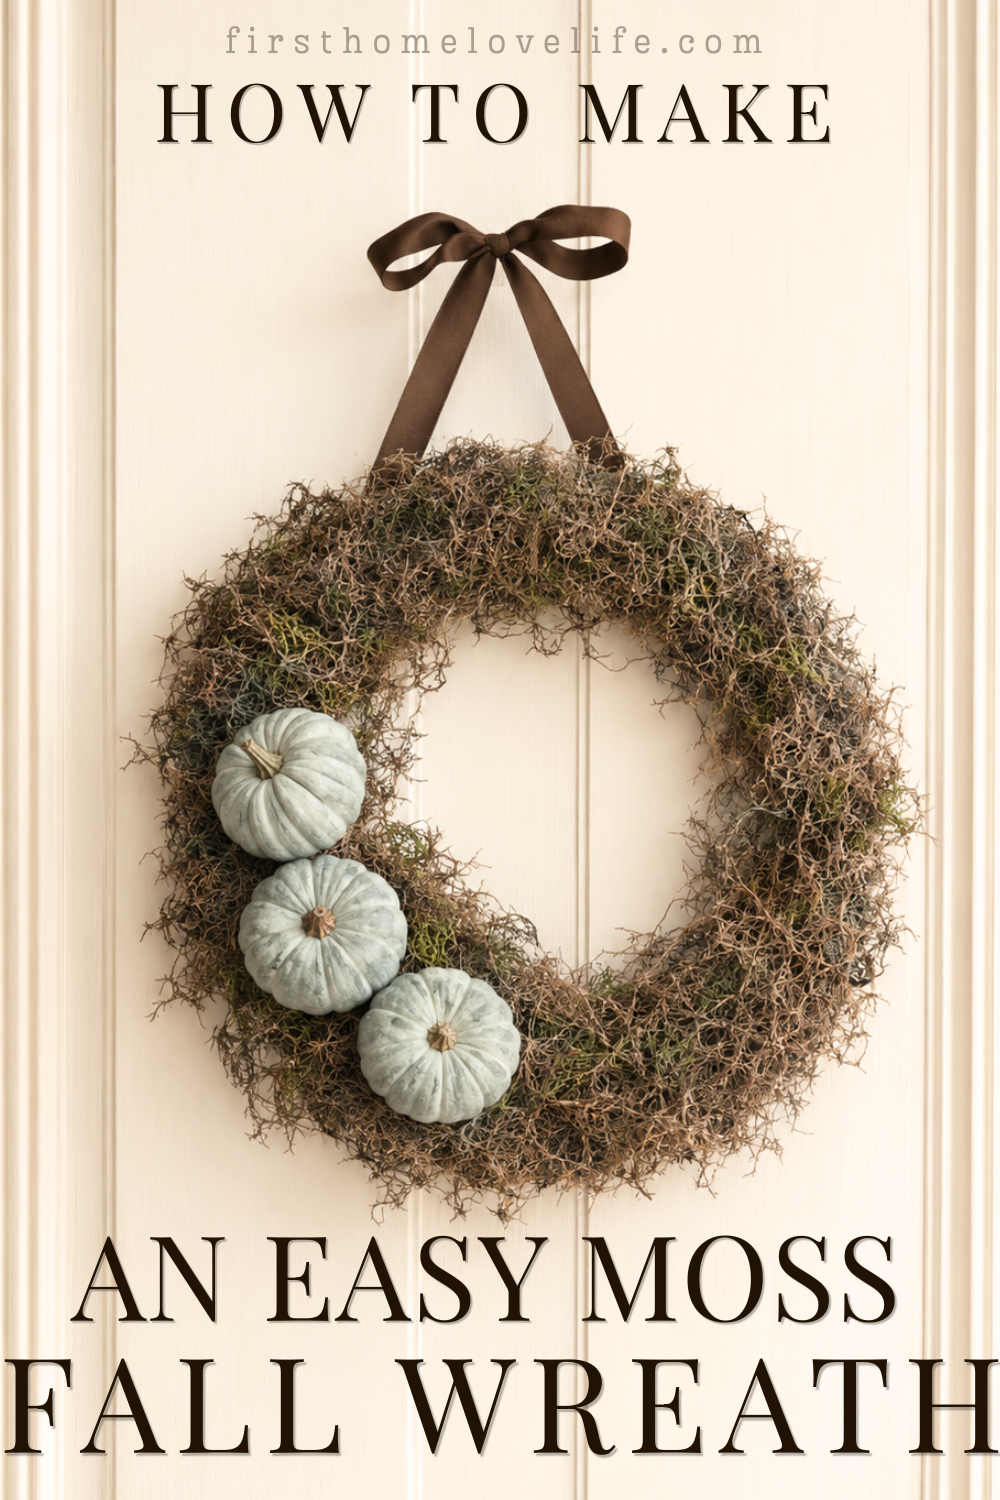
Where to Display Your Pumpkin Wreath
This blue pumpkin wreath is perfect for the front door, but it can also be displayed:
- Above a fall mantel
- On an interior kitchen or pantry door
- Over a vintage mirror
- On a dining room wall
- Inside an entryway
- Above a console table
- As part of a covered porch display
If you plan to hang it outdoors, keep the wreath under a covered porch to protect the painted pumpkins and moss from rain and direct sunlight.
Frequently Asked Questions
Can I use real moss on a fall wreath?
You can use clean, completely dry natural moss, but preserved craft moss is usually the better choice. It is easier to work with, comes in different colors, and is less likely to contain moisture or insects.
What kind of paint works on faux pumpkins?
Chalk paint and acrylic craft paint both work well on foam or plastic faux pumpkins. If the surface is very glossy, lightly sanding or priming it first may help the paint adhere.
How do I keep the pumpkins attached?
Use a generous amount of hot glue and press each pumpkin firmly into the grapevine. For heavier pumpkins or an outdoor wreath, reinforce them with floral wire.
Can this wreath be stored and reused?
Yes. Store the wreath upright in a wreath box or loosely covered container. Keep it in a cool, dry area so the moss and painted pumpkins remain in good condition.
How long does this fall wreath take to make?
The wreath can be assembled in approximately 30 minutes, although you will need additional drying time if the pumpkins require multiple coats of paint.
Final Thoughts
This DIY blue pumpkin and moss fall wreath is an easy way to decorate your front door with something seasonal, natural, and a little unexpected. The blue-gray pumpkins offer a beautiful alternative to traditional orange décor, while the moss and grapevine add plenty of rustic fall texture.
It is simple, inexpensive, and easy to customize—which is exactly the kind of seasonal project I love.
Welcome, fall. I’m ready for you.