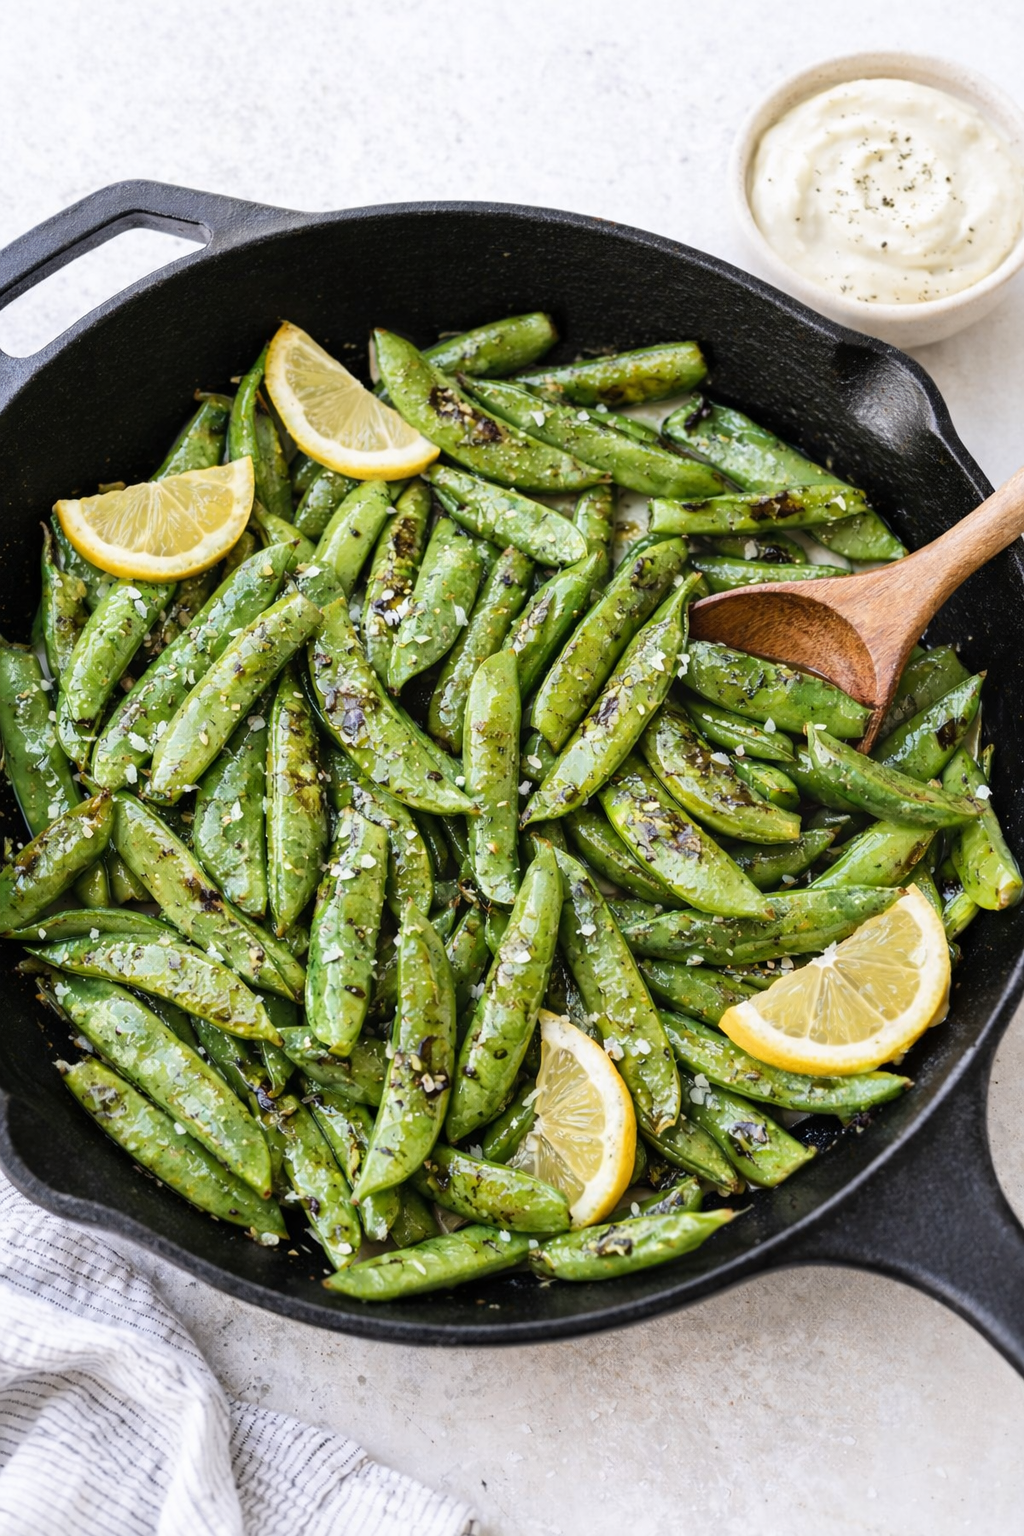
If you need a quick vegetable side that feels a little elevated but takes barely any effort, these blistered snap peas with creamy garlic aioli are it. Sweet, crisp snap peas are seared in a hot skillet until lightly charred and tender, then served with a rich, garlicky dipping sauce that makes them completely irresistible.
Perfect as an appetizer, party snack, or fresh side dish for weeknight dinners.
Why You’ll Love This Recipe
- Ready in under 15 minutes
- Naturally gluten-free
- Simple ingredients
- Bright, fresh flavor
- Perfect for entertaining
Blistering snap peas brings out their natural sweetness while adding just the right amount of smoky char.
Ingredients
For the Blistered Snap Peas
- 1 pound fresh sugar snap peas, trimmed
- 1 tablespoon olive oil
- ½ teaspoon sea salt
- ¼ teaspoon black pepper
- Optional: squeeze of fresh lemon
For the Creamy Garlic Aioli
- ½ cup mayonnaise
- 1–2 cloves garlic, finely minced or grated
- 1 tablespoon fresh lemon juice
- 1 tablespoon olive oil
- Pinch of salt
- Optional: pinch of smoked paprika
How to Make Blistered Snap Peas
Step 1: Heat the Pan
Heat a large skillet over medium-high heat. Add olive oil and let it get hot.
Step 2: Blister the Peas
Add snap peas in a single layer. Cook without stirring for 2–3 minutes to allow blistering. Toss and continue cooking another 3–4 minutes until lightly charred but still crisp-tender.
Season with salt and pepper. Add a squeeze of lemon if desired.
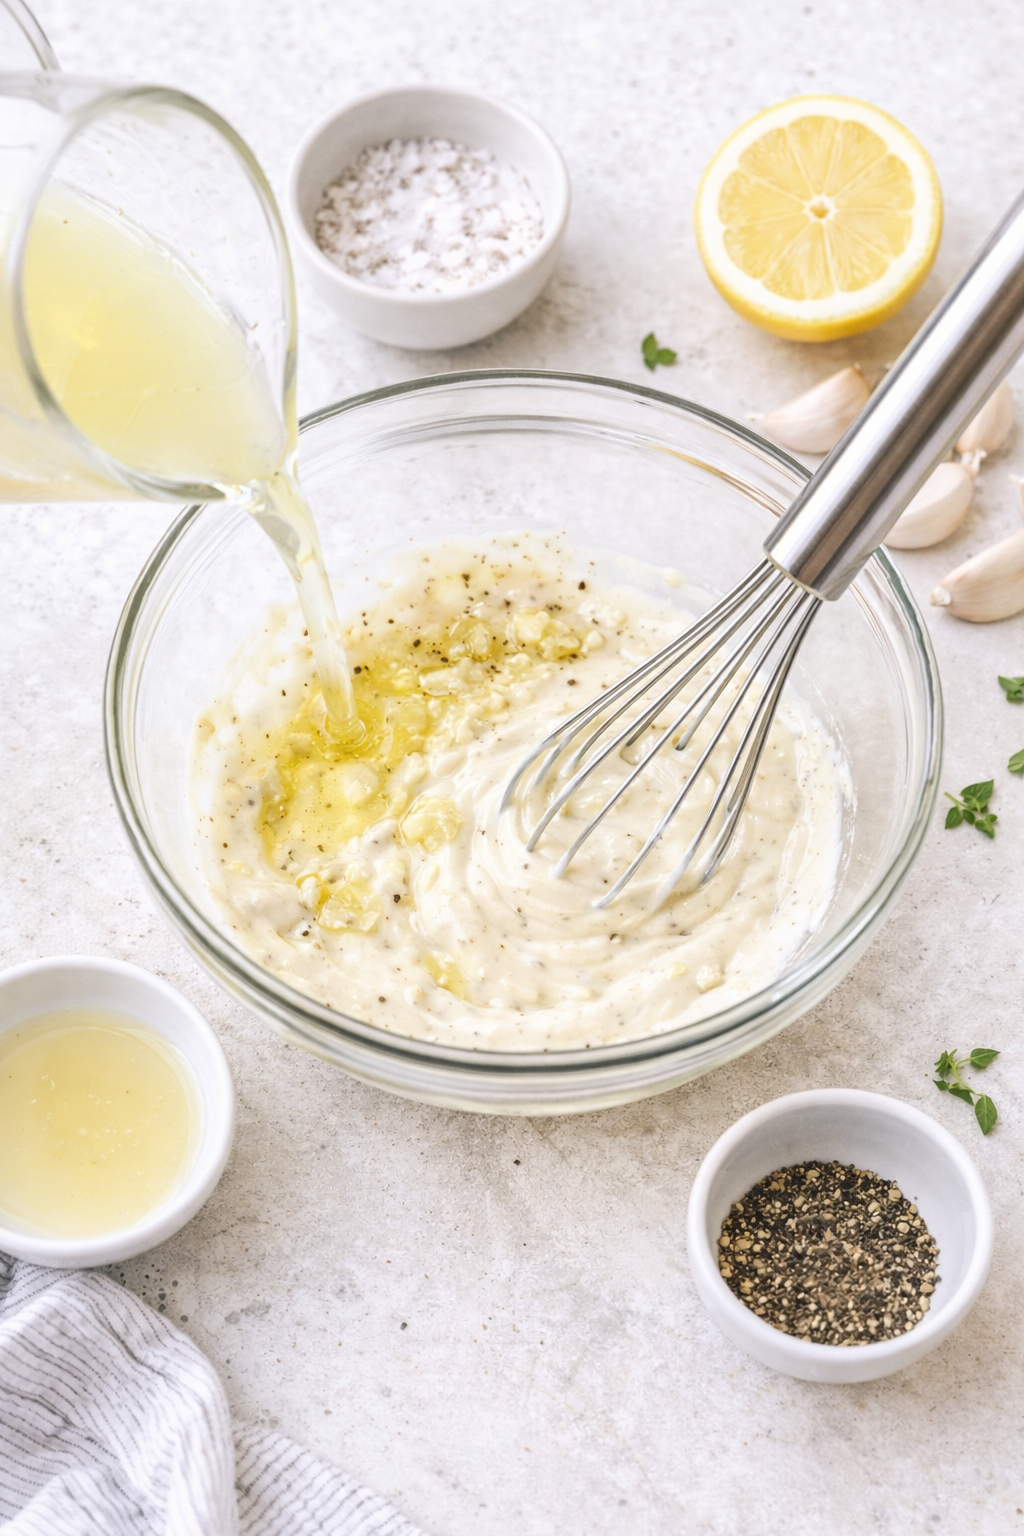
Step 3: Make the Garlic Aioli
In a small bowl, whisk together mayonnaise, garlic, lemon juice, olive oil, and salt until smooth. Adjust seasoning to taste.
Step 4: Serve
Serve warm snap peas with the creamy garlic aioli on the side for dipping.
Tips for the Best Snap Peas
- Use high heat to get that perfect blistered char.
- Don’t overcrowd the pan.
- Fresh garlic makes a big difference in the aioli.
- For extra flavor, sprinkle with flaky sea salt before serving.
Variations
- Add crushed red pepper flakes for heat
- Sprinkle with grated parmesan
- Drizzle with balsamic glaze
- Add fresh herbs like parsley or dill
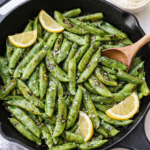
Blistered Snap Peas with Creamy Garlic Aioli
- Total Time: 0 hours
- Yield: 4 SERVINGS 1x
- Diet: Vegetarian
Description
These blistered snap peas are quickly seared in a hot cast iron skillet until lightly charred and crisp-tender, then sprinkled with flaky sea salt and fresh lemon. Served with a creamy homemade garlic aioli dipping sauce, this easy 15-minute recipe makes the perfect fresh side dish or simple appetizer.
Ingredients
For the Blistered Snap Peas
-
1 pound fresh sugar snap peas, trimmed
-
1 tablespoon olive oil
-
½ teaspoon flaky sea salt
-
¼ teaspoon freshly cracked black pepper
-
½ lemon, sliced (plus extra for squeezing, optional)
For the Creamy Garlic Aioli
-
½ cup mayonnaise
-
1–2 cloves garlic, finely minced or grated
-
1 tablespoon fresh lemon juice
-
1 tablespoon olive oil
-
¼ teaspoon sea salt
-
⅛ teaspoon black pepper
Instructions
-
Heat a large cast iron skillet over medium-high heat. Add olive oil and allow it to heat until shimmering.
-
Add snap peas in a single layer. Cook undisturbed for 2–3 minutes to allow blistering.
-
Toss and continue cooking another 3–4 minutes until lightly charred but still crisp-tender.
-
Add lemon slices to the pan during the last minute of cooking to lightly warm and caramelize them.
-
Sprinkle peas with flaky sea salt and cracked black pepper. Remove from heat.
-
In a small bowl, whisk together mayonnaise, garlic, lemon juice, olive oil, salt, and pepper until smooth and creamy.
-
Serve snap peas warm with garlic aioli on the side for dipping.
Notes
-
Use high heat for proper blistering.
-
Do not overcrowd the pan or peas will steam.
-
For extra flavor, let the aioli chill for 20–30 minutes before serving.
-
Best served fresh but can be reheated quickly in a hot skillet.
- Prep Time: 10 MINUTES
- Cook Time: 5-7 MINUTES
- Category: Side Dish
- Method: STOVETOP
- Cuisine: American
Storage
Store leftover snap peas in an airtight container in the refrigerator for up to 3 days. The aioli will keep for up to 4 days.
Frequently Asked Questions
Can I use frozen snap peas?
Fresh snap peas work best for blistering because they hold their crisp texture and char properly. Frozen peas release too much moisture and will steam instead of blister.
How do I know when snap peas are perfectly blistered?
They should have light brown char spots on the outside while still remaining bright green and slightly crisp. Overcooking will make them soft and dull in color.
Can I make the garlic aioli ahead of time?
Yes. The aioli can be made up to 24 hours in advance. Store it in an airtight container in the refrigerator to let the flavors deepen.
What can I substitute for mayonnaise in the aioli?
You can use Greek yogurt for a lighter option or a plant-based mayo for a dairy-free version. The texture may be slightly thinner, but the flavor will still be delicious.
Are blistered snap peas healthy?
Snap peas are naturally low in calories and high in fiber, vitamin C, and antioxidants. This makes them a nutritious side dish or snack, especially when paired with a simple homemade dipping sauce.
What main dishes pair well with this?
Blistered snap peas pair beautifully with grilled chicken, steak, salmon, pasta dishes, or even burgers. They also make a great addition to a spring appetizer spread.
These blistered snap peas with creamy garlic aioli are proof that simple ingredients can create bold, crave-worthy flavor. With their bright green color, lightly charred edges, and rich garlicky dip, they feel special enough for entertaining but easy enough for a weeknight dinner.
Keep this recipe on hand for when you need a fresh, fast side dish that everyone will reach for first. Whether you’re serving them alongside your favorite main course or setting them out as an appetizer, they’re guaranteed to disappear quickly.