A few of you have asked me to show you how I did the subway art graphic on my floor, so here’s what I did.
I first drew on a piece of paper the rough design, along with the words in certain spaces and fonts.
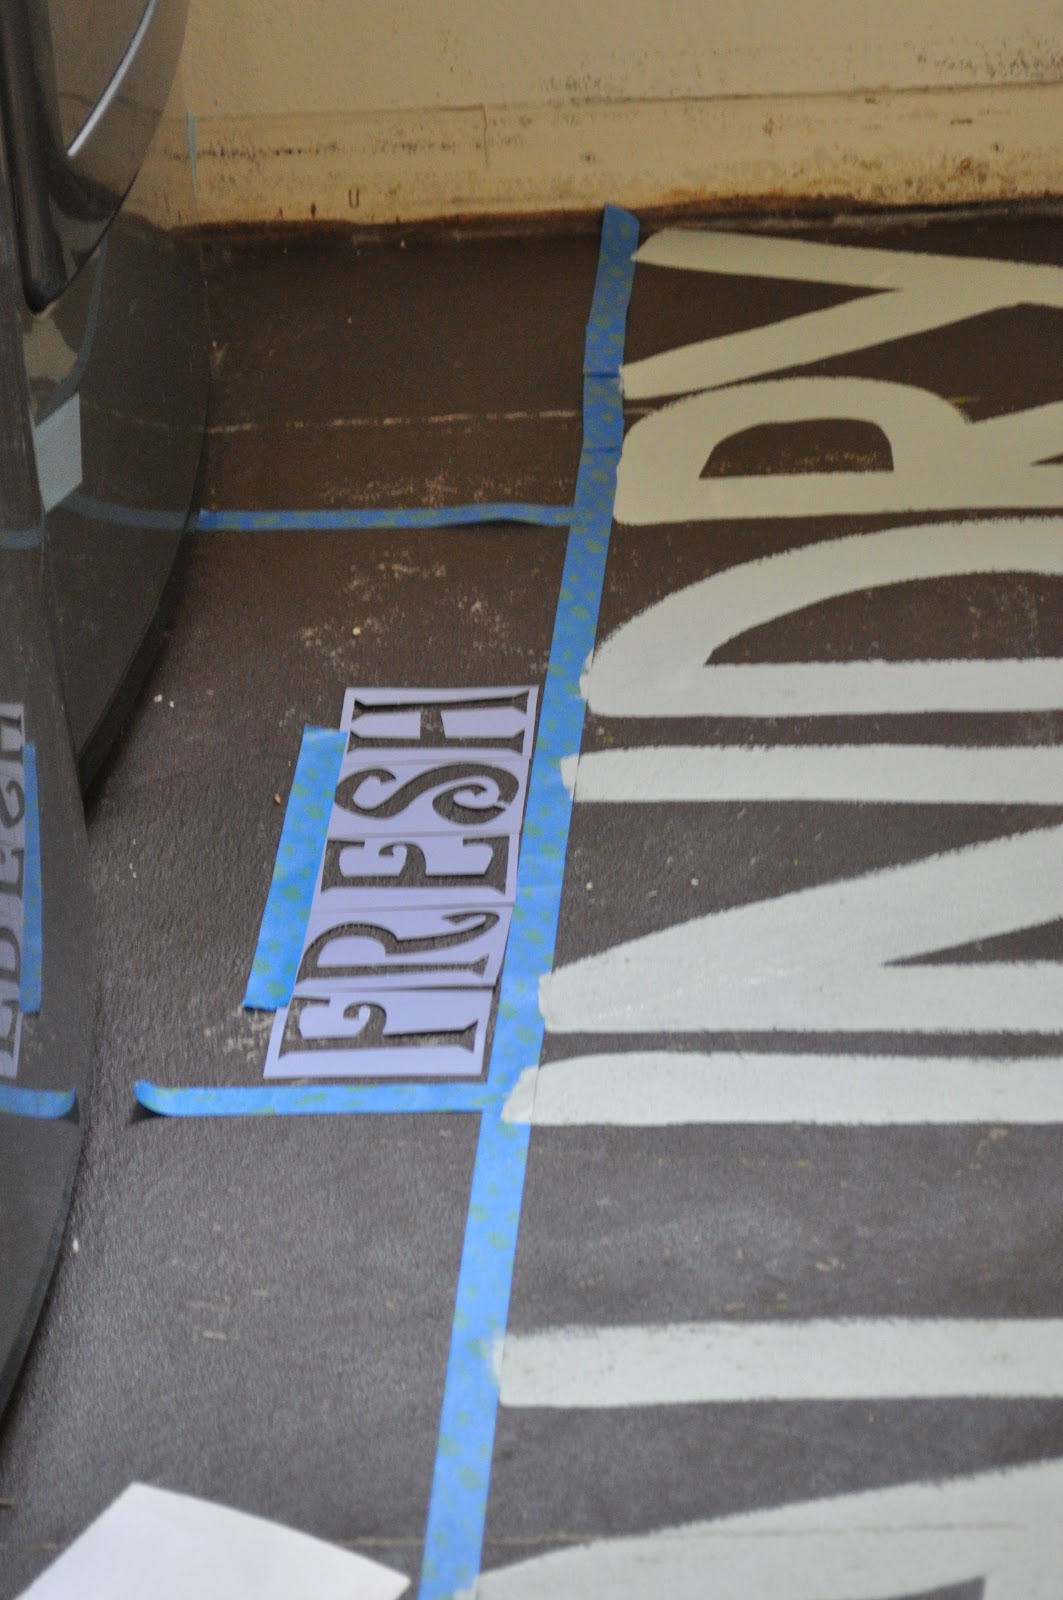
I then measured out, and marked off sections onto my floor with painters tape.
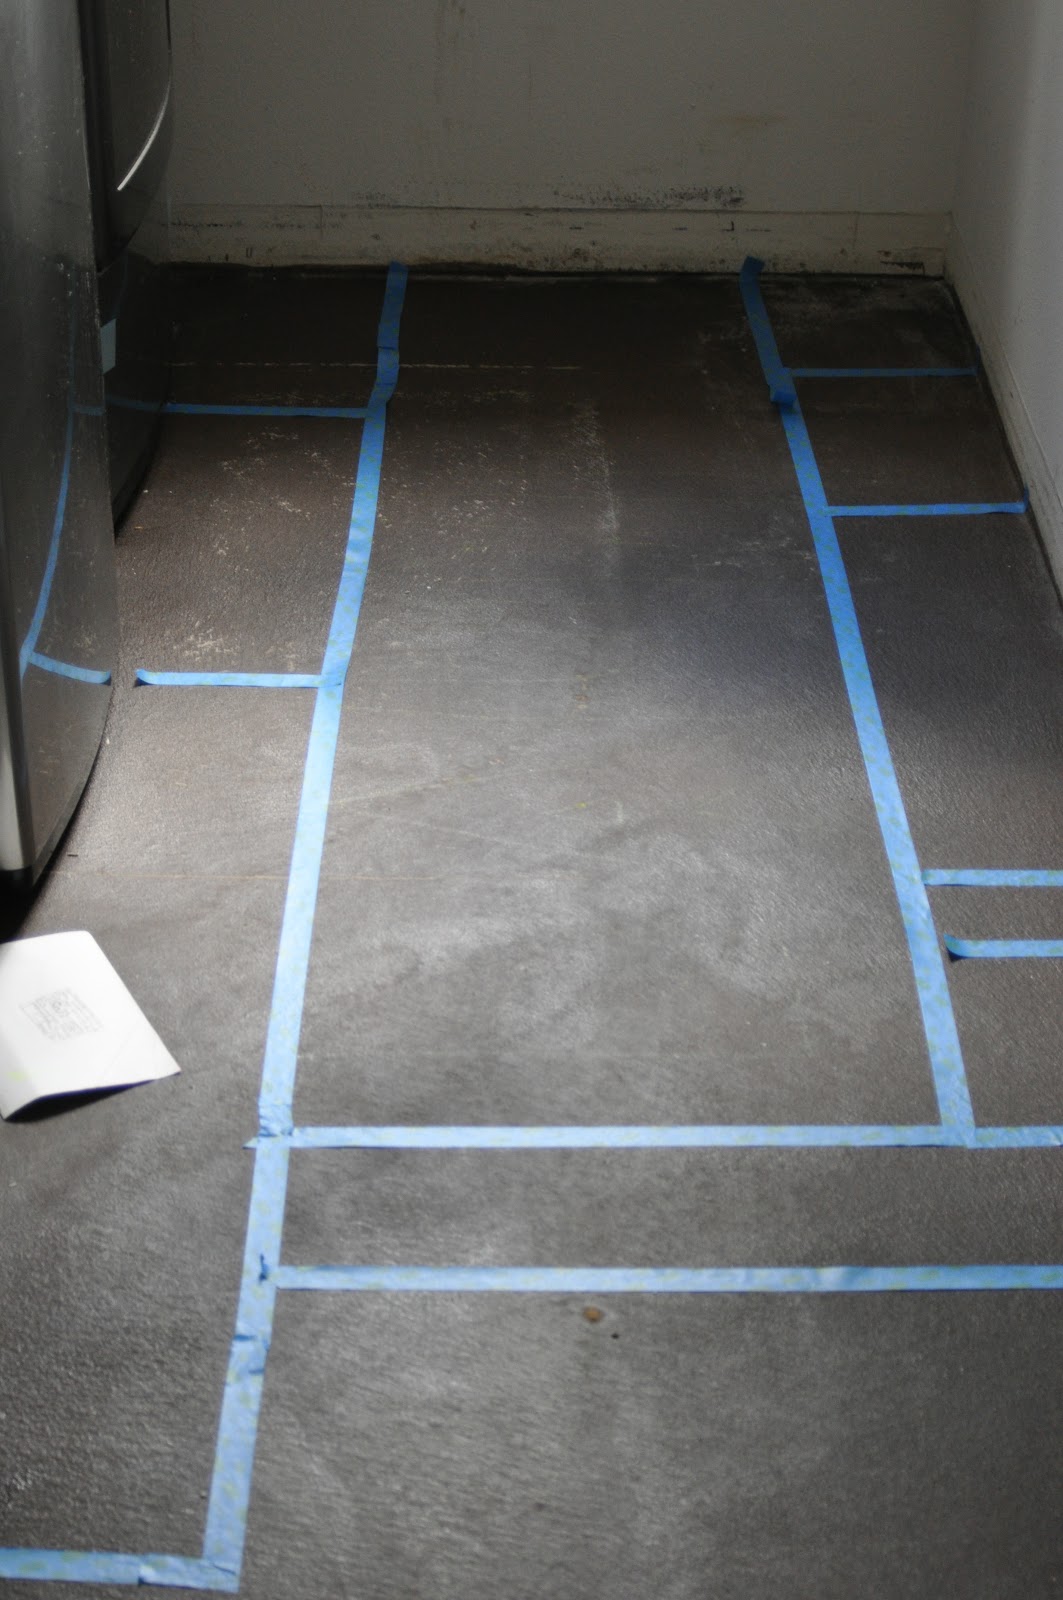
This is where it got kind of weird…
I started painting the main word “LAUNDRY” backwards. Why? Well, because just in case my measurements were wrong it would be much easier to move the tape than the wall. ;o)
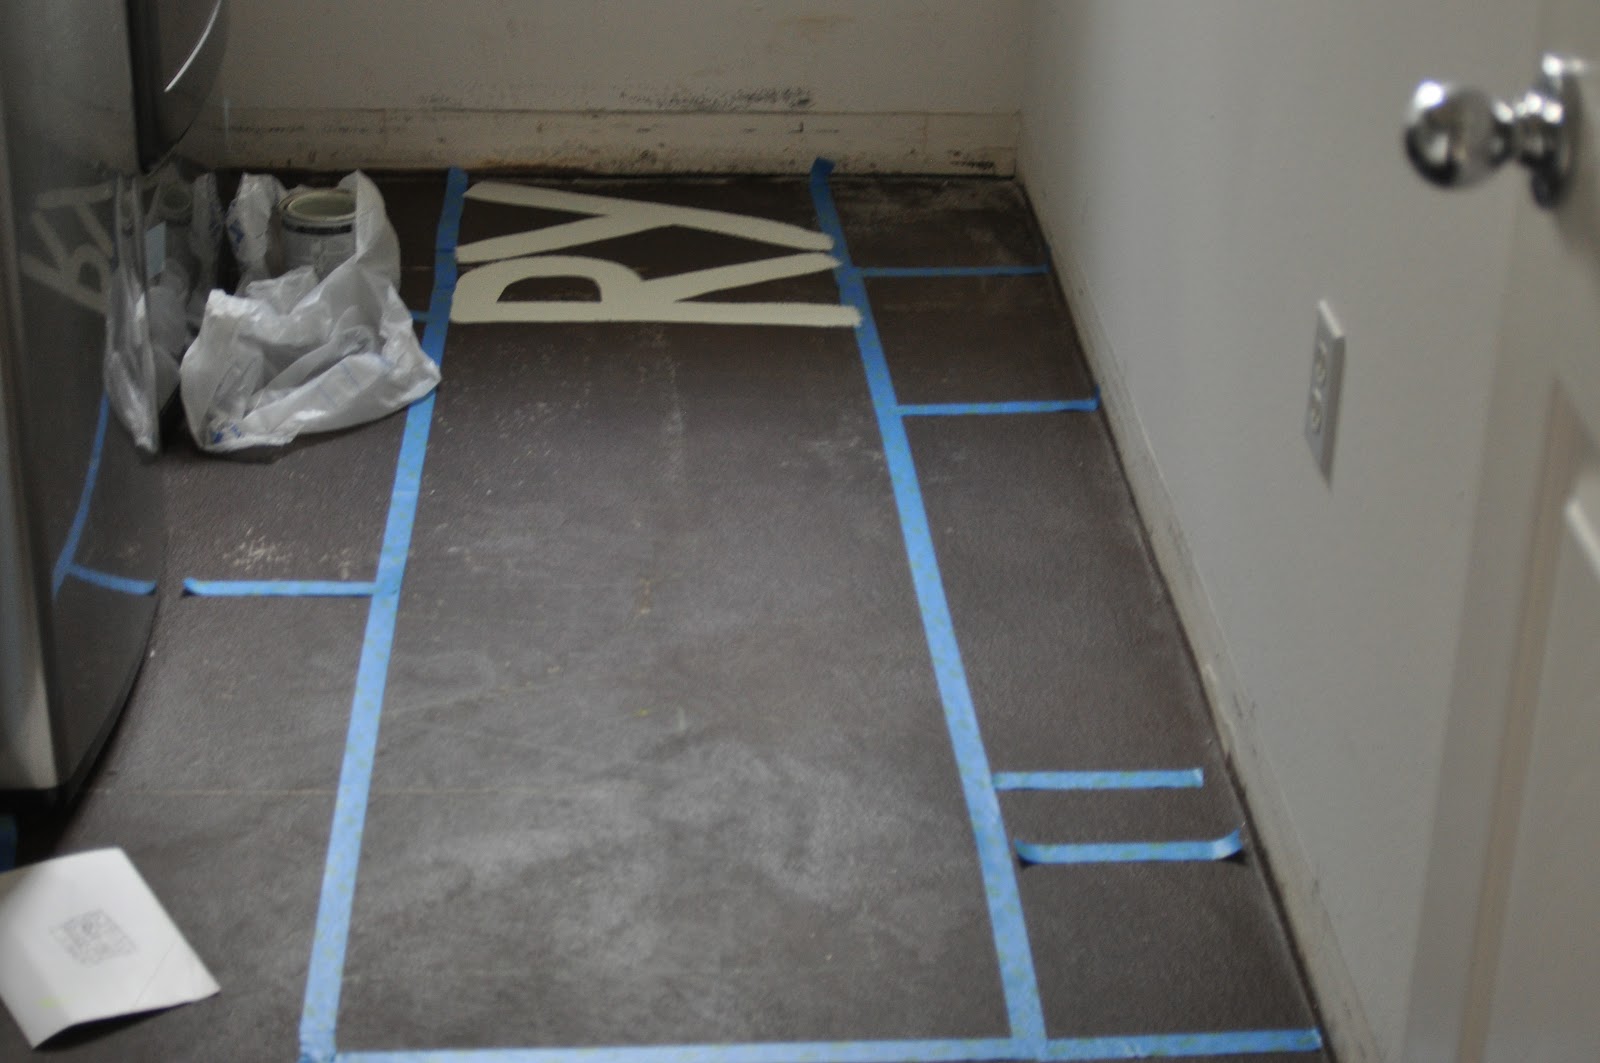
Sure enough, I did end up moving the tape.
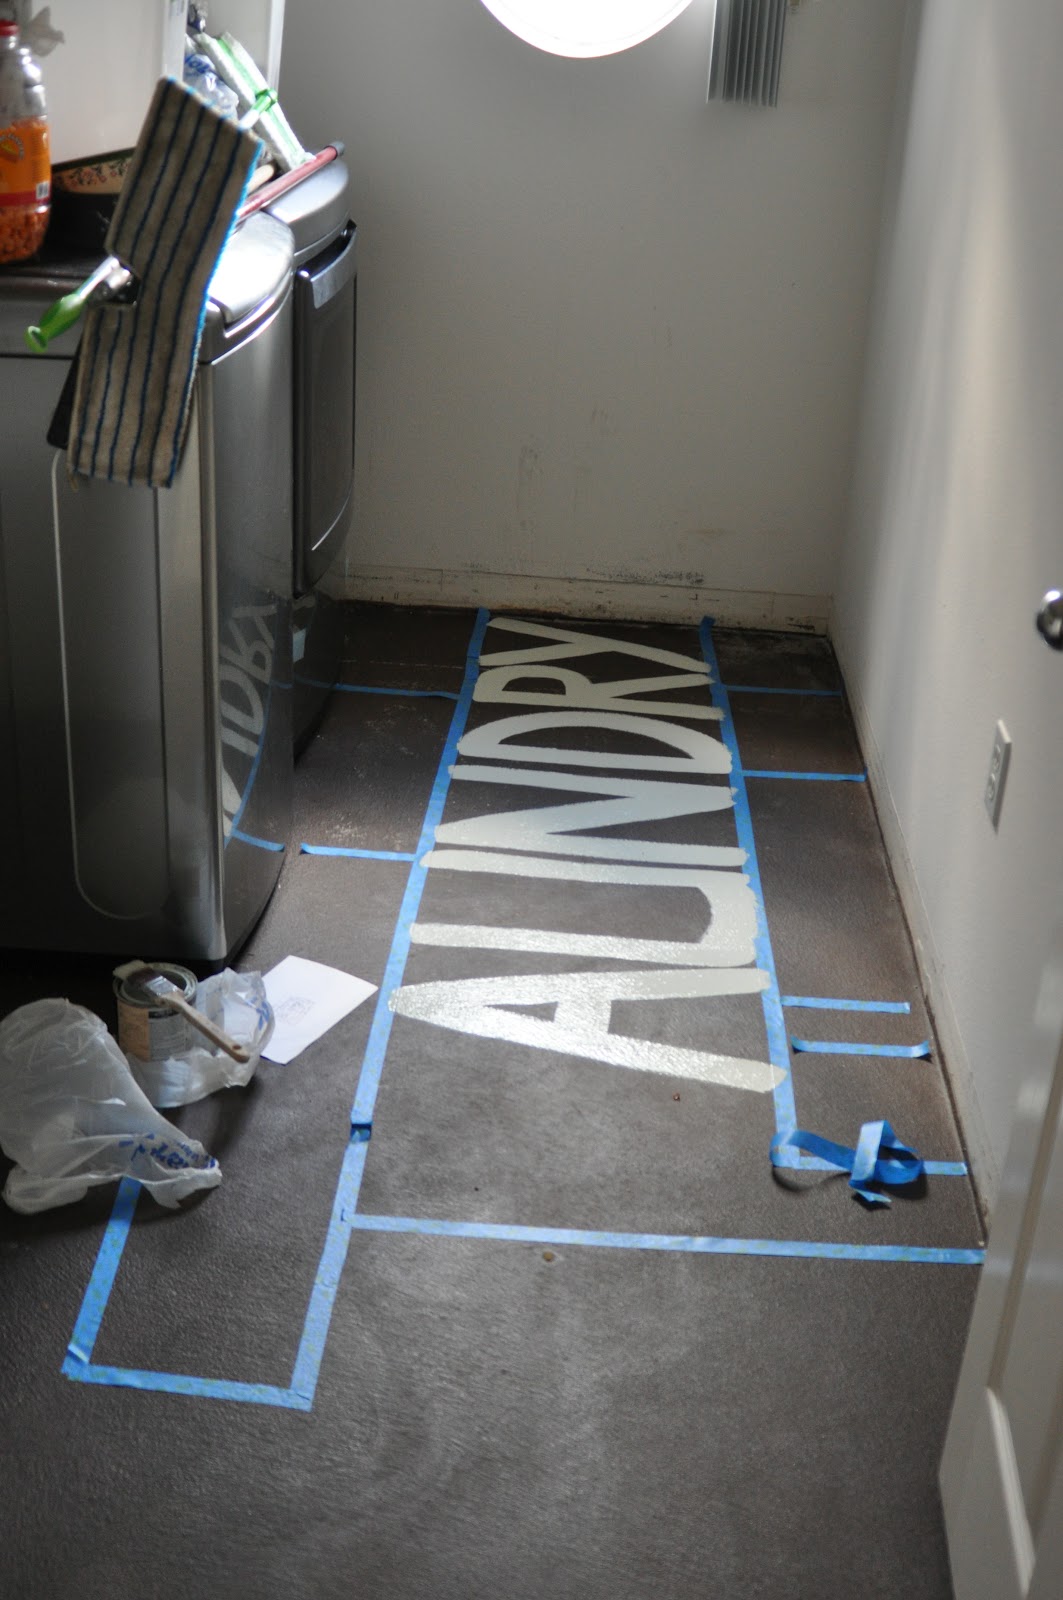
I let this word dry for a good 3-4 hours before I began working around it.

I found some pre-cut paper stencils at Walmart, and used them in the beginning. Taping down the stencils, and using a stencil brush to “tap” paint onto the floor.

I did this a few times, and got annoyed pretty quickly with using the stencil, so I ended up free-handing it most of the time.
What about making mistakes?
Trust me, I made a ton! I would paint a word, and not like the placement, or it was crooked, or too small or too big…ugggh I’m so glad this project is over!
This stuff (also from Walmart) is amazing at cleaning up paint!
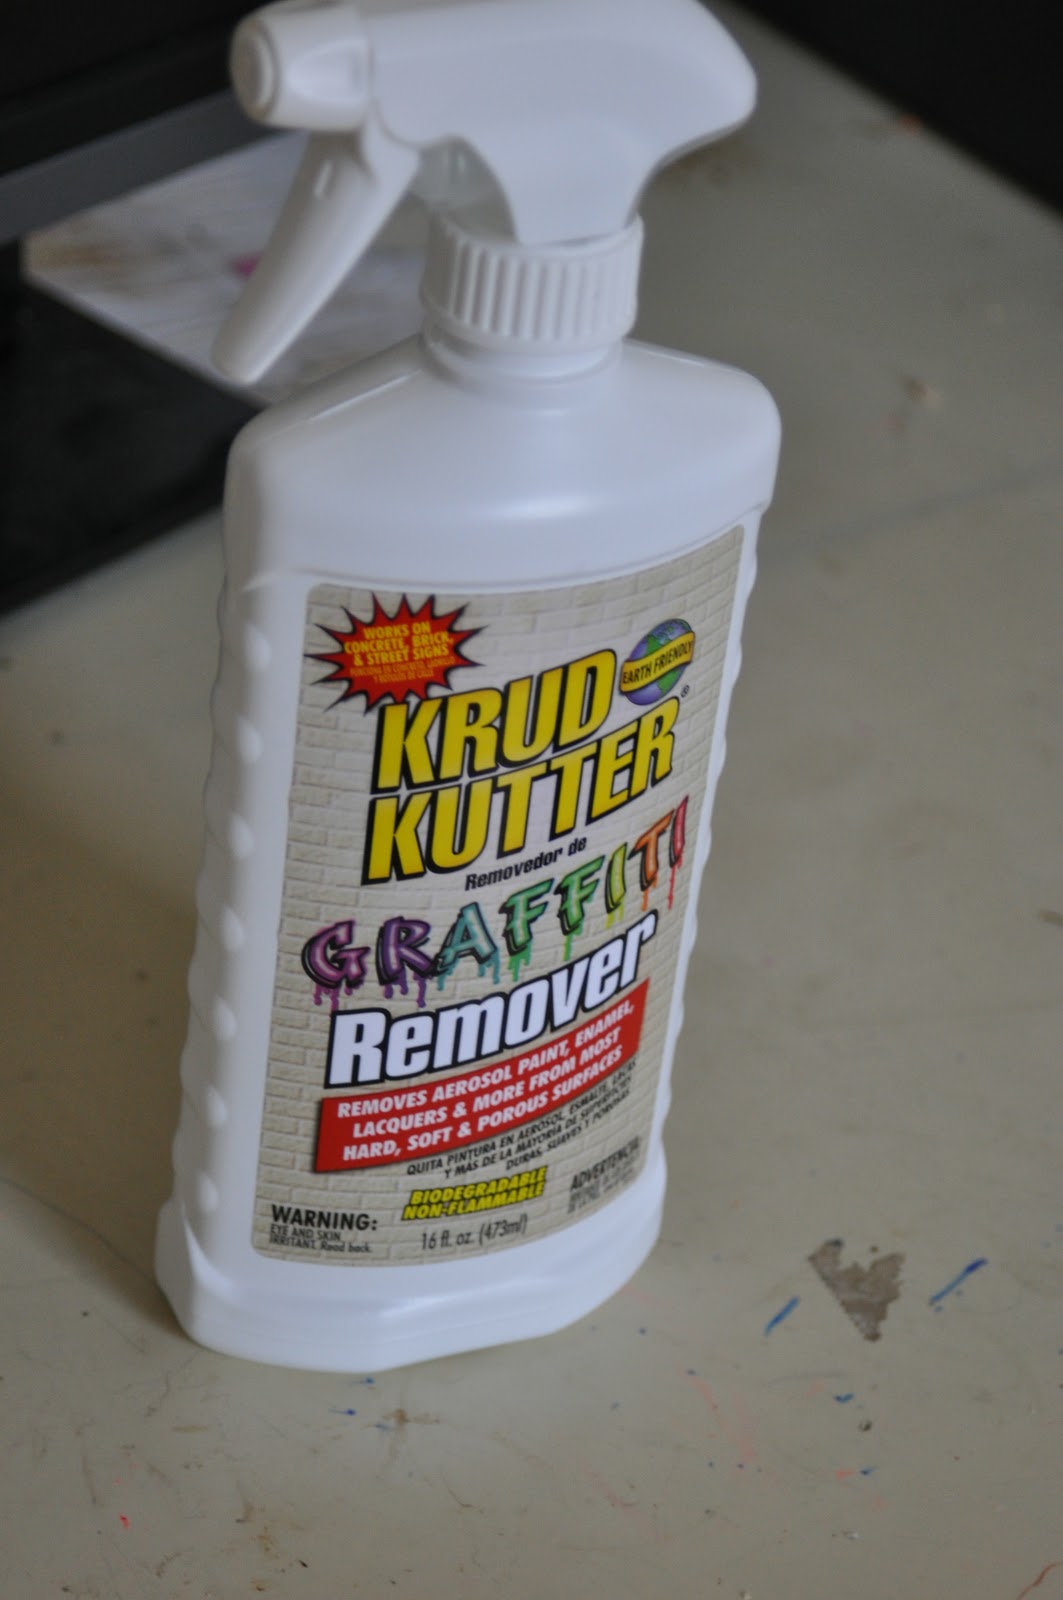
If When I made a mess mistake, I sprayed this stuff on it, and used a wire scrub brush to brush the word, and a damp towel to wipe it up. Easy peasy!
When I finally had all the words down and in place, I let everything dry for 24 hours. (In case you’re wondering, we didn’t do laundry for a week…door stayed closed at all times!)
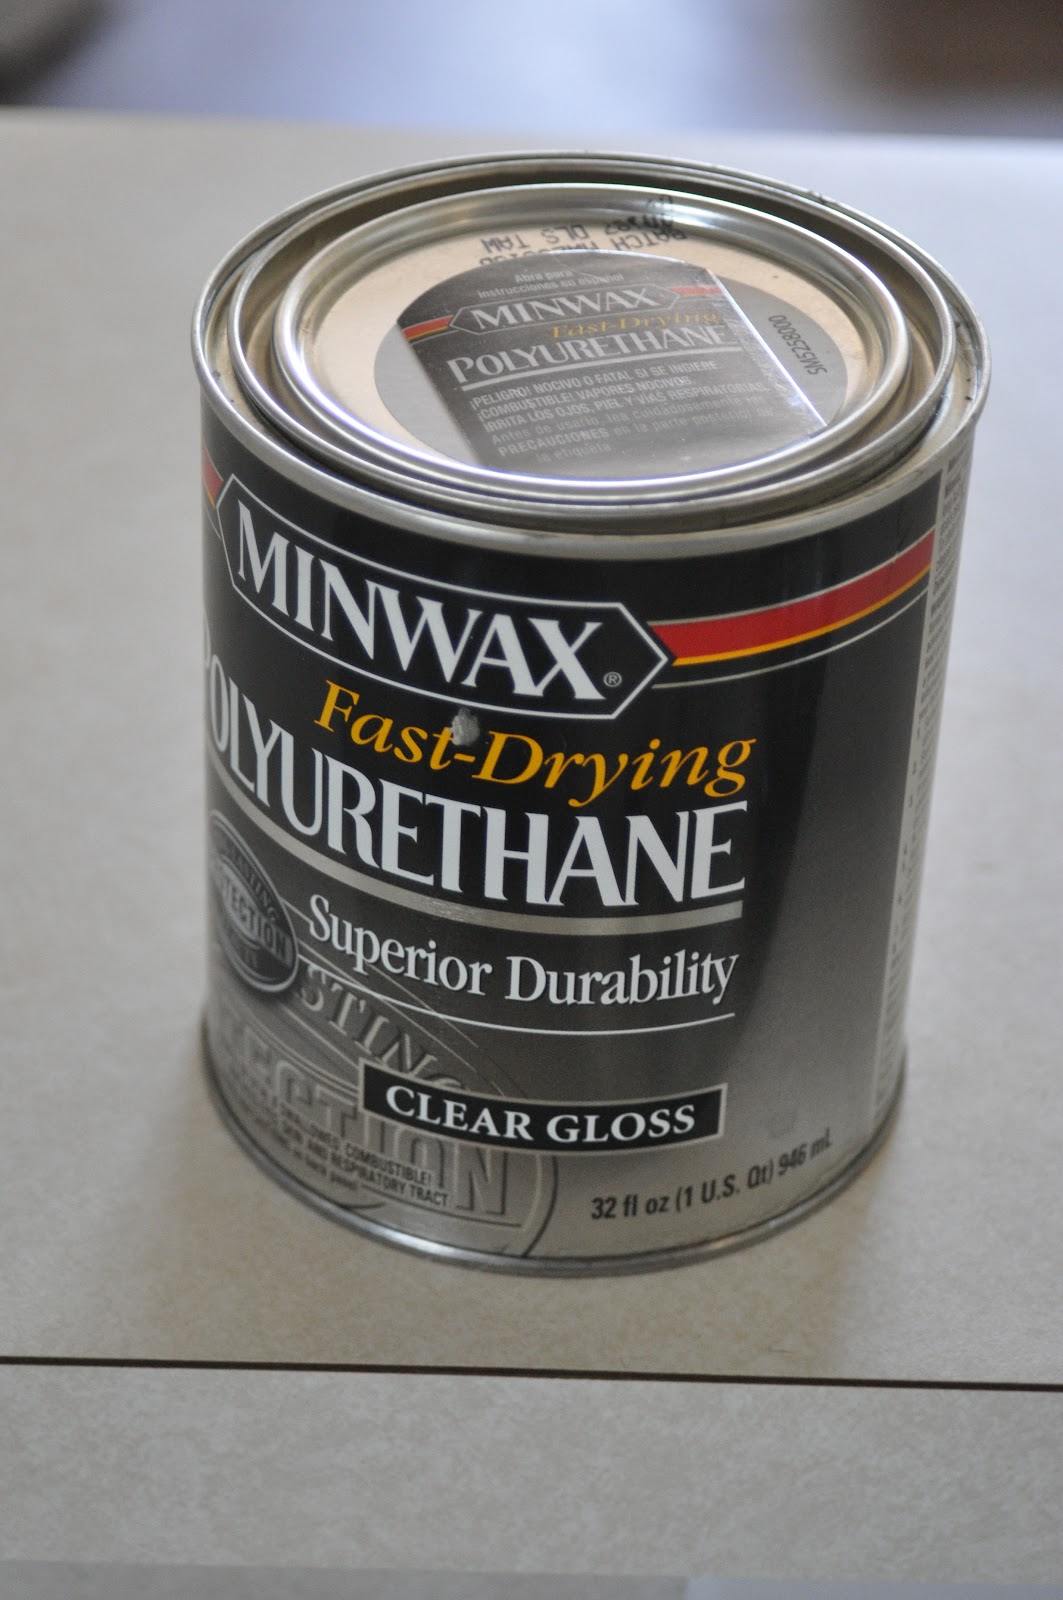
24 hours later I painted 2 coats of fast drying polyurethane down to protect the floor, leaving 3-4 hours in between coats for drying.
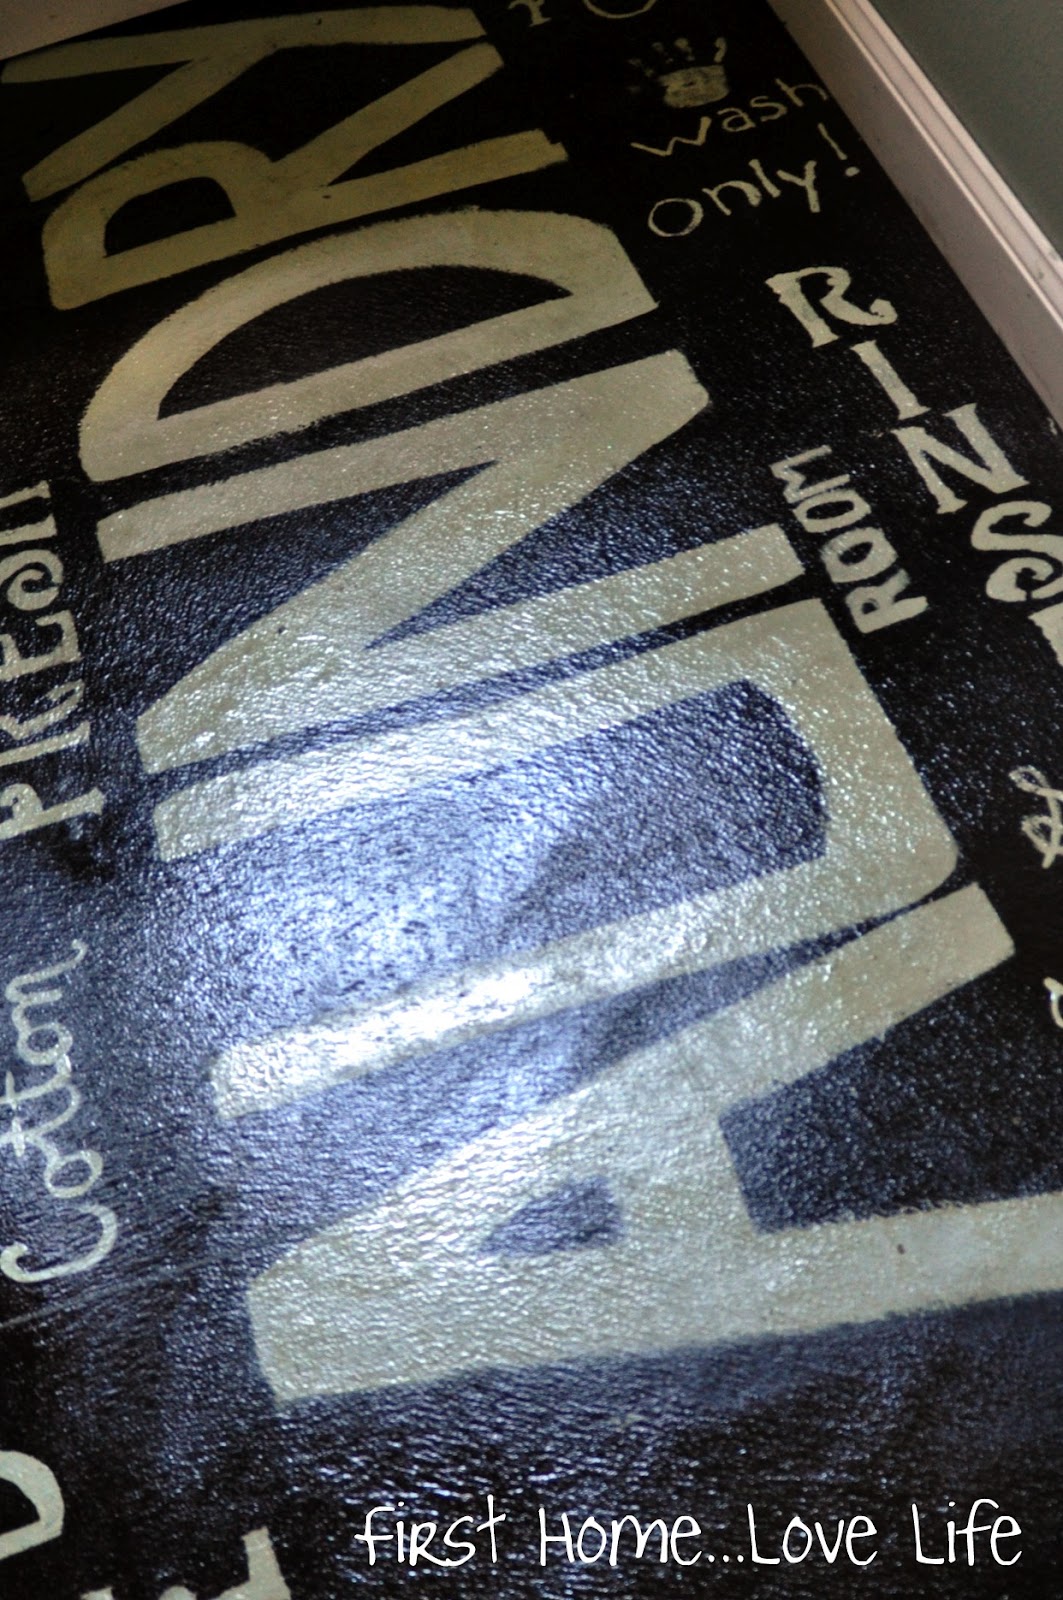
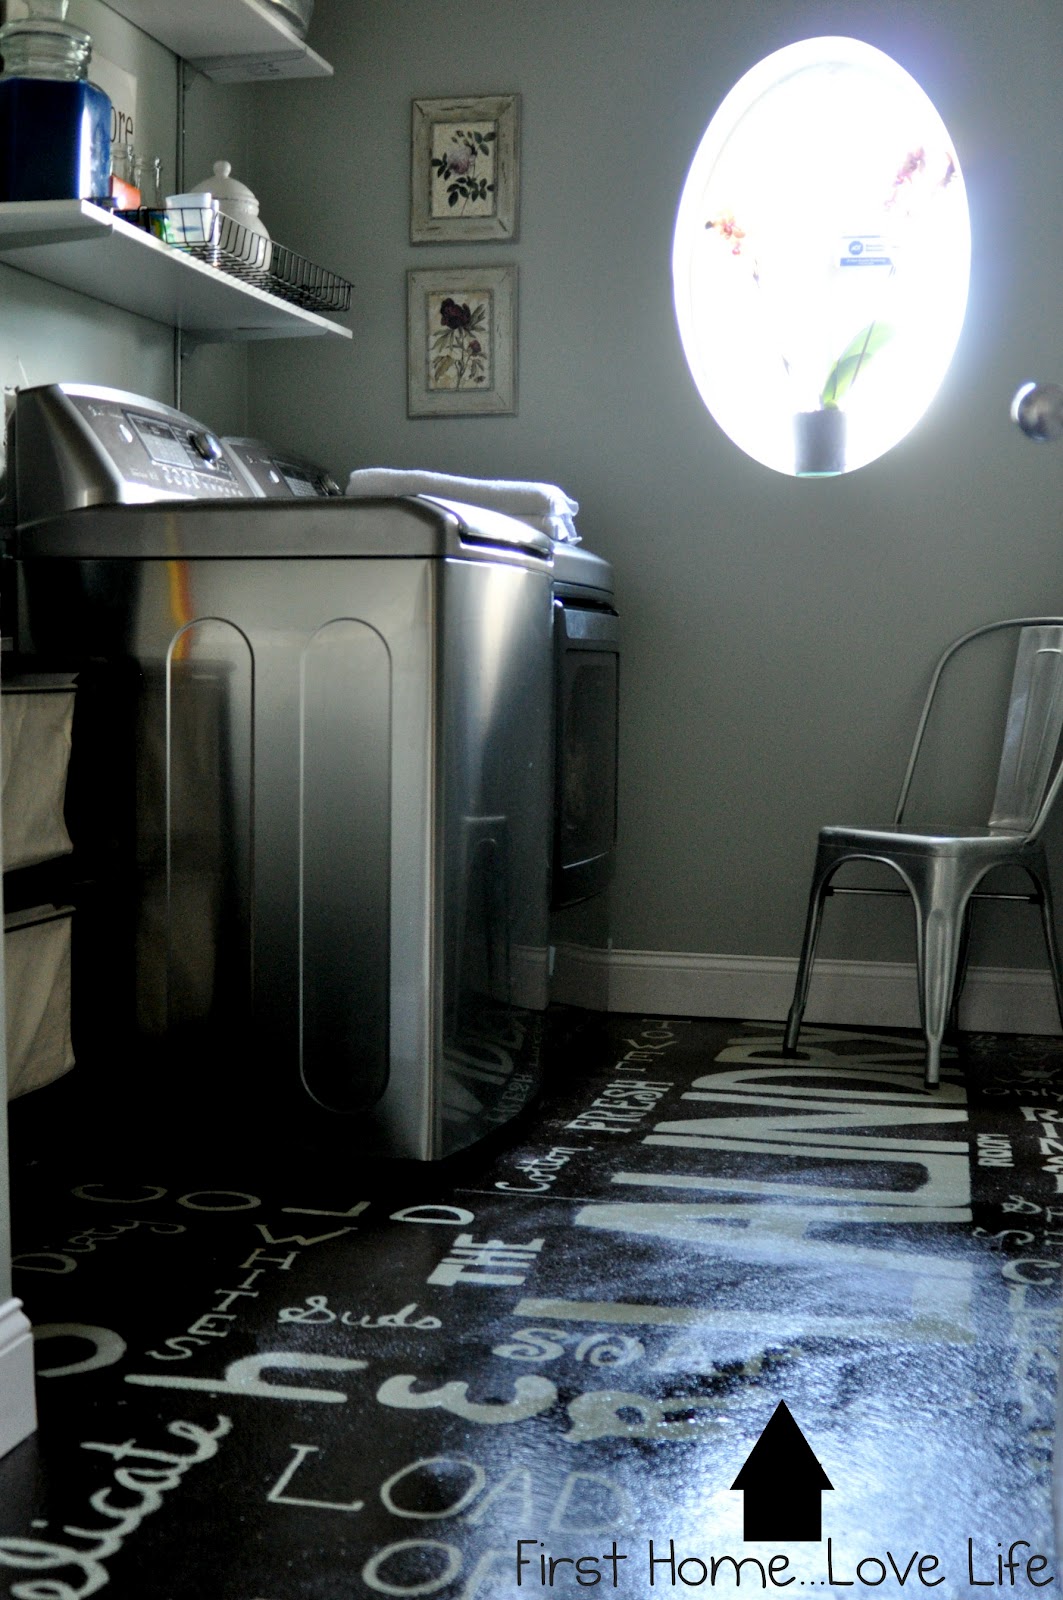
When everything was dry, this is what it turned out like.
Total cost for the floor $70, and worth every penny!
Talk to you soon 🙂

I’m partying at…


Ack! What a fun space, I love that floor! What a way to make laundry more interesting! Thanks so much for linking to the RRR party, we’re your newest follower too!
That was the goal! Although…I doubt the floor will make doing laundry more exciting 😉 Thanks for following! 🙂
OMG! This is AWESOME!! Loving this! What a cute blog!! Definitely following you!!
Thanks so much Lori 🙂
what a great idea…i’m considering doing this in my kitchen, with explicit instructions on how to remove dishes from the sink and put them into the dishwasher 😉
LOL!
That is too cute!
Carolyn
{my simple messterpiece}
Thanks for stopping by Carolyn, and I’m following you now as well 😉
How cute!! What a great idea!
I’m totally not brave enough to freehand words like you! Mine would be illegible and not very pretty 🙂 but yours turned out great!!
Thanks for the inspiration!
Ashley
http://www.simplydesigning.blogspot.com
Thanks for the link up party 🙂
Thanks so much for linking up this great project to the Pinworthy Projects linky party!
LOVE LOVE LOVE LOVE this! I will be doing this somewhere in my house! 😀
Oh I love the way this turned out!!! I’m new to your blog and I’m your newest follower via L.F.
I’d love it if you linked this up to a party that I have going on at Project Queen!
http://projectqueen.org/welcome-to-link-party-26-turning-the-daunting-into-the-do-able
This is the most original use of Subway art I have seen! Can you come do my laundry room? I love it. Look for it tomorrow at my party tomorrow afternoon! Thank you for sharing! -K
Thank you so much :)))) I will! I’m following you on FB and Linky<3
I love the floor! What a great transformation! I’m in the process of making over my laundry room right now, and doing something similar. I’m your newest follower. Would love to have you come and visit my blog as well.
I found your blog through the Facebook blog hop…so hi! I love, love, love this floor. You did an amazing job – what a great idea!
– Karen (@ Dogs Don’t Eat Pizza)
Love this one too – and funny thing, I almost always start out painting my words backwards too! For signs, words on furniture, anything. Just works out better that way sometimes, nothing worse than running out of room and scrunching it all together at the end.
Wow, ok your floor is way too cool! Nice job and I’ve got this linked to my painting floors post too today!
What a cool idea! I’m hating my laundry room floor, maybe I should consider this too! =)
Get out of Laundry TOWN! This floor is awesome!! Oh my gosh!
Jen @ Four Marrs & One Venus recently posted…Top 5 posts of 2012
You never saw this?! Thanks girlie 🙂 Still holding up great too!
Your laundry room looks AMAZING!! just wondering, did the floors hold up well against wear? I’m thinking of doing something like this in my kitchen! I wanna redue a bunch but have a very low budget, and it would be awesome to save tons of money on flooring! I have ugly sticky laminate stuff right now, so painting it wouldn’t be to bad 🙂
Thanks for sharing 🙂
Thanks so much for your sweet comment! It’s still holding up great going on a year later. I painted directly onto the concrete, so I suggest pulling up all of your laminate (daunting i know) then you will need to rent a floor sander to remove all of the glue if it’s there. Once your floor is clean and prepped, paint away! It will look great!
I love your paint on the walls. What color did you use?
Hi Michelle, It was Sherwin Williams Sea Salt. Thanks so much 🙂
Hello there,
I’ve always wanted to paint some concret around the house. I have a few questions hoping you could help with. 1) Is there a specific type of paint that should be used (is oil vs water base)? 2) Do you thing this method would work for the guarge floor? Same quality as the ” kits” that are being sold at home improvement stores?
Thanks in advance and you did a wonderful job.
Wen
For something like a garage with heavy equipment and vehicles going in and out I would definitely go with something specifically for garages. Latex paint will not hold up well on that kind of floor.