One of the things I’ve been saying to myself for a long time now is I want to learn how to sew. Nothing crazy, complicated or super fancy, but I’d like to know my way around a sewing machine. 🙂
I’m always in awe of women who can make their own clothes, or modify them in some way. It’s a skill I definitely don’t have (yet) but I’m anxious to learn! I think we’ll start easy though…Something that doesn’t require more than a straight line. I think I can do a straight line…
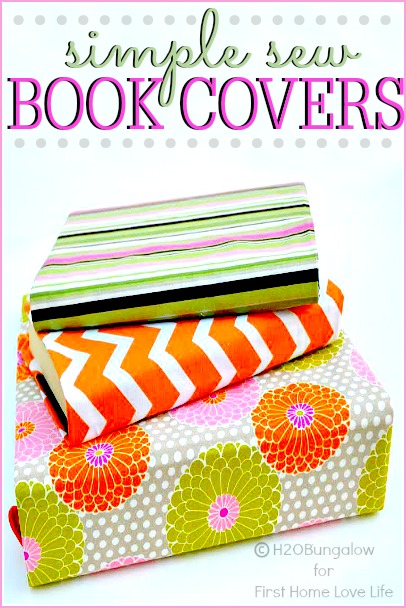
Wendi from H2OBungalow is a dear friend of mine that I met last year when we partnered with World Market and volunteered to redecorate a foster home’s office that was in desperate need of a makeover. I’m thrilled to introduce her to you all today because she’s going to be popping in once a month to bring you some super simple crafts! I know you’re going to love what she brings to the mix…Starting with these simple sew DIY fabric book covers.
Look ma! Straight lines…;)
When Christine and I were talking about a DIY fabric book cover project, she asked if I could sew. My answer was sure..err, a straight line.
This project is perfect for any level of sewing skills. Even if you’re like me…and all you can sew is a straight line. If you happen to be one of the talented ones who can sew for real, well then, you’ll look at these photos and do your own thing without further instruction 🙂
Either way, this is a fun project and what better way to add flair to a tween, teen or grade school set of school books!
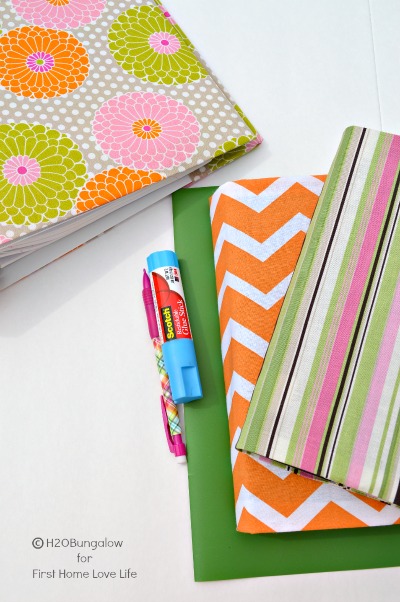
Start with 1/2 yard of cotton print fabric for each book you’re planning on covering.

Start by measuring your fabric to fit a notebook or book. Lay the book out like the picture below. Measure the length and add 2 inches. Measure the width and add 6 inches.

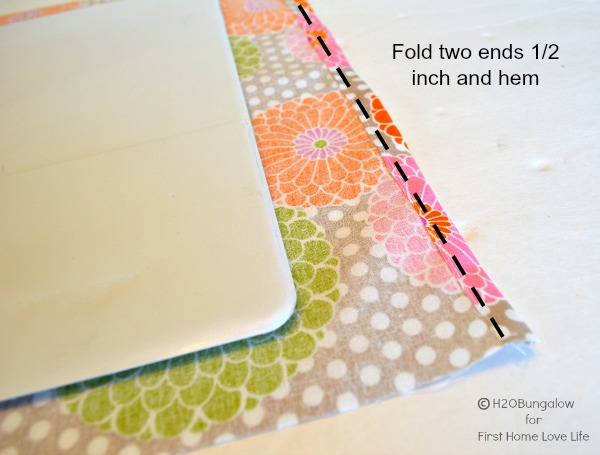
Fold the two ends where they will fold over the book ends and sew a 1/4 inch hem.
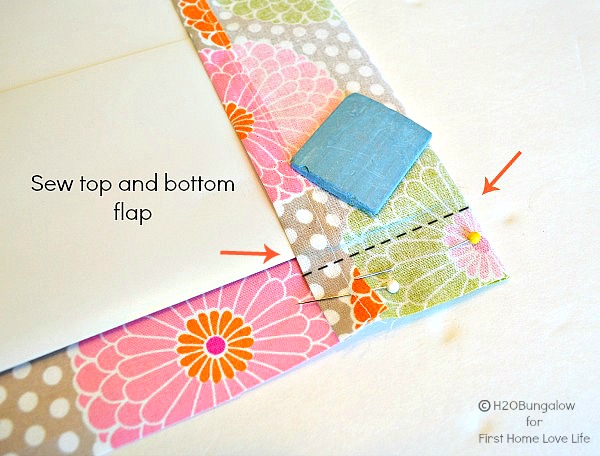
Next, you’ll make the two flaps for the book covers to slip in.
It’s easy if you lay the book or notebook out flat and fold the fabric over the book cover. Be sure the right side of the fabric is together like the picture below. Sew both end flaps at the top. Before you sew the bottom, measure with the book in again and mark your stitch line on the bottom. Stich the bottom hem on both sides.
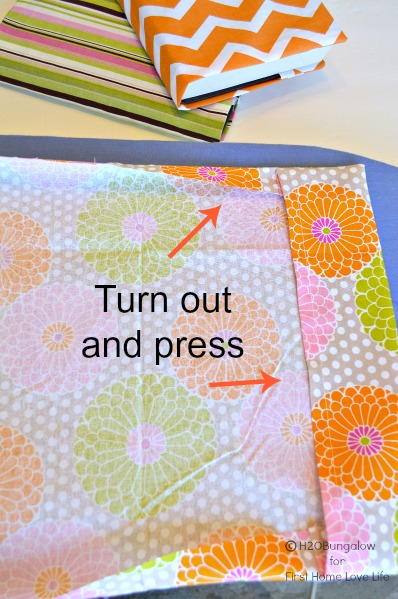
Turn the ends out. Press the ends, the top and bottom of your fabric book cover with an iron.
Place on your notebook!
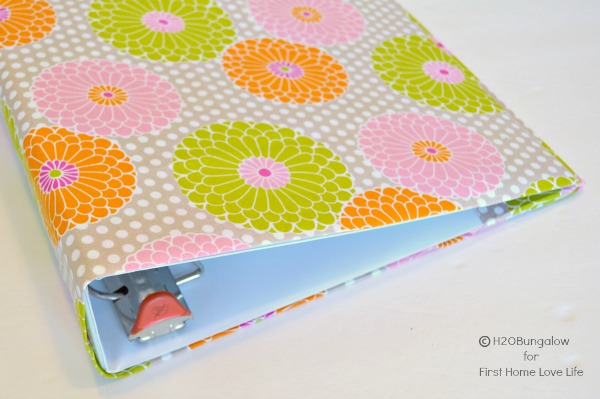
Voila!! Looks great!
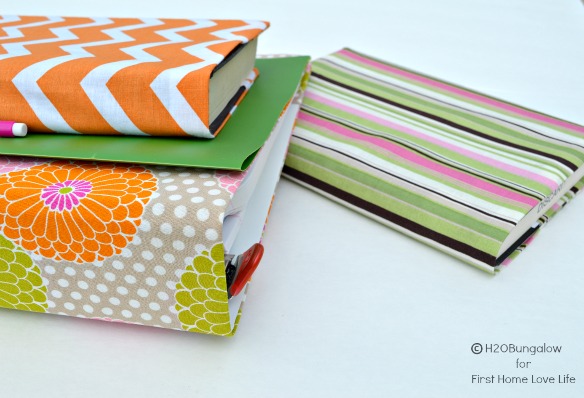
DIY fabric book covers are a really good way to reuse last years notebooks that are still in good shape!
Besides schoolbooks, can you think of other books that would look good with these fabric book covers?
If you liked this fabric notebook cover I shared today I know you’ll love my easy Clothespin Word Clips and my How To Make A Large Chalkboard projects as well. You can find me at H2OBungalow.com or follow me on Facebook , Twitter or Instagram.
Until next month..Happy Crafting!
XO- Wendi


I absolutely LOVE the idea of a pretty fabric cover for a boring ol’ binder! Now, let’s see if I can sew in a straight line 🙂
keri @ shaken together recently posted…Creamy Pesto Gorgonzola Dip
I love these bookcovers! Even if I’m the one who made them:) Thanks for your hospitality and having me over to share some simple back to school crafts!
Wendi @ H2OBungalow recently posted…Clothespin Word Note Clips
Love this tutorial! I will be using this to make a cover for my bible. Thanks!
This looks possibly doable, given my crappy sewing skills. Just wanted to let you know there is an error in the text: it should be LENGTH + 6 inches, not WIDTH. 🙂 Fortunately the photo below has the correct text.